Quantcast
Channel: Fashionicide // Fashion, Makeup and Beauty - with a difference
Viewing all 299 articles
Browse latest View live

IRIDESCENT // Shattered Glass Nails

$
0
0
GlassMarbleNails5 

I know right. Another nail post. But don't worry, I'll be laying off the nail posts after this one to concentrate on more interesting things, I promise! The reason I'm putting this one up though is that by now some of you may already know that I'm obsessed with iridescense. From lampshades, to parkas, to makeup bags, to eyeshadows and now, to nails!

Around this time last year I posted a face of the day featuring an explosion of iridescent shards on my face (HERE). At the time I thought it'd be pretty cool to apply them to my nails too, but I never really got around to it. Then a couple of weeks ago I came across Shattered Glass nails, and it re-ignited the idea in my brain.

GlassMarbleNails4 

What I love most about this particular effect on the nails is how it's a bit two-faced, in a way. Up close, it's pretty clear to see that I've stuck some bits of iridescence on to the nails, but from afar, that's where it really shines. When you catch a glimpse of the nails in a more normal, day to day context, they have that ethereal quality I always associate with iridescence. They look pretty damn magnificent, and the gleam attracts attention - "What exactly is that on your nails?" 

The technique is simple, however I went about it a little differently. Firstly, I applied two coats of Barry M's Pearl. Oh Barry. I didn't even realise Barry was an actual real-life person until yesterday, I always thought the Barry M moniker was just another Sally Hansen style front, and then when I googled him I saw that he passed away last year.

I digress! Once Barry's delicious Pearl polish was just about touch-dry, but not quite fully dry, I cut up some shards of iridescent material. This sounds easy, but actually it's a complete ball-ache. The pieces need to be small enough to fit my nails, and when you start cutting it all up, some of the bits seemingly vanish into thin air. No matter though, they will turn up probably stuck to your forehead, weaved in to the carpet or on the cat's tongue*. If the cutting thing is too annoying though, you can purchase some pre-cut shards HERE.

GlassMarbleNails2

After removing the pieces from my forehead, the cat's tongue and anywhere else they might appear, I apply topcoat to the first nail and use tweezers to carefully place a few shards onto the nail. Then just work your way through your fingers until all of your nails are covered. The topcoat acts as a kind of glue for the shards to latch onto, however if any of your shards verge over the edge of the nail, just clip off the excess with some nail scissors.

The only issue I've found with having shattered glass nails or glass nails (as they're sometime called) is that after a day or so, the iridescent shards begin to peel off around the edges.

WHYYYYYYYY!

GlassMarbleNails1

So there you have it, my Iridescent Shattered Glass Nails!

Let me know if you give it a try, I want to see some results! Also, do you like my big lumps of rock? They're so awe-inspiring, and also multi-functional - they look great as ornamental pieces around the house, they work as bookends and also act as a great burglar deterrent: 

"Get out of my f**king house or I'll deck you with my rock!"**

Toodles. 

*No cats were harmed in the making of this post

**Please note that I did not get burgled, have never been burgled and neither do I advocate using this rock as a weapon against burglars. If anything, you should use a shotgun and blow one of their legs off.


MAKEUP // Henna Designs on Thy Face

$
0
0

DSC_3076

I'm not sure that words can describe just how much I love Mehndi, or Henna as it's also known. It was all so different when I was a youngster, and I think there were three main reasons for that: 1.) Everybody had their Mehndi done, and I was a bit of a rebel, 2.) The scent of it just made me gag and 3.) Those round discs on the palm. If you're Asian, you'll know exactly what I mean. If you're not, basically it was the 'in' thing back then, to force your children to have a big circular splodge of henna slopped on to their palms. It was horrific, truly.

But time does funny things to people, and I have to say I've really began to appreciate it over the past couple of years. It's a part of my culture, not a huge part, more like a comfy sofa in the lounge of India's cultural heritage, but it's always there, and actually it can look outrageously amazing. As I've grown older, the scent of it doesn't seem bother me any more, and thinking about it, a big splodge of henna on the palm is pretty retro.

I guess it helps that I have a talented sister to do my henna, she's a henna artist, doing bridal henna for err... brides and also henna parties. I think if she hadn't taught herself how to do it so well, I probably wouldn't be all that fussed, but as it is, as soon as I get back home to see the family, I lay out my hands and instruct her:

"Paint me up!! Paint me up gooooooooood!!!"

Me, on the other hand, I don't quite have the touch when it comes to drawing pretty patterns like my sister does, and I don't live close by so I do what everyone else like me should. I cheat. A couple of years ago I did aBeginners Guide to Henna post, using stencils to adorn my hands and arms. I'm almost embarrassed to admit that nothing's changed - I still do it! But now, I've started to use my crafty little stencils for other things....

DSC_3208

I get my stencils from eBay (where else!) for about a fiver, you get several sheets in a pack with all manner of different designs. The way they work is simple, but at times fiddly - all you do is peel off the design you want, stick it to the body part you want to embellish and away you go! If you're careful enough, and cheap enough (like me), you can even re-use them!

I've always had this thing about tattoos, maybe even facial tattoos,where I like the idea and the look of some but on the other hand, I lack the commitment to actually go through with it. What if I don't like it in a few years time? What if it goes all saggy when I start to age? What if it doesn't go with my wardrobe? So last time I was using the stencils on my hands, I had one of those lightbulb moments and thought:

"What if I use them on my FACE? With EYELINER!"

Obviously using actual henna on the face would be pretty silly, god only knows how long that would take to wash off - and if you messed it up there would be literally nowhere to hide. So eyeliner presented a pressure-free, washable alternative that would give results fairly similar to those seen from my old friends at Face Lace.

DSC_3072

 So how did I do this? Simple, four (with a fifth optional) steps!
  1. Pick your design
  2. Stick on face
  3. Pick a flat eyeshadow brush and fill in the gaps with your favourite gel liner (Illamasqua's Precision Gel Liner in Infiinty in my case - as per usual!)
  4. Peel off stickers
  5. Admire your face in the mirror for hours (optional)
As a final touch I sprayed hairpray on to my face - no joke - to ensure the eyeliner didn't take a little wander down my face. As you can probably imagine, removing my makeup that night was an absolute joy(!) 

Speaking of makeup - here's what I used to create the rest of the look:

FACE 

NARS All Day Luminous Weightless Foundation in Barcelona (it's beginning to grow on me..)

CHEEKS 

NARS Blush in Deep Throat

EYEBROWS

Anastasia Beverly Hills Dipbrow Pomade in Medium Brown 

EYES

Urban DecayElectric Pressed Pigment Palette (stains like a bitch)
Illamasqua Precision Ink in Scribe
Illamasqua Precision Gel Liner in Infinity
Urban Decay 24/7 Glide On Eye Pencil in Perversion
Bourjois 1 Seconde Mascara in Black  

LIPS

Barry M Lip Liner in Fuschia
Lime Crime Velvetine in RAVE (LOVE LOVE LOVE)
 

I hope you've enjoyed reading this post and it inspires you to try something new or get yourself some Henna stencils. Anyone can do it - even me!


NYX Now Stocked in Boots Manchester, UK + HAUL!

$
0
0
P1010246

Something that pretty much every makeup or beauty addict on either side of the Atlantic Ocean can relate to is that one amazing brand that's stuck all the way on the other side of the pond with no outlets on your side. There's simply no other way to put this: It's just not fair.

Those of us who've been stuck in such a position will be familiar with ordering direct from the USA, or the UK depending on where you live. The wait feels like an eternity, each morning it doesn't arrive brings with it fresh disappointment. You know it's going to take a week or two to arrive, but hope springs eternal, every morning.

"Maybe, just maybe, it'll arrive today."

For two weeks, or more, your mind torments itself, tricks itself into believing that today might be the day. Then, like a desert wanderer running out of water, you'll see a package come through the letterbox. YES, this is it! But no, it's just a mirage of the most beautiful oasis, full of deep azure blue water ready to quench your thirst. "DAMN YOU, CRUEL WORLD!"

But no matter, a few days later and the thing finally arrives, a sense of relief overcomes you, followed by joy, followed by disbelief. Disbelief at the bloody cheek of customs charging you a handling fee! It's fine though, you're officially the cat that got the cream, the tastiest cream in the UK, because in the UK nobody sells NYX in store.
Until now.

Yes, you read that right. And believe me, I myself required a triple-take when I saw that NYX had announced Manchester as the location of their first Boots counter. Manchester?! The Boots in Manchester isn't exactly unpleasant, but then it's not really anything special either, so god only knows why NYX chose this fine city as their first location. And I'm certainly not going to complain, because I'm fed up of having to go all the way to London if I want to just look at some Inglot stuff in store. But now you southerners have to come up here to my town if you want some NYX-y goodness!

Don't worry though, NYX have planned stores in other cities, though I must confess to not really knowing where or when, because if I'm being honest I don't really care - NYX are in Manchester! Of course I marked the occasion of their first Saturday's trading with a visit, and as you'd expect the place was heaving - the festive season in full swing, Christmas Markets rocking it outside, a cold November chill in the air, it all adds up to a busy, busy day.

Despite how busy it was, I turned up at about 2pm and the counter didn't look like Primark on Black Friday: stuff tossed all over the place, ripped, trampled on, put back in the wrong place, opened up and abused, blood and other bits of human strewn across the floor etc. It still looked immaculate with plenty of stock on the shelves and a lot of makeup to peruse.

I did splash out a little, purchasing no less than 10 items but surely a girl can be forgiven for getting a bit excited - how long have NYX been going for now - 5 or 6 years at least? And I've never been able to actually test any of their products before buying!

So, for this haul post I'm going true old skool - just a bunch of pretty pictures showing all the awesome things I ended up purchasing. This definitely isn't a review post, but I will be incorporating reviews of these products into some upcoming makeup looks.

Anyway, you've caught me monologuing! On to the actual haulage, here's what ended up in my basket:

Liquid Crystal Glitter Liners

  DSC_3626

Left to Right - LCL106, LCL109, LCL107, LCL103 & LCL108

DSC_3629

Swatches from Left to Right - LCL106, LCL109, LCL107, LCL103 & LCL108

Obviously I'm like a magpie to glitter, so I had to go and buy most of the Glitter Liners on show. It's totally justifiable (as if I need to justify it anyway!), as I don't actually have any glitter liners in my collection at the moment. You'll have to make do with the dreaded wrist swatches for now, I've yet to line the eyes with any of these just yet!

NYX COLOUR MASCARA


DSC_3636


DSC_3641

Left to Right - CM08 Pink Perfect, CM07 Forget Me Not, CM06 Mint Julep, CM02 Blue & CM01 Purple

I also picked up five of the coloured mascaras. I find it quite difficult looking for any kind of coloured mascara as they're not so readily available, Bourjois brought one out a few years ago but it was quickly discontinued! I gave a couple of these a whirl at the weekend and my first thoughts are that they're actually amazing, I cannot believe how much they show up on the lashes. My favourite so far is the blue, it looks genuinely electrifying! 

NYX WICKED LIPPIE in WIL06 STONE COLD

DSC_3644

DSC_3650

DSC_3670

Swatch of Stone Cold

This is one of those lipsticks that first came out a while back, and I got really excited about it! But for whatever reason I never bought it at the time, and as time wore on I quickly forgot all about it. So when I saw it in Boots it was like all of my Christmases had came early! I snapped it up straight away and can now say I'm the proud owner of a silver lipstick!

NYX HD CONCEALER and ABOVE & BEYOND FULL COVERAGE CONCEALER - both in YELLOW

DSC_3672

DSC_3679

Left to Right - HD Concealer and Above & Beyond Full Coverage Concealer 

Now I'm not that much of a concealer girl, however I couldn't resist picking both of these up. I purchased the infamous Ben NYE Banana Powder last year and thought that these may complement it perfectly. As you can see from the swatch the HD Concealer has a much thinner consistency, I gave it a go earlier on in the week and found that it reminds me of the MAC Select Cover Up concealer.

On the other hand the Above & Beyond Coverage Concealer is much thicker, almost like an incredibly pigmented hard cream. I also gave this one a bit of a test run and found that I needed to seriously moisturise underneath the eyes to avoid it looking like a big slice of cake. The thing is, I've not had the chance to properly play around with it just yet so it could be that I need to figure out how to work it best.

That concludes the haul post, I hope it's given you just a little taste of what's available at the new NYX counter in Manchester, though I can assure you this really is just a small selection. Stay tuned for some makeup looks incorporating these products over the next few weeks where I'll be giving them a proper review!


Mint Matte Lipstick | LA Splash Smitten Lip Tint Mousse in Severo

$
0
0
DSC_3413 

I've been chasing a matte mint lipstick for what feels like an absolute age now. Lime Crime's 'Mint to Be'lipstick is close, but unfortunately it isn't matte so isn't quite what I'm looking for. As it turns out, I ended up buying that during the Black Friday sales, and yes, I feel dirty for taking part in such festivities, never mind writing about doing so afterwards, but after reading my review of LA Splash's 'Severo' - you'll find out why.

DSC_3420

I first dabbled with LA Splash a couple of months ago, reviewing 'Hidden Desires'. I'd hoped it would turn out to be a dupe for Lime Crime's 'Airborne Unicorn' but it didn't turn out quite that way. And this kind of set the tone for my relationship with LA Splash's lipsticks - plenty of promise, but with disappointments along the way.

The longevity of 'Hidden Desires' and the fact that it felt like a dream to apply, convinced me to splash out (see what I did there?) on the Lip Tint Mousse in Severo. The colour is of course, fantastic, but we've all bought lipsticks in the past based purely on colour, only to be stung later on by an unappealing formula or disastrous longevity. But my experience with Hidden Desires convinced me that there was nothing to fear here, at £9.95 it's still a fairly high price to pay.

DSC_3524

Sadly, everything that was great about Hidden Desires was horrible about Sevaro. I really can't imagine what went wrong at LA Splash to produce something so awful. Sure, the colour is simply stunning, but the texture of it is so thick, I actually felt like I was applying a tin of Dulux to the lips. It did dry to an opaque, matte finish, however literally seconds after drying, it began to crumble. Needless to say, sipping away on my fresh mug of tea, I found a few crumbly bits of mint floating around in it - the durability is just shocking.

DSC_3416

In summary then, if you're doing a sponsored silence and sponsored fast all in the same day, this lipstick is what dreams are made of. If however you plan on talking throughout the day, eating or even drinking, I'd avoid this lipstick like the plague. It's so bad, I even went bargain hunting on Black Friday to find something better.

Just so you are aware, I regularly exfoliate my lips and generally take great care of them. I am in love with matte lipsticks, but matte lipsticks are not in love with lips that are in bad condition, they highlight every single flaw - so for me, lip care is of the utmost importance. It just so happens that this lipstick did not work out at all for me!

And that's where the big disappointment lies really. I found the perfect looking matte, mint coloured lipstick, but it falls down in the fact that it should probably be painting walls, not adorning lips. Let's see if Lime Crime's offering works out any better.

So, now that I've wasted £9.95 on this awful, awful lipstick the question is how am I going to get my money's worth? My plan is to actually give it a try as an eyeliner, see if that works out any better. I'm not gonna hold my breath though.


5 Ways to Brighten Up Your Home - String Fairy Lights from IWOOT!

$
0
0
iwoot

My love for all things sparkly is well known by now, but just in case you were thinking that my love only reaches as far as lipsticks, nail polishes, eyeshadows, jewellery or clothes, I thought this post would help to set that particular record straight!

If you've been checking up on my Instagram at all from the beginning of the summer onwards, you'll have noticed that plants were popping up all over the place! And that's because I feel it's important to come home to something worth feeling proud about, something comfortable after a long day at the office. If you think about it, we spend so little time in our homes, so why not make it as enjoyable as possible?

Plants are definitely not the only home decor thing I like to keep in plentiful supply throughout my home though, I absolutely love lights! And maybe this is a little crazy, but surely you all remember those boring trips to B&Q when you were a kid? Being dragged along by your dad because he wanted to buy some planks of wood or a brand new hammer or some other rubbish - but that was all offset by a trip down the lighting aisles!

For me, those lighting aisles were like Aladdin's 'Cave of Wonders' - though a bit less likely to swallow you up whole in the desert and bury you in sand - it was a truly wondrous place full of all manner of shiny things! That's where my fascination for lighting comes from, and it's a fire that still burns to this day - my lampshades are all iridescent and I have all kinds of interesting lamps in various shapes and sizes floating about the place, as well as solar lights for the garden (not doing much good right now though) and fairy lights brightening up various other rooms in the house.

I'd noticed as part of Next's Wintery window displays, they had these amazing looking fairy lights, but with a bit of a difference. Instead of being attached to your standard, boring wire, they were kind of built into a long string of coppery wire. It just looked epic, and you can shape the wire however you want it and it holds - the possibilities!!

So imagine my delight when IWOOT sent me a couple of these beauties through the post for review! They sent them through as part of their Christmas Gift campaign, and as much as I love them, I think they'd only make a suitable gift for someone who's really into their home decor - or you could give them to a friend before Christmas to help light up their home in time for the big day!

They really are as good as they looked in Next (though I'm not sure if it's the same brand etc), they are incredibly adaptable, can fit into small spaces, can wrap around things with much less effort than the traditional wired fairy lights and they look classy. Typical fairy lights can't get away from the fact that the wires just look cheap - not the case with these!

So, I thought I'd get a little creative, and show you a few different ways you can put these to use:

iwoot
They make for a nice bedside lamp when stuffed into a sciencey-type flask!

iwoot
Let's all gather around the Christmas Bonsai Tree?!

iwoot
They can add a bit of atmosphere at the end of the bed.

iwoot
Or make for an excellent new toy...

iwoot
But look much better around a Bonsai

iwoot
And magnificent in a stained glass vase

iwoot
They look pretty electrifying in this candle holder

iwoot
It's probably best not to leave them on the bed. Not even for a second.

iwoot
They make for interesting bracelets (maybe not good in the rain though)

P1010380
And they also take your breath away as a choker...

As you can see, these lights really are the shizz. If I were you, I'd get on a set of these right now, without delay. Just think of the fun you can have! If the lights aren't for you though, check out the IWOOT Christmas Gift Guide - there are some pretty cool items on display! I bought the Smartphone Cinema Projector from TK Maxx for £15, so I was gutted to see it on there for under £13!


FASHION | White On White Part Two: Defeating Winter

$
0
0
P1010073

Winter is a truly horrible thing for a part-time blogger. Not only do we have to deal with the cold, the rain, the wind and overall darkness like everyone else, we also have to figure out ways of making sure the blog keeps going through all of this. That pretty much means that a large chunk of at least one day every weekend is dedicated to taking photos, because during the working week, we have no free sunlight hours to help us out.

So imagine then, you've went out on the Saturday, to have a little fun (what's that again?!) and put your feet up - a well earned day away from working and blogging, only to wake up on Sunday morning and see it lashing it down outside, with thick, grey, overcast skies that look like they're never going to clear up. Ugh, winter. Why do you torment me so?

Well last Sunday I stuck two fingers up to the drudgery and the tipping winter rain: "I'm getting my OOTD photos taken, if it's the last thing I do!" and yes, there was a lot of fist-shaking and witch-like cackling immediately afterwards. Because I will not be defeated by the season of good will and bad weather.

Those of you with good memories might recall a 'White-on-White' look I did way back in January of this year, where during a break in the rain, I snuck out in to the back garden with an awesome white furry bomber jacket and Bodycon dress. If not, the post is here. And this post is like a part two of that one. But this time I'm wearing a white feathery halterneck coupled with a white tulle skirt, and this time there was no break in the rain, hence my slightly broken H&M umbrella!

P1010039

P1010092
Yep, still raining...

 P1010066

P1010095
"Has anyone seen my other leg?"

P1010059
The Feathered Halterneck gave me Goosebumps... Or was it the cold?

P1010109
Couldn't resist a twirl

White Tulle Skirt // eBay 
Pointed White Heels // eBay 

Tulle skirts have been on my 'must-buy' list for a year or so, having seen countless examples on eBay. But for whatever reason, I'd always add them to my watchlist, and then never follow it up - even Buy it Nows! But the other week I saw a trio of beautiful skirts - one white, another mint and the final one pink - I thought "Sort yourself out Lima, we're f**king buying them".

And that was that, no watchlist, just a straight 'Buy it Now', and at around £6 each, I have to say it would have been rude of me not to! The only downside really is that they came all the way from China, so there was a couple of week's waiting time, but arrive they did, and vacuum packed too so I had absolutely no idea what I'd been sent until the package was torn open.

The feather halterneck was purchased from Missguided a couple of weeks back too, where I also bought a black feather bardot croptop. And yes, there is a theme here, don't you just find that feathered garments look so cosy and warm, as well as classy and luxurious? It's odd how one garment can make you feel like both a polar bear and some kind of iconic actress at the same time. Maybe that's just me though.

Either way, the white tulle skirt goes perfectly well with the white feather halterneck and managed to brighten up a particularly dull, wet November Sunday afternoon. What more could you ask for?


REVIEWS // The Library Of Fragrance in Oud & Jasmine

$
0
0
P1010567

Who doesn't love a bit of perfume?

Personally, I have my very own signature scent which is of course Chloe. I've been spritzing myself with Chloe for years, and even though I've been through more than my fair share of perfumes, Chloe will always be the one for me. It's so distinct and instantly recognisable that people can scent my approach from around corners!

There was even a time where I had two Chloes on the go, how naughty of me, one at home and one in my handbag - an expensive habit, no doubt. The reason being, it was nice to have a lunch-time pick-me-up, something to make me feel fresh again halfway through the daily grind.

It was on one of my lunch hours when I wandered into Boots and spotted the Library of Fragrance perfumes spread across two shelves, I recognised them straight away as at the time they'd been blogged to death! Unbelievably they offer over 300 fragrances, with 101 of them available in the UK and probably about 40 or so in my local Boots. I have to say though, even 40 seemed like a bit of an overwhelming choice, I think I'd pass out if I walked into find all 300!

Luckily for me, Boots had the 2 for £25 deal on at the time and I was itching to get something fairly similar to Chloe, with the same base tones, something a little powdery. I spotted Baby Powder, conveniently enough, had a little spritz and fell in love - I just had to have it. Unfortunately, they only had the tester left. Why?! To compound my misery, I also noticed their Oud fragrance. Tester only: "Oh, please!!!"

I left that day, excited by the possibilites, but disappointed that I'd have to save it all for another day. No matter though, a couple of weeks later I trotted back into Boots and Oud was back in stock - hurrah! But... Baby Powder was still sold out. Curse my luck. Anyway, I opted for Jasmine instead which turned out to be an inspired choice.

Oud
 
P1010557

Ilove the smell of Oud, it just oozes of intense Arabian richness and luxury. I'm instantly taken back to days spent walking through the souks of Dubai, Egypt and Istanbul. It really is a powerful, unmistakable scent and Library of Fragrance have captured it well. It isn't as strong as your more traditional Oud scents, or certain other Eau de Parfums but it does what it needs to - it offers a small, light and refreshing glimpse into another world. Enough to make you feel good and bring back those memories, but not too much to blow you away.

If you happen to be looking for something truly powerful and intense, I'd recommend Oud Ispahan by Christian Dior. I was put on to it by Sheenie when I travelled to London for an iftar with her and a group of friends, she was sat a couple of seats away from me but I could smell her perfume over and above the Indian cuisine we were tucking in to! Library of Fragrance's Oud is nowhere near on that level, but in fairness it does come at a fraction of the price.

Jasmine 

P1010561

As much as I love the Oud fragrance, I much prefer theJasmine. I find it's much stronger and seems to linger on endlessly. I first spritzed it onto my scarf, and still days later I could smell it quite strongly. Naturally, it smells of Jasmine, an intense floral scent that invites nostalgia to take you by the arm and whisk you away in to a world of treasured memories. It really reminds me of when I was younger and my mum would light up someJasmine scented incense, or when she'd massage my hair with Jasmine oil. I'm sure she'd still do it now - If I'd let her!

But for me, that's the great thing about fragrances, they have an incredible hold over the human mind, able to recall memories that you thought were lost in the mist of time. A good fragrance will enter through the nose, find it's way to your brain and immediately trigger the happiest of memories. The Oud fragrance worked well, but for me it was eclipsed by the sheer power of the Jasmine.

With those 300 fragrances out there, and 101 of them available in the UK, I sense that after testing the waters with these two, I'll be purchasing more from Library of Fragrance in the not too distant future. And with Boots seemingly having them up on offer every other week, It'd be rude not to!

Now, what to choose?!

Tell me, which ones have you tried and fell in love with?


REVIEWS // Jeffree Star Velour Liquid Lipsticks in Jawbreaker and Blue Velvet

$
0
0
P1010590

I've read a lot of reviews on Jeffree Star's lipsticks over the past few months, and I've found it remarkable just how many of the reviewers have been following him 'from the beginning' - with such a huge fanbase upon launch, it's no wonder his lipsticks have been a roaring success! Me on the other hand, I'd never even heard of the guy until I saw a few of his photos appear on the 'Popular' page of Instagram.

In fact, the reason I actually started paying attention to Jeffree Star, and I'm sure there are many, many others out there in the same boat, is because of the whole Lime Crime DRAMZ that's boiled over during the past few years. I won't go into all of that here (Google it if you haven't already heard about it), but what I will say is that initially at least, the speculation and rumour did put me off Lime Crime a little.

And really, no matter what you think of Lime Crime, their owner or their treatment of customers, they make f**king good lipsticks. I've read and watched so many rants about how Lime Crime treat customers badly or how the owner's an idiot where the person has gone on to say something ridiculous like: 'Their lipsticks aren't that good anyway.' 

Bollocks.

Anyway, at the time, half of the Beauty Interweb had a Lime Crime-shaped hole in their lipstick lives and needed to seek out an alternative brand with unique colours combined with an amazing formula. It seemed that Jeffree Star was their shining beacon of hope with rave reviews cropping up left, right and centre and generating a lot of hype and buzz. 

To paraphrase Mark Twain, I often find myself questioning the view held by the majority, so I didn't turn myself into a Jeffree Star fangirl overnight, I just watched from a distance, happy to stick with what I had and dip into a few lesser known brands with weird and wonderful colours. Eventually though, my time arrived, and I purchased the Jawbreaker and Blue Velvet liquid lipsticks.

I went for these two as I actually don't own any blue Liquid Lipsticks, and the colours looked so vibrant and opaque in the various photos scattered across Instagram. Why not, eh? 

P1010616
Jawbreaker wrist swatch

P1010611
Blue Velvet's time to shine

When they arrived I was genuinely excited at the colour peeping back at me through the clear plastic tubes, they're so rich, luxurious and vibrant. The swatches on the wrist certainly show just how opaque it really is - that's just one swipe. No going back over it, just one swipe. It's pretty impressive to say the least, however, as I mentioned in a recent #bbloggers chat, wrist swatches alone are next to useless. The skin on your arm is a little different to the lips in both texture and colour so #OnYourMugLove!

DSC_3921
Blue Velvet on the lips

DSC_3796
Jawbreaker - setting my lips alight

On the lips, the doe-foot applicator is shaped in a way that's so easy to apply around the curvature of the lips, it goes on like a dream. The formula of the liquid lipstick is quite wet, yet dries to a comfortable, matte finish within a minute or so. Most importantly, the colour retains the vibrance and richness as promised by the tube. First impressions then, are that this is an excellent liquid lipstick. Great colours, applies like a dream and stands out from the crowd.

P1010599
Jawbreaker - sky blue goodness, and notice the doe-foot applicator

P1010606
Blue Velvet is a much deeper, darker blue.

Arguably the biggest test for any lipstick is in the longevity. Usually I road test my lipsticks at work, however non-conformity is generally frowned upon, so I gave it try at the weekend. Still, I put it through it's paces by going to Gourmet Burger Kitchen! 

I was pleasantly surprised by just how durable this lipstick actually was, unnaturally pigmented lipsticks tend to fade away much, much quicker than your reds, pinks, nudes etc as they fade into your natural lip colour but this one seemed to last pretty well. Why wasn't I born with blue lips?! Of course, I ended up eating a burger with a blue bun, but it could have been a whole lot worse.

Oh, and by the way, does anyone else end up with a tiny little line of lipstick on the chin after eating, or is just me?


EYE MAKEUP // Glittered Inner Corners with Lime Crime's Glitter Helper!

$
0
0
Glittered-Inner-Corners-Eye-Makeup

GLITTER

I've always wondered why it is that Autumn/Winter fashion trends tend to exclude glittery, shiny, pretty things. Apart from Christmas time of course, when it's perfectly acceptable - nay, compulsory - to wear said glittery, shiny, pretty things. In my humble opinion, glitter really ought to be an all year thing. Why restrict ourselves to just a month or so of sparkle? WHY?

Not long before my trip to Norway (blog coming soon, promise!) I packed on some glitter on to the inner corners of my eye. I'm a huge fan of the inner corner highlight, and I've really excelled with it this year too, extending it further up and further down. Also, instead of using the more 'typical' beige-slash-white colours, I began experimenting with slightly less orthodox colours, such as an iridescent blue from Makeup Forever - which, by the way, I completely adore.

For glittery inner corners, it's actually pretty simple. You'll need just a couple of items to achieve the look (sadly, an empty washing up liquid bottle is not one of them!)

 Lime-Crime-Glitter-Helper-2

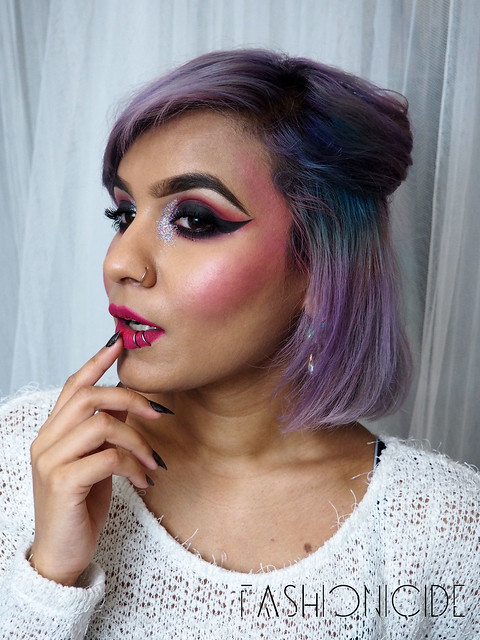
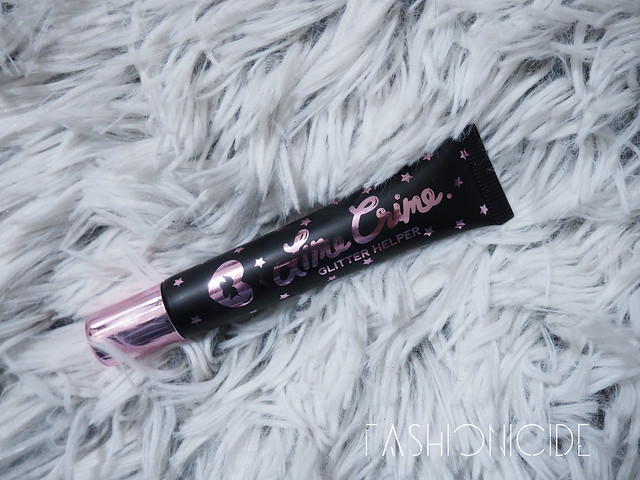
Lime Crime's Glitter Helper is the first thing you'll need. Now I only purchased this a couple of weeks ago as part of my Black Friday splurge, but I am seriously glad that I did. It's not what I imagined it would be, in fact I don't even know what exactly I was expecting, but when I squeezed the tube, out came a thick cream. it wasn't until I applied it to the face that I realised that this was actual glue. Glue for the face! Genius!

So, I dabbed the Glitter Helper onto the area where I wanted the inner corner glitter and extended it out a little. I've found that you can't rub this in or move it around once applied as the glue starts to get a little streaky.

Once that's applied, it's time for the glitters:

 Lime-Crime-Glitter-Helper 

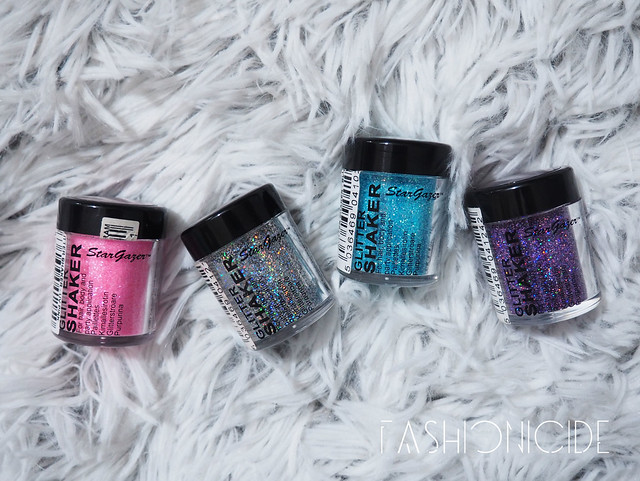
STARGAZERGlitter Shakers (L-R) - UV Pink, Holo, Blue& Lazer Purple

Stargazer Glitters are *so* underrated. At just £3 each, they're an absolute steal. Each tub contains an awful lot of finely milled glitter, and they do a great job of filtering out the big chunky bits you sometimes find in glitter pots. None of that here.

For the look, I tipped out a tiny amount of each glitter into one of the lids and mixed them all together. Then I simply patted the mixture little by little on to the glue until the area became fully opaque and I could no longer see the skin. It really is that simple!

If you take a close look at the photos, you can just about make out the individual glitter colours in there, and when you start to move around under various different lighting conditions, the sheen varies with it. 

OTHER PRODUCTS USED

// FACE 

NARS All Day Luminous Weightless Foundation in Barcelona

// CHEEKS

Sugarpill Dollipop Eyeshadow (used as a blusher)
MAC Mineralize Skinfinish in Lightscapade

// BROWS

Illamasqua Eyebrow Cake in Thunder

// EYES

NYX Jumbo Eye Pencil in Milk (brow bone highlight)
NYX Jumbo Eye Pencil in Black Bean (base for eyeshadow)
MAC e/s in Beauty Marked (all over the lid and undereye)
Urban Decay 24/7 Glide-On Eye Pencil in Perversion
Muse from the Lime Crime Venus Palette (crease and undereye)
BourjoisVolume 1 Seconde Mascara

// LIPS 

Lime Crime Velvetine in Pink Velvet

 Glittered-Inner-Corners-Eye-Makeup-2

 As you may have noticed in the face photos, I extended my blusher beyond the cheeks and all the way up to the temples. I had this vision in my mind of Fairies or Nymphs, and imagined that when they blush, more than just the cheeks would turn a rosy red! Maybe that's just me though(?) Either way, I think it turned out rather well, don't you?

Until next time!

VALFRE - Blanco Three-Eyed Cat Phone Case

$
0
0
P1010032

I know what you're thinking. Crazy Cat Lady Alert! And who am I to disagree? I love my little four-legged furbabies, and I'm not ashamed to say so! I'm also a fan of phone cases that take you way outside the norm. I've had all manner of cases in the past, the last one I posted up on Instagram generated a little bit of a stir with it's middle fingers (paws?!) stuck up.

But then on one of my weird and wonderful web-browsing sessions I came across Valfre. They're a company based in the US of A who create and sell their own range of clothing, accessories and paper-based goods. And that's all good clean fun, their t-shirt range contains some delightfully creepy designs that half freak me out and half make me want to buy everything they have.

P1010005

But above all, their phone cases are perfectly quirky. None of their designs appear to be within the spectrum of what people would define as 'normal'. They have some phone-shaped cases that look very pretty, with what can only be described as batshit-crazy designs, and they also have some odd-shaped cases on their site too, and those are the ones that really grabbed my attention.

You can either go for the Spray-can, the lipstick, the shell, the milk carton, the poptart or the pencil shaped cases, but my favourite is the Three-Eyed Cat - it's just so out of the ordinary, that when I first laid eyes upon it, I knew it just had to be mine. Regardless of the price ($38), the shipping costs ($11) or the customs charges (£13) it's worth it. I've been so besotted with the thing, I don't even know how much sterling all that even adds up to - I just don't care!

P1010043P1010040

What really stands out about the case though, head and shoulders above all other Silicone '3D' case designs I've seen and had before, is that it still feels like you're actually holding a phone in your hand. I've had other, cheaper cases that are much bulkier and make holding the phone pretty awkward and unnatural, but Valfrehave got this one spot on. You know the case is there, but it doesn't take (much) away from the fact I'm holding a slimline iPhone 6s in my palm.

If you're after a unique, functional and above all, pretty phone case, check out Valfre - if you're ordering direct though, be prepared for those pesky customs charges! There is one UK stockist that I know of, Spoilt Brat, however they don't have the entire range unfortunately. boo-freakin'-hoo!

TRAVEL // Guide to seeing the Northern Lights in Tromsø!

$
0
0
DSC_5028

We all have our very own bucket list - things that we simply must do before we die. The Northern Lights has been on mine since I was a kid, it's always fascinated me how these mysterious, magical, dancing lights come to be. I've seen countless photographs, videos and documentaries and read about the experiences of others who've had the privilege of seeing them. All of this only added to my desire to see them with my own eyes.

But I've always found that wantingto do something is completely different to actually going ahead and doing it. There are so many people I know who say how much they'd love to go and see the Northern Lights, but never actually get around to actually going. So I thought to myself: "I am NOT going to be one of those people."

And so it was, one evening after a day of dreaming about them at work, I said to the OH: 'Let's just book it tonight!'So shall it be written, so shall it be done! (It was never written, btw). But of course this presented us with a few dilemmas - do we go to Iceland, or do we go to Norway? And wherever we do go, it's gonna be freezing. It was clear to me then that this would be no ordinary holiday. After a few hours research, we opted for Tromsø in Northern Norway, inside the Arctic Circle. It was a tough choice in the end, but a few things swayed it for us:
  1. Northern Lights - one of the best places to see it, directly on the arctic ring where most activity occurs. If it's too cloudy though, there are options - go out in a boat in the fjords or drive around the Norwegian countryside.
  2. Whale watching - you can go whale watching in Iceland, but the chances of seeing some whales in Tromsø are about 99.99%.
  3. Polar Nights - for 40 days in November thru January, the sun doesn't rise above the horizon.
Going to Norway instead of Iceland would mean no Blue Lagoons, but we can save that for a later trip, right? Also, Norway was actually cheaper in terms of Flights & Hotels for December than Reykjavik, but as we'd find out, doing things was most certainly not cheaper! We'd settled on Norway, because the one thing you can be sure of when going in search of Aurora Borealis, is you're never guaranteed to see it. It's a natural phenomenon that we don't fully understand yet, so whilst we can have forecasts, those forecasts aren't always accurate. So you need to make sure you're going to have a fun time whether you see them or not!

DSC_4514
Tromsø at Night... Or Day, I can't remember.

Tromsø itself is a city of about 70,000 and is the Northernmost city on earth. It's not actually a part of the Norwegian mainland so to speak, as the Norwegian coastline is not too dissimilar to the Western coast of Scotland in that it's ragged and made up of lots of Islands close to the mainland. The city of Tromsø is spread across a couple of these Islands and surrounded by Fjords. The terrain isn't quite mountainous, but it's certainly rugged and rocky.

SAUNA, HOT TUB, TEA AND A TURKISH HAMMAM - ON A BOAT!

P1010045
Apple and Cinnamon Tea on board.

We managed to get our first glimpse of the rocky, mountainous terrain around Tromsø on our first day. Somehow we'd managed to find ourselves on a two-hour boat trip out in to the Fjord, aimed at the locals so quite cheap. But this was no ordinary boat. It began life about 50 years ago as a fishing boat, but as the fishing trade slowed, the owners began to make a loss, so it was sold to a group of entrepreneurs from Tromsø who converted it in to a floating spa! 

Inside, there was a Finnish Sauna, complete with a huge window, overlooking the passing Fjords. A Japanese-style communal area for guests to relax with some Norwegian Apple and Cinnamon tea, which led to the Turkish Hammam. Outside, on deck, there was a saltwater hot-tub, set at 40C. This boat was insane! But I have to say, it was an amazing experience, only available on Saturdays, so it was now or never, and after a day of stressful air-travel, including bad advice from the airline, a missed connecting flight and hoping that at least 9 people decided not to show up for the next, fully-booked, flight as well as having our luggage lost with nobody seeming to know where it was - this boat trip was much needed!

The Sauna was immensely relaxing, the Hammam was a little strange, but nice and warm, but the hot tub really stole the show. After emerging from the Sauna, we walked out on deck - remembering it's pitch black, probably subzero temperatures, an arctic wind, and all we're wearing is our swimming costumes - and headed towards the hot tub. Surprisingly, it didn't actually feel all that cold out on deck, but we hopped in to the Hot Tub nonetheless and this was a most bizarre thing. Sat amongst a (friendly) Norwegian family, in a hot tub, on a boat, on deck, with the freezing arctic winds blustering, wearing a beanie hat. But, it was absolutely amazing and I could not recommend it enough. The only slight downside was getting out of that Hot Tub, because all of a sudden, we realised exactly how cold it was!

NORTHERN LIGHTS HUNTING - ATTEMPT ONE
 
DSC_5001
A Quaint Norwegian Rural Home

Because we were traveling there in the midst of their winter, temperatures can range from -16 to +5C, there would be no direct sunlight, there's a high chance of snow, the roads would be incredibly slippery and the surrounding mountains would be covered in the white stuff. But the lack of light would provide perfect viewing conditions for the aurora - so long as the cloud cover broke up.

I did manage to learn quite a few things whilst in Tromsø - you become an expert in cloud cover for a start! Apparently, there are three types of cloud cover to look out for: high, medium and low. For perfect Aurora conditions, you need all three levels to be clear and the forecast for the first three nights was not looking good. Also, the weather in Tromsø is difficult to forecast anyway, seemingly changing on an hourly basis! We also learned about Aurorae strength, and on the 3rd day the strength was due to reach KP8 - basically meaning very, very strong, and potential even visible in Northern England!!?!!!!1!!

I also learnt to love my DSLR camera again! I bought my Nikon D7000 way back in 2011, but was beginning to fall out of love with it of late. However, after looking at a few websites giving tips on Aurora Photography and seeing the results I got, I realised that the problem was definitely me, not the camera! As for Aurora photography, I recommend you take one of the Northern Lights tours on offer. The guides are enthusiastic, knowledgeable and have their own network of scouts to help increase your chances of seeing them. They also take their own photographs, and are more than willing to help you out if you're having camera troubles. If your camera allows you to move out of Automatic settings and into Manual, you're onto a winner, if not - you need a better camera!

Unfortunately for us though, the cloud cover in Tromsø for that night was due to be thick, so there'd be no chance of seeing it above the city. This meant we'd have to book ourselves on to a Northern Lights hunt tour, and hope that our guide was an expert at seeking out gaps in the clouds! We departed at 6:30pm, though time had already become immaterial by this point, in a supremely comfortable minibus with just four other people on board. The guide gave us the lowdown on the forecasts and said that tonight we will actually be hunting the Aurora - exciting times!

To cut a long story short, we ended up under a gap in the clouds across the border in Finland! We hopped out of the minibus, looked up and saw a couple of large trails of Aurorae dancing amongst the low level clouds. It was a breathtaking sight, it was like thousands of long, thin shards of faint green light attempting but failing to hit the earth. But it didn't last too long that night, despite the high activity (trending on Twitter in the UK by the way), the cloud cover above Northern Scandinavia that night had only allowed us a tantalising little glimpse. Life can be cruel!

THE SEARCH FOR KILLER WHALES

DSC_4662
Orcas, getting ready for dinner.

We were actually due to go whale watching at 9am the following morning, however we arrived back at our hotel at 5am and thought better of it. This turned out to be a stroke of luck on our part though, as we spent the day strolling around the icy streets of Tromsø, ate breakfast at our hotel, had a nice lunch and dinner in the city. The next day we did go whale-watching at 9am, and this is where our luck really began to change! The crew of the Polar Explorer (the boat we'd be on) were like excited little children at the prospect of seeing the whales, so that was a good sign. As they were giving the safety induction, they mentioned the previous day that there were no Orca / Killer Whale sightings (luckily we had skipped it), but local fisherman had spotted some this morning in the Fjords.

After an hour travelling through the fjord, flanked by forested, snow-covered mountains, the captain spotted a pod of Orcas. We went out on deck, colder than anything I've ever experienced before, with strong, icy winds only making it colder, looked out ahead and saw the unmistakable fin of a Killer whale. And then another. And another. And another. Then all of a sudden there's a line of nine or ten, moving in unison towards their dinner (not us, Herring). It was simply incredible to see the iconic white patches that everyone as kids thought were the eyes.

Just when I thought it couldn't get any better, a pair of Humpback whales (mother and child) muscle in and steal the rest of the Orcas' fish! It was like a scene out of The Hunt, or The Blue Planet, except it wasn't on a screen, David Attenborough wasn't narrating and I wasn't sat in front of a fireplace. No, it was for fucking real, happening in front of my face! And then of course a flock of seagulls were alerted to the commotion by the Orcas slapping the sea with their tailfins, and we really were in a real-documentary, watching a feeding frenzy.

There were about 6 other boats of tourists on the same Fjord, but much further ahead of us, probably having left earlier that missed out on this, but had spotted our boat stopping, looked through their telescope, saw a few fins and raced over to see the end of the action. The frenzy died down, the Orcas moved away, but then more Orcas started appearing from all over the place, then a family of three Humpbacks, and the frenzies just kept coming! The guys leading our tour were every bit as excited as we were, running around to all sides of the boat (which was pretty big) trying to see where the action was moving to.

We got back to the dock at about 2:30pm. But from 10am onwards, it was non-stop whale action, even as we were heading back to base, the Orcas were chasing our boat, using it as a kind of training, trying to keep up with a fast-moving object, and a couple of Humpbacks where gliding away in front of us. By this time though, we were frozen to the core, so were just sat watching from the warmth of the cabin.

NORTHERN LIGHTS HUNTING - ATTEMPT TWO

DSC_5125 
Long Exposure Shot of the Northern Lights - That's the Moon, not the Sun.

After a brisk walk around Tromsø, and a hearty meal I might add, we thought: "Fuck it, it's our last night, let's go looking for the Aurorae again!"

As magical as it was to see the Aurora during our first attempt, I'd say it felt more satisfying than anything else. Just because of the effort that was involved in seeing them. We had to traipse across the Northern regions of Norway and into another bloody country, staying awake into the early hours, braving the increasingly cold temperatures. As satisfying as it was, to have found the Northern Lights, we wanted to see them actually light up the skies above us.

Our final night in Tromsø was forecast for decent levels of Aurora activity (around 4 or 5 KP) and minimal cloud cover. But the Norwegian weather wasn't fully compliant, as we drove to our guide's 'Base Camp' about an hour north of Tromsø next to a frozen lake, we could see the aurora, pretty strong, but behind layers of streaky cloud cover. Damn you Norway!

We remained patient though, for an hour or so, before admitting defeat here and starting to look elsewhere. We embarked on a two hour drive into the middle of nowhere, on an icy road in a valley. Clear skies. I had fallen asleep by this point though, so the OH had to wake me up. I jumped out, a little bit disorientated, looked up and the Aurora was there. I was so excited that I forgot to actually look where I was going, and walked over the road onto what appeared to be a path. It was actually 3 foot ditch filled with snow, and my foot went all the way down, leaving me with snow up to my waist!!

After being hauled out of the ditch, I could see that the Aurora were fairly weak at first, though stronger than our first viewing experience, it still managed to take the breath away. But then it started to disappear, fading away in to the Arctic night sky. Only for it to reappear behind us, this time much stronger. The green light danced in the sky in front of us, before traversing the stars and creeping overhead. I was literally underneath the Northern Lights. We stayed put for maybe 3 hours, the aurora constantly around us.

It truly is a sight to behold, a shape-shifting green light in the sky. It appears to take on so many forms, but my favourite was when it appeared as a thick, bright green beam of light meandering through the star-filled sky. It was truly spectacular, and even though I'd already enjoyed my time in Norway, this was what I'd came for, and it was well, well worth it.

This is the guy we booked with for both nights: LINK - his name's Tom and his minibus is much more modern than some of the others we saw out there (including a transit van!) He's also a decent guy and was desperate to make sure we saw the Aurora on both occasions!

TRAVEL TIPS: NORWAY

DSC_4636
Looks like a fiery path in to Mordor. It's actually a road.

Norway is a beautiful country, the people are incredibly laid back, friendly, and they want you to enjoy your time in their country. It felt so refreshing, and it makes you realise just how uppity and unwelcoming Britain can actually be. Also, the Norwegians are experts at walking on ice, even when drunk on Friday or Saturday nights - that itself is a sight to behold!

Before travelling, we'd obviously researched the place and knew that it'd be expensive but once there it's shocking just how expensive it really is. In Tromsø, the cost of living is 25% higher than that of London. Food is very, very expensive. We looked at an Indian Restaurant and saw poppadoms priced at £8. For two. That being said, it certainly felt that small, snacky items were much more expensive, whilst actual meals didn't feel quite so bad. Meals cost about £40 - £50 for two.

It's cold. Really, really cold. My iPhone app had the temperature at about 2 - 3C most of the time we were there, which you'd think isn't all that different to a typical UK winter, but you'd be wrong. It's freezing, and there's no let up. The footpaths and roads were covered in snow and ice, and the wind can be unbearably cold. Real feel temperature was about -6 on one particular day. Then, if you want to actually go out and do something fun, be prepared for the temperature out at sea or in the countryside to dip even further. It gets to the point where checking the temperature is an irrelevance - it's either cold or f**king cold.

To help deal with this you need a few things:
  1. Waterproof walking shoes - they simply must be waterproof, they will stop your feet getting wet and freezing over.
  2. Non-cotton underlayers - cotton gets wet and turn cold, making you cold. Wool underlayers get wet and stay warm. No brainer.
  3. Wool or Fleece Layers - these layers trap in warm air and keep you nice and toasty!
  4. Windproof, waterproof jacket - this will save your life every minute of every day. In my photos I may look cold, but actually I'm pretty warm- the coldest areas are my hands and feet, everywhere else was warm! 
If you're after a Halal Holiday, I found Tromsø to be ok. There's a halal kebab shop and an Indian restaurant with some halal options - neither of which I went to - but pretty much every restaurant, cafe or gastro-bar offers decent vegetarian options. I found that the quality of the food was excellent, no cheap and dirty eateries out here thank you very much.

Also, if you love fish (which I don't), the Norwegians basically live off fish, so you'll have your fill of Cod and Salmon. The Norwegians also seem to be obsessed with Pizza, the main pizza place in Tromsø is called Peppe's, but vegetarian options there are limited. Also, the only full-on Vegan/Vegetarian cafe in town, Sivertsen's, was closed for the duration of our stay. This was disappointing, as apparently it's rather good!

Finally, when to go? Well Tromso is an all-year-round tourist destination so pretty much any time is good! However, September through to March are the only months you can see the Aurora, as there's too much light in the sky from April to August. March is apparently a good time to go as there's more chance of clear skies, however we fancied December as we were attracted by the allure of the Polar Nights. Just remember though, from May to July, they have the opposite of the Polar Nights, which is called the Midnight Sun. Basically, the sun never drops beneath the horizon! Feel free to drop me an email if you're interested in visiting and need any advice!

I'll sign off this mega-post with a few more indulgent photos of Tromsø, because why not? If you've ever thought of going, and been put off by the price, the weather or the effort required to see the Northern Lights, don't be. Just go for it, it's worth every penny, every hardship and every minute of subzero temperatures!

P1010210
Just in case you'd forgotten

P1010073
Caution - Slippery Surface

P1010251 
The Arctic Cathedral - Northernmost Cathedral in the world.

DSC_4988 
Every bit as cold as it looks...

 P1010701 
Christmas Decorations in Tromsø

P1010113 
Fresh every morning!

P1010086 
God Jul! Or Merry Christmas

P1010395 
The cutest little yellow house you'll ever see.

P1010798 
Pretty sure this bitch is bigger than me.

P1010840 
A welcome respite from the cold

P1010534 
Looking for Orcas

 P1010321 
Claire & Rich left their padlock on Tromsø Bridge.

P1010218 
Found this in a service station toilet.

DSC_4819 
Humpback Whale saying 'Hey!' to the Tourists.

DSC_5135 
Like Green Fire.

P1010755 
Norwegian Trolls.  Better looking than Internet Trolls.

P1010289 
It's for you...

P1010168 
Hotel Selfie

P1010665 
People live here.

P1010725 
 
DSC_4439 
Tromsø

P1010829 

DSC_5019 
The Burning Bush?

DSC_5148 
Had to be done, right?

REVIEWS // Pixi Skin Treats Glow Peel Pads

$
0
0
P1010854 

 If there's one thing you can count on in terms of my daily routine, it's that my skin will be well cared for. That's everyday, come rain or shine. Whether I'm feeling fine or stuck in bed. If I'm going to work or having a well-earned rest day. In every scenario, I ensure that my skin, particularly on the face, is looked after. The mantra I've bought in to since I was a teenager is "Prevention is better than cure."

It's in that spirit that I do everything I can to prevent the onset of Milia. Milia are horrible, horrible little things that can appear anywhere on the body, but typically on the face. They are tiny yellowy-white raised bumps on the skin, that feel a little bit like braille on your face. The milia themselves are completely harmless, and eventually fade away, but they don't do you any favours in your quest for flawless looking skin. Fortunately, there are a few excellent products out there that will help get rid of them and keep them away.

One such product is Pixi's 'Glow Peel Pads'. I literally don't know where my skin would be if it wasn't for their enduring presence in my nightly skin routine. I'd tried various other pads beforehand - Nip+Fab's Glycolic Fix and First Aid Beauty's Facial Radiance Pads - with varying degrees of success. Nip+Fab's offering was good, but it felt like progress was just too slow whilst First Aid Beauty's offering felt like soap pads to my skin, and had no effect whatsoever.

I'd been putting off trying Pixi's Glow Peel Pads for a while, mainly because of the price. But once I'd decided that Nip+Fab and First Aid Beauty weren't up to much, and taken in to account how much I love Pixi's famous Glow Tonic and then actually did my research on the Glow Peel Pads, I thought it only fair (on my skin) to give them a go.

What Do They Even Do?

Aside from working miracles, Pixi lay down these claims about their Glow Peel Pads:

"These highly effective exfoliating pads contain 20% glycolic acid to reveal brighter, healthier, more radiant skin over time. Helps to minimize pores, breakouts, and fine lines while promoting an even skintone. Enriched with vitamin E and aloe vera to nourish & soothe."

Yes, you read that right. 20% Glycolic Acid! Just to put that in to context, Nib+Fab's Glycolic Fix Pads contain just 2.8% and First Aid Beauty don't even give a number on it, though I'm assuming it's less than 2.8% as they're marketed towards sensitive skin and don't give you the tingling sensation associated with Glycolic Acid.

But yes, Pixi have crammed in 20% Glycolic Acid into their pads, which is perfect for my resilient skin. It means that when I apply it to my cleansed face, I can feel the Pixi magic beginning to work almost instantly. 

Glycolic Acid itself is an exfoliator that was originally found in sugar cane (how?!), however it is now synthetically produced. It safely removes the outer layer of dead skin cells and allows fresh new skin to raise to the surface. This is why Glycolic Acid is so useful at getting rid of so many imperfections: Age spots, sun spots, acne, blackheads, enlarged pores and of course, milia.

How do I use them?

I use them every night just before I go to bed, not so sure that using 20% Glycolic acid in the morning would ever be such a good idea! My method for using the pads is simple:

P1010861
  1. Cleanse my face using Pixi's Glow Mud Cleanser (I really like this, but by all means stick to your tried and tested here)
  2. Rinse off the cleanser, then either let your face dry naturally or pat with a dry, clean towel
  3. Take out one pad, and begin to sweep it across your face making sure to avoid the sensitive eye area
  4. Once you've swept the pad all over the face, you might feel your pores begin to tingle. For me this has varied from a gentle tingle, all the way up to excruciating pain!
  5. Leave your face for 2 - 3 minutes, before rinsing off with cold water
Even if you're using Pixi's Glow Peel Pads in winter, it's important to remember that you are using a form of acid on your face. This will make you more susceptible to sunburn, so as weird as it might feel, you need to apply SPF the next day to look after your skin, otherwise, all your good work the night before will sadly be wasted.

Pixi say that you need to use this every day, however I would recommend you use it as and when you feel it necessary. Personally, I do use it every day however if I've threaded my 'tache area I will usually skip over that part as it stings like a bitch!

The Results

I found that within a few days of using Pixi's Glow Peel Pads, the results were noticeable. I'm not saying that they'd cured my skin of all its ailments, but you could see that they were at least having some kind of visible effect. The milia on my skin were beginning to recede, I found that my face was actually brighter, my skin looked porcelain smooth and foundation was applying so much better. The OH also started using them at the same time as me, and his acne scarring had began to heal after just a week.

After a month's usage, the Glow Peel Pads have become a staple of my skincare diet. My face is definitely much brighter, it looks and feels healthier and more radiant than ever before. I've also noticed that I haven't actually had any breakouts (yet!), my larger pores have now almost vanished and most importantly of all, the milia have almost completely gone! As for Pixi's claims on even skin tone and removal of fine lines, I don't feel I can quite comment just yet as a month isn't enough time to take effect.

Recommend?

Yes! Without any hesitation. I bought these pads with the sole aim of getting rid of the milia, and in my opinion they've not only done that, they've gone above and beyond all of my expectations. They've been a major factor in my skin coming 'back to life'. I didn't even realise there was anything else wrong with my skin before using Pixi's Glow Peel Pads, but now that I've seen how much more radiant and smooth my skin is, I'll be making sure I have a constant supply.

The only slight downside is the price. At £24 these pads are considerably more expensive than Nip+Fab's high street alternative (£8.59 or £9.95 for the Extreme version) and just a touch more expensive than First Aid Beauty's offering (£22) - but believe me, they're worth it! Nip+Fab feels like water in comparison.

You'll get 60 pads in one tub, so if you're using them each and every night they'll last you a couple of months - unless of course you have another half who also uses them!

DIY // How to: Smokey Pastel Moonstone Hair using Pravana Locked In Dye!

$
0
0
Moonstone-Smokey-Hair-1 

It has been far, far too long since I last put up a hair post, but what better way to kick off the new year than with a new do? Totally coincidental though, yeah? 

My hair has been mostly lilac for over a year now, with a month or two of grey thrown in too. Along the way I've added in various colours just to mix it up a bit, such as blue, purple, mint and even peach. Eventually though, I always go back to pure lilac. So now, it's time for a change!

Lately I've been feeling the whole smoked out hair vibe, where pretty colours look smouldering hot. It's almost as though the smoked out hair is an evolution of my beloved pastel hair, so that's what I ended up going for. The colours look like darkened pastels, as if they've lost their squeaky clean look and been given a dark edge to them. The overall look is silky, smooth hair in incredibly pretty colours with an air of mystery thrown in to the mix.

I'm not going to go in to my bleaching process, as it hasn't changed a jot since I posted THIS - if you want to know how I bleach, check that link (or THIS ONE) then come back here!

So, to achieve my mysterious smoked-out hair look, the first thing I had to do was let the existing colour in my hair fade back down to silver. My hair was a mixture of plain old Directions in pink, violet and blue, so getting it to fade wasn't too much trouble. Within just a week, it had faded down to a silver colour, with the odd section here or there with a little bit of blue or pink peeking through. As long as it's not vivid, it's no big deal.

The next question is of course, what dyes will I use to achieve my Smokey Pastel look? Luckily enough, I'd ordered a haul of Pravana dyes a week before, and they'd arrived just in time. But why change from Directions to Pravana? The truth is, you don't really have to, however I'm looking for longevity now and that's something that Directions struggles with. I was seriously impressed by Pravana's longevity though, when I died my hair grey using Pravana's Locked In Silver (post HERE). So Pravana would be my weapon of choice this time around too.

DYES USED

Moonstone-Smokey-Hair 
PravanaChromasilk Vivids - Locked In Teal, Locked In Purple, Locked In Pink & Locked In Silver.
PravanaChromasilk Pastels in Blissful Blue

PREP

To get your hair ready for the dyeing, I washed it in the shower without using conditioner. Using conditioner would form a barrier over the hair and prevent the dye from having any significant effect, so none of that around dye-time! Next, I towel dry my hair and run a comb through it to get rid of those pesky knots.

Grab yourself a couple of bowls, enough for one bowl per colour, squeeze in some of the Pravana dyes and add conditioner to bring down the vibrant colours to something more pastel-y. For this look, I only mixed in two colours together - Locked In Teal and Blissful Blue - in order to make the Teal less green and more minty.

I know some find diluting hair colour with conditioner a bit confusing but it's actually quite straightforward. Add a small amount of dye to the bowl and squirt in some conditioner (make sure it's white though!) and start mixing it up. The colour you see in the bowl should translate on to the hair, providing you've bleached it very light. So, if the colour appears too dark, add some conditioner, if it appears too light, add some more dye. Simple!

Moonstone-Smokey-Hair-2 

APPLICATION 
 
I section my hair using clips and begin applying the colours to random sections, and alternate each section with another colour. The aim is to apply the dyes in sections, and to attempt to mix up the colours so that very few sections of the same colour are right next to each other.

Once my hair is completely covered in dye, I stick on a shower cap (I know, attractive!), then wrap my hair in a turban (being Indian helps for this part!) and leave it on overnight. Pravana state you can leave the colour to process for 20-30 minutes at room temperature, however I tend to leave it on overnight in order to intensify the colour, almost as if the colour is being cooked in to the hair. There's no need to worry about damage to the hair, as the Pravana colours are actually a conditioning dye, basically a hair stain. There's no peroxide or bleach contained within, so you're safe!

When I wake up in the morning, I remove the turban and shower cap then rinse off the dyes. This is where I feel that Pravana dyes have a massive edge over pretty much every dye I've ever used - the water runs clear. That may not sound all that impressive, but if the water runs the colour of the dye, and you're using more than one colour, they end up running into each other. So because Pravana runs clear, you can rinse away to your heart's content knowing that the blue won't run in to the pink. The colour you applied, will only appear on the sections of the hair you applied it to!

Moonstone-Smokey-Hair-4 

And that really is that. It's ever so simple once you've got the dreaded bleaching out of the way. After rinsing and blow-drying my hair in the morning, I was literally speechless at how my hair turned out! Whenever applying colour to the hair, I always have this mental image of exactly how I want it to look, and rarely does it ever turn out that way in reality. But this time around, with Pravana's Locked in dyes, I have beautiful swirls of pink, smokey purples, grey and mint. It looks absolutely sensational, even if I do say so myself!

As Pravana is not a UK-based brand, they're not all that readily available on our shores. However, Haircrazy do sell them on their website, so all is not lost. Also, Jen from Glasgow Fashion Girl has told me that you can actually get them much cheaper on eBay - so get looking!

I'd love to hear what you guys all think, and what hair colours or trends are currently tempting you in to taking the plunge and making that giant leap in to the world of coloured hair?

LOVE // Crystal Rock Rings

$
0
0
Crystal-Rock-Rings-2

Hello hello!

Can you believe that this will be my fifth post this month? And we're only 12 days into it! Definitely a case of start as you mean to carry on for me as far as 2016 goes. As much as I can't stand the idea of making New Year's Resolutions, I have to admit that I really do want to focus a bit more on the blog this year. Although 2015 was a big improvement on 2014, I feel like there's an awful lot more left in me yet. So hopefully you'll be seeing plenty of me this year, and even more importantly, hopefully I'll be seeing plenty of you this year too.
Anyway, on to this post. This one's about some rings that I bought recently, and I think I might need your help. You know when you're at an independent retailer, where things aren't quite labelled as well as they might be in a chain store, you see something so f**king pretty that you just have to buy it there and then? Well, yeah, this happens to me a lot and at times it can be frustrating, because afterwards, when I want to tell people about it, I have to go away and do some research to find out what the thing I've bought is actually called.

And that's definitely a cue for a photo of one of these little beauts. I think these are raw, semi-precious rocks sliced in half and stuck on to a ring, but that description clearly doesn't do them justice. I often find myself sat there staring at them in a trance-like state, genuinely fascinated that something so pretty was found inside a rock.

Crystal-Rock-Rings-3

I picked these up at a shop in Affleck's Palace in Manchester at £10 each, it's a great place filled with all sorts of quirky and unusual shops that you just don't see anywhere else. Sure, there's a few that might freak you out a bit but if you just keep looking there are a few hidden gems (pun intended) scattered across it's four-floored labyrinth.

In my opinion, the pink ring looks to be Rose Quartz, but I can't tell for sure - so if you (or a friend of a friend of a friend) are an expert in all things rocky, please tell me if I'm right or otherwise! As for the blue one, I have no idea and the multi-coloured rainbow type one - well, not a clue! 

Whatever the actual rocks are, they're beautiful and you get a good solid chunk of rock on each ring. I always like to have some kind of ring on my fingers - I tend to find that they're really easy to lose - the rings, not my fingers - particularly those little stackable ones you get in sets of 3 or 5 from H&M and Topshop. But given the size of these, there's little chance I could ever lose them! In fact, they make me think of the Stonecutters episode of The Simpson (the Stone of Shame and the Stone of Triumph!)

Crystal-Rock-Rings

I've been really liking these types of stones of late though I don't always know what they're called, I've got myself an absolutely huge lump of amethyst that you might have seen making its way in to my Instagram or blog photos recently. Most people know what Amethyst is, with it's distinct purple colour, but some of the other pretty ones almost seem anonymous in comparison. I can't get over the natural crystal effect so often held within the rocks, and these rings are fine exponents of that, with the light bouncing off hundreds of tiny little surfaces in all directions - it's truly dazzling to behold.

So if you quite fancy getting your hands on one of these, and you live in the Northwest area, head in to Affleck's in the Northern Quarter for your fix of rocky goodness. If you don't live around this neck of the woods, no matter, I'm sure there are plenty of places online or in a town centre near you stocking something similar. And remember, if you know what these rocks are called - tell me!


MAKEUP // Negative Space Eyeliner

$
0
0
Negative-Space-Eyeliner

Hello ladies & gentlemen! Yes that's right, I'm knocking out a sixth post in a month! I know what you're thinking: "What have we done to deserve being blessed with your presence so often?" But don't worry my little stalkers, I happen to believe that you always deserve to blessed with my presence! But all jokes aside, here I am again, this time I'm showing you a new look I created this week and I'm going to tell you how to do it! It's called Negative Space, or, Cut Out Eyeliner.

I believe that Negative SpaceNails were 'on trend' maybe a year or so ago, and I remember spotting it cropping up all over the internet through blogs, YouTube, Pinterest, Instagram etc. It's something that I must admit, infuriated me no end. And it wasn't anything to do with how it looked or how often I kept seeing it on my iPhone, or how many times I heard people say it's the best thing since sliced bread, oh no. See the problem for me was that I actually gave it a try, and failed at it oh so hard.

How? Well, I just couldn't get my drawing hand steady enough. 'How could this be?'You might be thinking. 'How could it possibly be, that the queen of eyeliner couldn't keep her hand steady?'Believe me, I thought the exact same thing, and I couldn't come up with a rational answer. The best I could come up with is that my hand subconsciously recognises that if it slips near the eyes it might poke one out, but there's no such nail-related danger. But whatever the reason, my steady eye-liner hand turns to jelly when it comes to the nails, so the Negative Space Nail look failed, and it failed bad.

Just recently I thought I'd give it a go again, but this time not on the nails, but with my eyeliner! How did this idea come about? Well one particular morning I was drawing on my eyeliner as usual, but I was in quite a rush. I drew on the flicks, but didn't fill it in. I checked the time again, then checked my eyes in the mirror - they looked awesome! I loved the non-filled-in wings on either side, and that's when the dreaded words "Negative Space" popped into my head!

Negative-Space-Eyeliner-6

The funny thing about this look, is that it's not too different to my all-time favourite: the 60s look! The reason for that is 60s eye makeup is defined by the stark contrast between the brilliant white eyeshadow and the deep, black liner. I have loved 60s Eyeliner, and Graphic Eyeliner in general for a couple of years now. It's such a classic look, I consider it my go-to now.

With the negative space eyeliner, the contrast is between that same deep, black eyeliner, but instead of contrasting with the white eyeshadow, it contrasts perfectly with the empty space. The great thing about this, is you can get really creative without a great deal of effort - though of course, practice makes perfect.

So, how can you achieve this look? Simple: apply your winged eyeliner as per usual, but this time you'll need an extra tool in your makeup kit - the cotton bud (or Q tip). Look into the mirror at your eyeliner and plan where you'd like the gaps to be. Then simply take the cotton bud, dip it into your favourite makeup remover, then simply remove one small section at a time. Don't worry too much if it doesn't look perfect, remember the cotton bud isn't exactly a precision instrument, so it will always look a little wonky.

Once you've removed a section here or there and are happy with the placement, all you need to do is get your eyeliner back out and using your eyeliner brush of choice, simply sharpen up those wonky edges. And that really is that! Pro Tip though: in the photos I have white eyeshadow applied too, which means taking a little slice out of the top liner, means you're going to need to fill that gap in with eyeshadow - trust me, that is not easy. So my advice would be to try this without eyeshadow.

Negative-Space-Eyeliner-2

 Negative-Space-Eyeliner-1
Yes, that's right. I murder Barbie Dolls in my spare time.

For reference, I use Illamasqua's Precision Gel Liner in Infinity which I reviewedHERE using the Real TechniquesPrecision Eyeliner Brush - See my post on that HERE

And that really is that, it's much more simple than it looks, yet also it's very, very striking. Give it a try, and show me the results!

Twitter | Instagram | Facebook | Bloglovin | Tumblr


Lima and the Technicolour Dream-kimono

$
0
0
Rainbow-Sequin-Disc-Kimono-1 

Can you believe, this is the first Outfit of the Day for 2016? Of course, as soon as I saw the snow falling last night I had this vision of posing in the snow, so for the first time in my life I found myself wishing that the blasted snow would actually settle! Not only did it settle, it actually continue snowing long in to the Sunday, so you may actually see the blur of a few flakes in the photos!

For such a momentous occasion, I reverted back to my old favourite - the Kimono. If you've followed me throughout the years, you'll no doubt recall my endless and undying love for the blessed kimono. Along with Cherry Blossom and Origami, Kimonos are probably the best thing to have come out of Japan (note the lack of Sushi from this list), and I absolutely adore them. I just love how floaty and easy to wear they are. They can be thrown on top of a plain old bodycon to dress it up or over a simple two piece top and skirt.

That being said, the Kimono I'm wearing for this OOTD, isn't exactly the easiest to wear! I purchased this beautiful petrol coloured sequin disc'd kimono last year from an online store that I can't seem to tear myself away from - Oh My Love. The thing about Oh My Love, is they do the usual clothes you'd expect to find at any other retailers really, but every now and then they come out with an absolute gem. This kimono is one such gem, and THIS Pastel Floral Smudge Print Dress is another.

Unsurprisingly, they've named this Kimono the Petrol Sequin Kimono - it's literally choc full of iridescent petroleum style discs sewn on to the black fabric beneath. The effect this has as your body moves or the wind catches it is mesmerising, each individual disc changes colour according to the light. And this is why I bought it, as it makes me think of mermaid scales.

What is surprising though, is how lightweight the Kimono actually is, when you first lay eyes upon it, it looks back-breakingly heavy, but mercifully it feels light as a feather. Whilst it isn't so heavy, it certainly is noisy! As you can imagine, all those little discs clink into each other as you move, but it's a small price to pay. What I would say though, is it isn't such a good idea to wear this on a night out - inevitably, a few of the discs will end up slipping off, but it's perfect for a posh meal or just pottering around the house.

So for this OOTD, I thought I'd pair the glamour of the kimono with the simplicity of a black bodycon dress and a pair of pointed black suede boots. Oh, not to mention a pair of tights to stop my legs freezing over in the f**king snow and my OH's rainbow umbrella! Yep, that's right, this colourful number does notbelong to me... Yet. *Wild Cackling*

 Sequin-Unicorn-Kimono 

 Sequin-Rainbow-Disc-Kimono-2 

 Mermaid-Sequin-Kimono 

 Mermaid-Sequin-Jacket 

 Rainbow-Sequin-Disc-Jacket 

 Rainbow-Mermaid-Jacket 

 Rainbow-Sequin-Disc-Kimono 

 Sequin-Disc-Kimono

Petrol Sequin Kimono - Oh My Love (LINK)
Black Bodycon Dress - Topshop (OLD)
Pointed Black Suede Boots - Primark (this season)
Geo Earrings - Cheap Monday (OLD)
Clean Dial Holographic Strap Watch - ASOS (LINK)

I purchased the Kimono at full price, however a quick look at the Oh My Love site today, and I can see that it's actually on sale at just £38. I'm usually somewhere between a size 4-6, so I went for an XS and still find it quite roomy.

I really, really like this kimono, it just feels very me. And no, I won't be letting the seasons stop me from wearing this, although I am particularly looking forward to wearing this in the summer. I can't even imagine what it would look like with sun's rays beaming down onto the discs. I think I'll probably end up dreaming about this image tonight!

Also, the dazzling kimono may have taken all your attention away from my face throughout the pictures in this post, but no matter - I'll soon be dedicating an entire post to this. I went a little bit crazy with the eyeliner, and I can't wait to show you the close-ups - I think you're gonna love it!

Until next time, stay fabulous.

REVIEWS: Olaplex No 1 and No 2 - Home 'Bond Strengthening' Treatment

$
0
0
P1010056 

Right at this very second, it's an exciting time to be in the hairdressing industry. With creative colouring and cutting on the rise, I have to say that I truly do miss working in a salon. I was always fascinated by colours, by the almost infinite possibilities.

But, at the risk of sounding old, back in my day it was all about those highlights, lowlights, long layers and even feathers around the face. On the odd occasion you might have gotten someone asking for a slice of purple, which was considered quite wacky 9 or 10 years ago. All I knew of at the time was Paintbox by Fudge, and that all of the household brands didn't really offer much.

Despite my blossoming love for all things colour, I positively dreaded the day a client with jet black hair would come in asking for blonde streaks. You were never really sure how it would turn out colourwise, and worse still, there was always the fear that the hair would become so damaged, it'd simply break off.

But now that more and more people are pushing the boundaries and breaking the monopoly that black, brown, blonde and red have had over hair colour since the dawn of time, it makes sense for someone to look at all the issues commonly faced by hairdressers and develop a solution that makes things much easier and less fraught with fear. Thankfully, some super-clever people did just that, and they gave birth to Olaplex.

Back in 2014, LaaLaahttp://www.dolcevanity.com and myself both came across it around the same time, whilst it was still only available in the US. The noises coming from across the pond were less "OH MY GOD WHAT HAVE YOU DONE TO MY BEAUTIFUL HAIR?" and more "OH MY GOD IT LOOKS SO GOOD I'M GONNA CRY!"

It didn't take too long before a few salons on this side of the pond introduced the treatment on to their menus, great news for me as I really wanted to try it out. I also noticed whilst in Tromso, Norway, at the end of 2015 there was a salon there offering Olaplex treatments - it's gone international now!But whilst going International is obviously a good sign, after all, someone out there must be liking it, that in itself doesn't necessarily mean that it's any good. 

What the heck is Olaplex? 

As Olaplex state: "Olaplex is free of silicones, sulfates, phthalates, DEA, aldehydes and gluten and is never tested on animals. Olaplex reconnects broken disulfide sulfur bonds in the hair. Hair bonds are broken during thermal, mechanical and chemical services."

Don't confuse this with a simple protein treatment though, Olaplex doesn't add protein to the hair. It's much, much more than that. As Olaplex themselves say, it is supposed to reconnect the broken bonds, and these broken bonds are what leads to breakage in the bleaching process. Basically, if it's half as good as what they claim, it's halfway to being a miracle.

So of course I purchased the Olaplex Travel Kit, which comes with relatively small bottles of all three steps, conveniently named: No 1, No 2 and No 3.

No1 and No2 are to be used by trained professionals in the salon. No 1 is mixed in with your bleach or other chemical service products, and you simply apply this mixture to the sections or areas of the hair you wish to lighten as you usually would. As your hair lightens, normally your hair will weaken because some of the chemical bonds will break, so adding in the right amount of Olaplex No 1 should help to reduce that. Once your hair has developed and you've reached your goal colour, rinse out the bleach/Olaplex mix and then apply No 2.

If using Olaplex when lightening the hair though, you need to understand that the additional strength it's giving to your bonds is actually making the bleach less effective. So you'll find that you need to take the peroxide up a notch. Taking myself as an example, I use 6% Peroxide or 20 Vol. If I were to use Olaplex, I'd need to move up to 9% Peroxide or 30 Vol, ensuring that the correct ratio is used, as directed by Olaplex. I'm yet to use it for bleaching, as I'm currently waiting for my roots to grow out a little more.

The No 3 treatment is more aimed at retail customers and can be easily purchased from any salon offering Olaplex, as it's the take home treatment.

The BOND STRENGTHENING TREATMENT

If you have no real interest in bleaching your hair at home though, that's not necessarily reason to dismiss Olaplex No 1 and No 2 just yet, as it has another application too. It can be used as a standalone treatment, or as Olaplex call it - the Bond Strengthening Treatment. And that's what I've used it for, at home, in the tub!

It's done in 2 stages, and goes a little something like this:

STEP ONE


P1010043

I mixed 10ml of Olaplex No 1 with 90ml of warm water. Conveniently enough, Olaplex No 1 comes with a handy little measuring cap which you can attach in place of the lid (as pictured). Once the measuring cap is on, you simply squeeze the bottle until the level on the cap shows as 10ml. Easy. As for the water, a measuring jug will do. Next, you pour the Olaplex No 1 and the water into a non-spray applicator bottle.

Note here that it's tempting to think about using a spray bottle to apply, as the consistency of the mixture is pretty much water, but please resist that temptation. Although Olaplex is non-toxic, using a spray bottle with any kind of product of this nature could potentially irritate the lungs.

Before applying any of the Olaplex No 1 treatment to my hair, I gave it a good shampoo, twice, to get rid of any build up and get the hair squeaky clean ready for the Olaplex magic. Once that's over with, blot out the excess water and towel dry your hair until it's just damp.

Now your hair is ready for the treatment, you can start applying the mixture all over the hair, including the root area ensuring the hair is fully saturated. Make sure you focus on any troublesome areas where there's most damage to the hair, and also ensure you use up all of your mixture. You'll find that once you've applied the whole lot to your hair, it'll be dripping wet. GOOD STUFF! 

 Now, this next bit might make some of my fellow unicorns and mermaids recoil in sheer terror. You're gonna have to comb it through your hair. I'll let that thought sink in for a moment or two.

Trust me though, there's nothing to fear. Now that you have Olaplex on your hair, you'll find that combing simply isn't an issue. I used a wide-tooth comb, and recommend you do too, and found that the comb went through my hair like a hot knife through butter - no tugging whatsoever. WINNING!

Olaplex suggest leaving this on for "5 minutes or so", and the 'or so'bit is key here. No need to get out a stopwatch or use your iPhone's clock app, in fact I actually left it on for hours with a shower cap over my hair to keep it nice and moist.

STEP TWO
 
 P1010048

After a couple of hours of Olaplex No 1 doing it's thing with my bonds, I whipped off the shower cap and got ready to apply Olaplex No 2. We're going to apply Olaplex No 2 right on top of Olaplex No 1, so there's no need to rinse anything off just yet. Simply apply a generous amount of No 2 on to the hair and massage it in. Whilst No 1 felt all runny and watery, No 2 has a completely different consistency - it's very thick and creamy, like conditioner. Once you've massaged it all throughout the hair, give it another cheeky comb through.

Olaplex say to leave this on for a minimum of 10 minutes. If your hair is extremely damaged, they just recommend leaving it on longer. Each time I've used it, it's getting pretty close to bed time, so I just pop my shower cap back on, wear a turban above that and go to sleep with it in my hair.

THE VERDICT

Now I'm a curious combination of raw cynic and eternal optimist, so whilst I was hoping it would have worked miracles over night, my cynical side wasn't quite so sure. The next morning I rinsed it all off in the shower and immediately I felt that it had given some much needed slip to my hair whilst rinsing off. Optimist was feeling optimistic, but cynicist was wondering whether it had actually repaired any of those bonds.

After rinsing in the shower comes blow-drying, though not in the shower, and please don't try this. Ever! But seriously, blow-drying was the first big test for Olaplex. As anyone who's ever died their hair can attest to, looking at the brush after blow-drying is a painful experience, all those broken follicles clung to it just isn't nice. But now it felt like blow-drying was a breeze, and my hair felt swishy, moveable and weightless. Not attributes you could ever associate with bleached hair, but something we all want and crave so, so badly.

Olaplex state that the Bond Strengthening Treatment is like a 'reset' button for the hair, and that you need to keep using it until your hair has reached its former glory. I'd say that before using, my hair was not in the worst condition it's ever been in. Maybe a year or so ago, before I switched to using 6% or 20 VOL peroxide and cut down on heat styling it was in a terrible state. Even after making those changes, my hair is still damaged and breakage still occurs more than I'd like it to. I wanted to roll back the years with my hair's condition, so Olaplex seemed like the best chance of me doing that.

I've used this treatment four or five times now, and it's my opinion that Olaplex No 1 and No 2 have made a huge difference. I find much less hair in my brush and comb, the hair is actually much easier to comb through and it looks and feels a lot thicker than it used to. That's not to say that Olaplex has thickened the hair, it's just reduced the breakage to the extent my hair is starting to fill back out again. Over and above that, my hair feels silky smooth again.

I'm not sure if the Olaplex treatment works on mushy, gummy hair - another issue that most folk with bleached hair will have had countless battles with - and to be honest, I really hope I never have to experience that again! If however, your hair is mushy or gummy, I don't see the harm in trying this out, aside from the cost of buying the stuff!

Olaplex has been described as being revolutionary, and whilst I'd love to say that it is, based on how I've used it so far, I can't. My hair is in much better condition, but I've used a product similar in nature to the Bond Strengthening Treatment before - L'Oreal'sFiberceutic Treatment, which has been classed as botox for the hair. Both treatments are applied over two steps, both can be left on over night and both give similar results. Both results also last well until you start torturing your coloured hair again with heat stylers and further chemical treatments.

Also, I don't want to appear to be harsh on Olaplex, because I really like the idea of it, and I have researched the story behind the product and it's truly fascinating how it came about, but once you've damaged your hair, you can never get that same hair back to how it was. You can try all the treatments under the sun, but I feel that you'll never quite get it back to 100% - but it certainly doesn't mean you shouldn't try!

Prevention is always better than cure though, and that's probably where Olaplex can be revolutionary. Mixing in No 1 with your bleach, and using it that way could prevent the hair being damaged in the first place. If that does turn out to be the case, you'd better believe I'll be shouting it from the rooftops.

Next time, I'll be taking the plunge using Olaplex No 1 with the bleach. The only thing is, it means I'll have to go back to the 9% or 30 VOL peroxide which so badly damaged my hair in the first place. If Olaplex passes that test, then it can be rightfully hailed as the miracle product it's so hyped up to be.

Until then, fire your Olaplex questions or experiences at me!


EYE MAKEUP // Criss Cross Eyeliner

$
0
0
Criss-Cross-Eyeliner-5 

Hello m'dears! 

Not so long ago, I made the classic makeup addict error. I was seduced by the variety of colours on offer in a particular range, and of course decided to buy the whole lot, more than I could ever want or need. At the time, this thought wasn't on my mind at all though, my mind was more like a moth to a flame: "They're so pretty!" And that was that. Bought.

I didn't have the dreaded post-purchase blues either, I wasn't wondering 'What have I done?' and I wasn't regretting it either. Until they arrived through the post that is. When I'd ripped open the packaging and laid them all out on the rug, they still looked pretty, but it's like the practical side of my mind started up belatedly and abruptly burst this bubble:

"What the fuck are you gonna with all those?"

And no, Practical Lima didn't hang around to sort out this shit-storm of a makeup purchase either, it just went back to sleep, leaving daydreaming Mer-Lima to make everything ok again. Mer-Lima all of a sudden realised that she doesn't really like Liquid Eyeliner, because it cracks all too easily. Damn it. I should take Practical Lima shopping with me more often.

But don't let a bad purchase haunt you forever. Don't let it become like 'The Tell Tale Heart' looking longingly you at you, laughing at you for making such a silly mistake, taunting you every time you do your makeup. No. Bad purchases only seem bad, because you don't like using them for what they're supposed to be used for. So what are you to do? Use them for something, a little different.

That's exactly what I did with these Liquid Eyeliners I purchased during the Lime Crime Black Friday sale. They set me back just $5 each, down from the usual $14 so I just couldn't resist! Instead of using these dazzling coloured liquid eyeliners to line my eyes as they're supposed to, I used them to create a new look. The only alternative was to just leave them in my makeup drawers, collecting dust until I need to clear up some space and eventually discard them, unopened, unused to the graveyard of poor makeup choices.

I tried the white one as a top liner, but it behaved exactly as I expected it to: within a few hours, cracks began to emerge. Disappointing if not unsurprising. But with Gel liner I tend to find it stays put, even with the poorer quality ones, they tend to fade away, instead of cracking. I much prefer the fading to the cracking, that's for sure.

Criss-Cross-Eyeliner-3 

Anyway, for this look I used my tried and trusted Precision Gel Liner from Illamasqua as the actual Eyeliner, applied some gorgeous eyeshadow and topped it all off with several criss-crossed streaks of Lime Crime's Coloured Liquid Eyeliner. I used pretty much their entire range, with the exception of the gold - I just ran out of eye space!

The criss-cross look isn't technically difficult to achieve, you just draw on a selection of straight lines in different colours at random points around the eye, making sure some intersect with each other. The difficulty lies in picking the right colours and applying them to the right places to give you an inspired, fresh look as opposed to a mess. I think I managed to get it looking pretty good, and in a way they seem to resemble fireworks!

Criss-Cross-Eyeliner-6 

FACE 

NARS All Day Luminous Weightless Foundation in Barcelona

CHEEKS

Sugarpill Pressed Eyeshadow in Dollipop (used as a blusher for dolly wolly cheeks!)
MAC Mineralize Skinfinish in Lightscapade - Correction it's actually MAC's Gold Deposit

EYEBROWS 

Illamasqua Broke Cake in Thunder
Illamasqua Precision Ink in Scribe (dotted above the eyebrow)

EYES

Sugarpill Pressed Eyeshadow in Poison Plum (lid and crease)
Sephora's Colorful Eyeshadow in Pool Party (lower lash line)
Makeup Forever Artist Eyeshadow (the name has rubbed off, damn it! However, it's in the inner corner)
Lime Crime Glitter Helper
Lime Crime Zodiac Glitter in Aquarius mixed with Stargazer's Glitter Shaker in UV Purple
Illamasqua Precision Gel Liner in Infinity (top liner and dots in between brows)
Lime Crime Liquid Eye Liner in Blue Milk, Lunar Sea, Reason, Citreuse, Lazuli & Orchidaceous
Boujois 1 Second Volume Mascara
Criss-Cross-Eyeliner-2 

LIPS 

Lime Crime Velvetine in Utopia
I'm actually quite happy with the way this look turned out, specially as it was the first attempt - I had visions of awkward looking lines scrawled all over my eyes but it seems to compliment the bold, vibrant eyeshadow. Of course I couldn't just stop there though, so I added in a line of white dots above the brow and a line of black dots above the bridge of the nose. All in all, there's a lot of things going on, but they all come together very well.

Have you tried Criss Cross Eyeliner before? Or have you made some spectacularly bad makeup purchases? I want to know!

Until next time!


JEWELLERY // The Decapitated Barbie Head Ring

$
0
0
Barbie-Ring-1 

 I absolutely love blogging about Jewellery, but after posting about my stunning Crystal Rock Rings earlier on in the month, I realised that I haven't actually blogged about jewellery all that much over the past year or so. I think the main reason for that is I've been concentrating on other topics, but I'll be looking to change that up a little bit this year.

So without further ado, I present to you The Barbie Head ring!

Barbie-Ring-2

I did actually have a Barbie when I was a kid, but not one of the standard white ones, it was a brown skinned model, bought for me ironically by a white family friend. I used to take her everywhere with me, and of course she took a right beating (I was 7, give me a break!) But aside from that, I've never really given a toss about Barbie or any other kind of doll if I'm honest. But this ring reminded me a little of Sid from Toy Story and I can just imagine a Barbie body somewhere out there in the world with an Alien head in place of her intended one!

The ring itself was purchased on Depop, which I find to be like a goldmine for odd and unusual things like this, at a snip for just under £5. There's not really an awful lot of description needed apart from to say it's a Barbie's head attached to an adjustable ring, it's a hollow rubbery head, with soft doll-like hair. I love the look of the ring, the way it stands out from the hand and attracts all kinds of attention!

Barbie-Ring-3 

There is one slight drawback is the adjustable part of the ring - what you'd usually expect from an adjustable ring is to adjust it to make it smaller to fit your finger, but this ring is so small, you have to adjust it to make it bigger! It's a weird annoyance, but given it cost just a fiver and looks positively awesome, I think I can let that slide!


MAKEUP LOOKS // Glittery Two Toned Eyeshadow inspired by Kat Von D!

$
0
0
Kat-Von-D7 

Kat Von D is an absolute babe. I don't even like using the word babe, but I save it for special people - and she is most certainly deserving of that label!

One of her signature looks is of course the Two Toned Eyes - if you give that a quick Google, you'll pretty quickly see (amongst the countless imitations) a lot of photos of her with blue eyeshadow on one eye and yellow on the other. It's so simple, yet so, so beautiful.

I've been completely hyped up all over Kat Von D of late, as I've heard that her very own range of makeup may actually be coming to Boots in the UK. I know it's only rumours, but with Boots introducing NYX only a few short months ago, anything is possible. Besides, what if it was actually true? Think of all the makeup! Let's just say I've got my fingers and toes crossed on that one.

I've already got a mental wishlist currently stored in my brain, including the ever-so-popular Tattoo Liner. It's a felt tip liner, and even though I'm not a fan of felt tip liners generally, this is Kat Von D - don't you understand? I will even give up the premium eyeliner space that Illamasqua's Precision Gel Liner has made it's own, just for a day or two to try it out.

And, by the way, if you're reading this thinking 'Who the hell is Kat Von D?'GET IN THE SEA. NOW.

So naturally, I had to create my own take on the Kat Von D Two Toned Eyes look that she is so often seen rocking! After applying Sugarpill's Mochi to one eye, I applied their Poison Plum to the other then I applied the same colours beneath the opposite undereyes. Kat applies her undereyes quite subtly, but I thought that the Sugarpill shadows deserved to be extended out just a little more and promptly went for it!

Kat-Von-D8

 To finish off the asymmetrical look, I added a few touches of my own: firstly, I drew on a little white unfinished triangle to just one eye, secondly I added three dots on the inner eyes in a triangle shape in contrasting colours too, and finally I added some glitter tears beneath both eyes using NYX's crystal liners, because, well... Glitter.

Kat-Von-D5 

// FACE

NARS All Day Luminous Weightless Foundation in Barcelona (this foundation does not seem to finish!)
BEN NYE Banana Powder (sweeped under the eyes to brighten!)

// CHEEKS

MAC Mineralize Blush in Warm Soul 

// EYEBROWS

Illamasqua Brow Cake in Thunder

// EYES

MAC Paint Pot in Painterly
Sugarpill Pressed Eyeshadow in Mochi
Sugarpill Pressed Eyeshadow in Poison Plum
Makeup Forever Artist Eyeshadow (the name has rubbed off, urgh!)
NYX Crystal Liners in Silver and Pewter
Benefit Bad Gal Liner
Illamasqua Precision Gel Liner in Infinity
Illamasqua Precision Ink in Scribe
Bourjois 1 Seconde Volume Mascara

// LIPS

NYX Soft Matte Lip Cream Transylvania

Kat-Von-D2 

 Kat-Von-D4 

So that concludes this post, I hope that you love this look just as much as I loved creating it. I think it's really important to draw inspiration from looks that you find on the internet, and attempt to recreate them. Above all though, add in your own personal touches to create something a little different, to really add something to the overall look. That's how you develop your makeup skills and work your way up to looks like this!

Until next time!

Viewing all 299 articles
Browse latest View live