Quantcast
Channel: Fashionicide // Fashion, Makeup and Beauty - with a difference
Viewing all 299 articles
Browse latest View live

OUTFIT: All Laced Out

$
0
0
 Hello my lovelies!

It's only just occurred to me today that I haven't actually bought many new clothes of late. I tend to find the Spring/Summer ranges to be a bit generic and 'Same old, same old'. I'd like it if the high street showed a bit of imagination! All of the usual suspects on the high streets seem to think that everybody loves tacky florals year in, year out. I don't. Don't get me wrong, I do love my florals but I find I have to sift through a lot of tacky prints to find the wearable ones.

I mentioned in a previous post about venturing in to the wardrobes and that is exactly what I've been doing these past few weeks. It's a brilliant feeling to re-discover pieces of clothing that you'd completely forgotten about and fall in love with them all over again. 

One such piece is this gorgeous tunic, it's a full-on lacy number with gold studded detailing and cuts around the chest area. The colour is just beautiful, like a gold champagne, it oozes class. I paired it with a Zara-style studded, cropped lace jacket and some high waisted lace trim shorts. Maybe I went a bit overboard on the lace but the combination looks like a natural fit.

DSC_6480DSC_6456DSC_6482DSC_6474DSC_6460DSC_6488 

Studded Champagne Lace Tunic - TOPSHOP 
Zara Style Studded Cropped Lace Jacket - Manchester Arndale Market
High Waisted Lace Trim Shorts - H&M

So now you've looked at the photos you're probably thinking 'What's going on with the hair? Pick a colour already!' Well I have now finally settled on this amazing light turquoise! It was 100% DIY and I'm so pleased with the way it's turned out, the colour is perfect and it's exactly as I imagined it. 

At the time my hair was showing the strain of being bleached a couple of times, however it does appear to have recovered now. I found a very special product that has strengthened my hair, perfect for those of us who are indecisive and/or like to experiment with hair colour so keep an eye out for a future post! ;)
 Halima

DIY: How to Dye Dark Hair to a Blue Based Turquoise!

$
0
0
blueturquoisehair4 

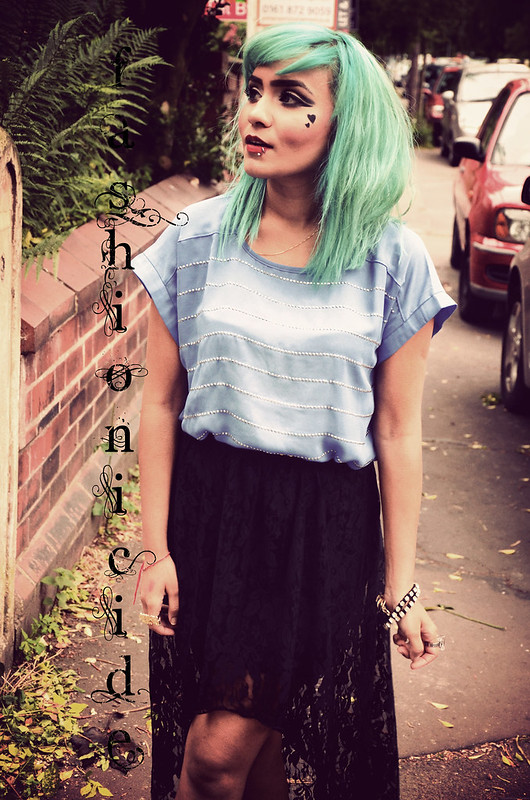
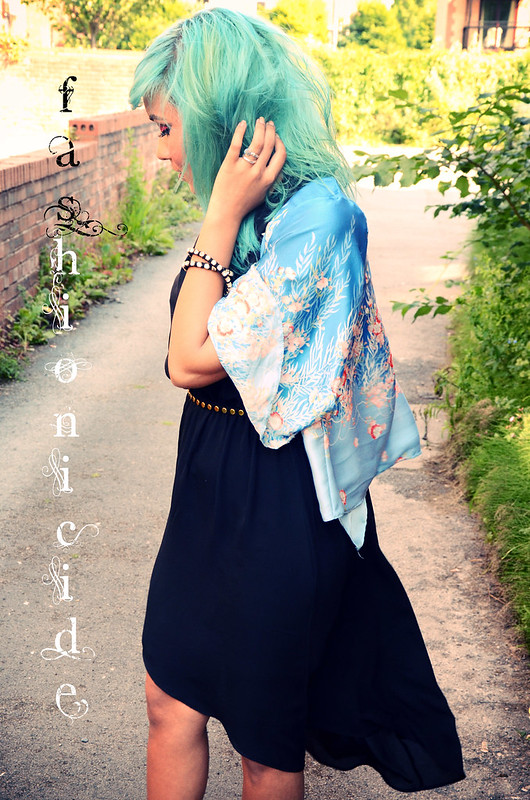
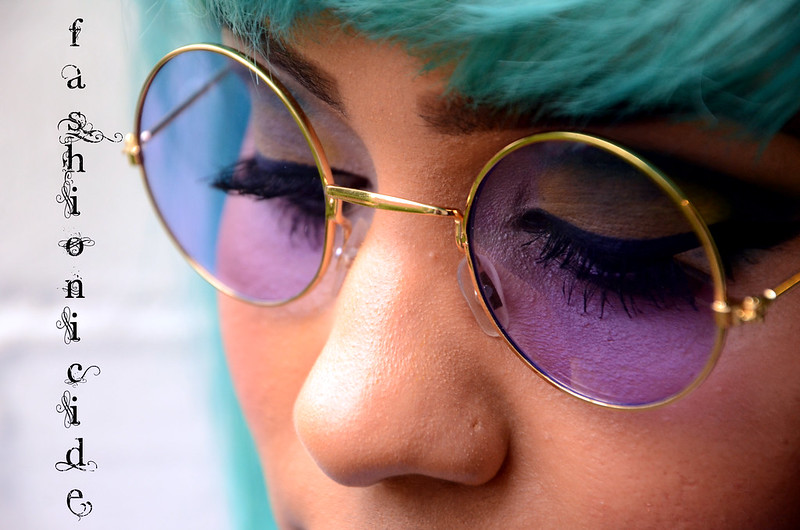
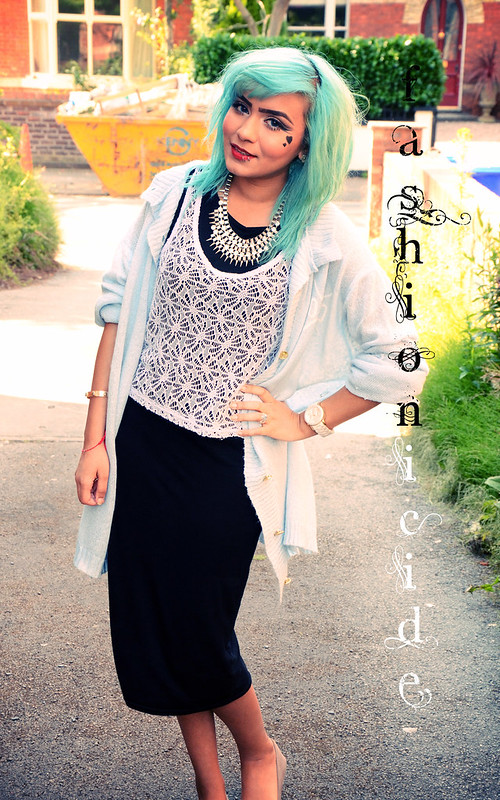
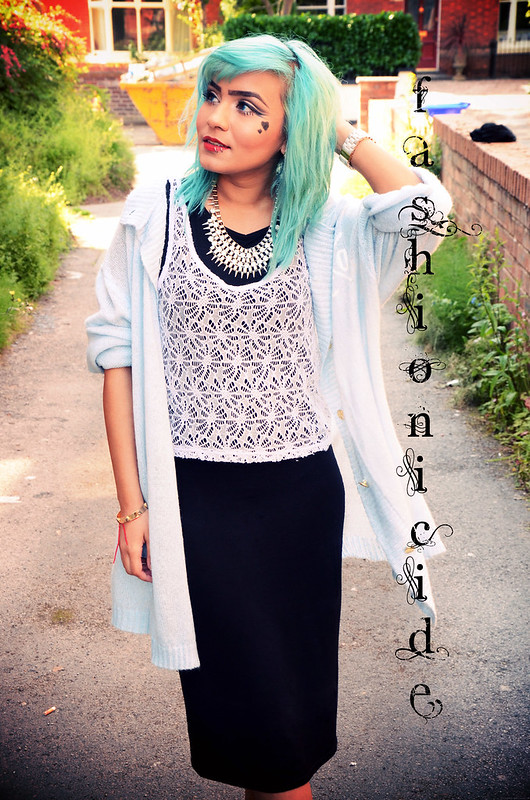
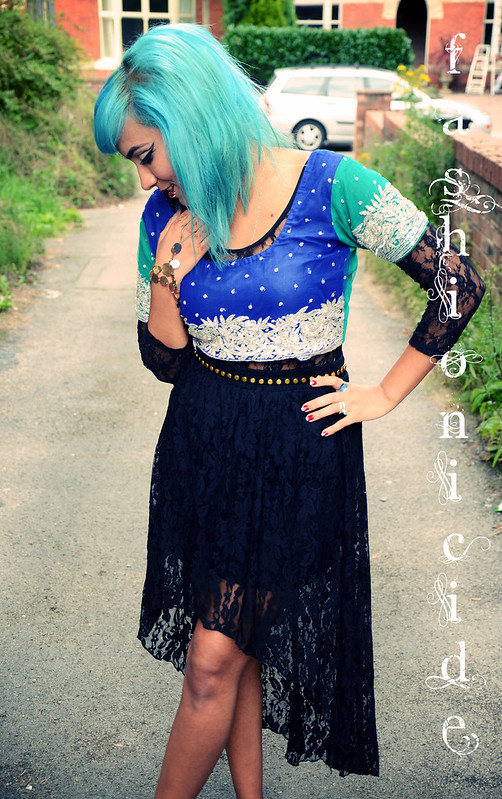
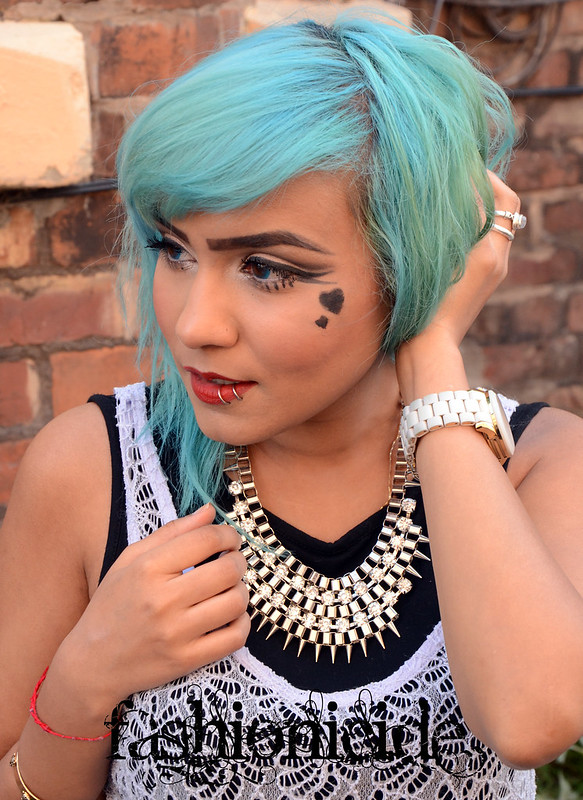
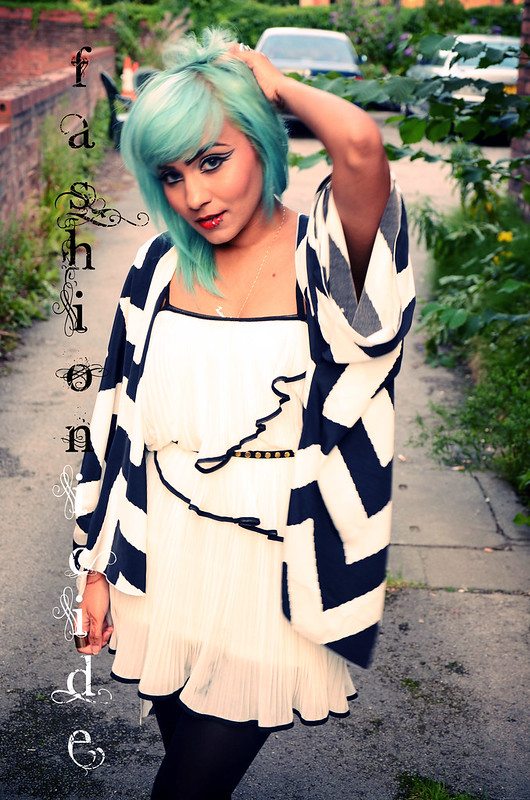
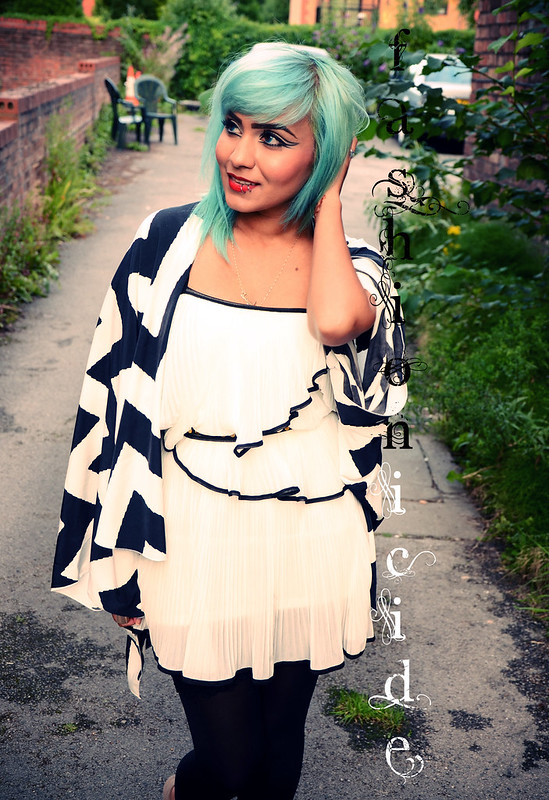
So yeah, if you've been keeping up with the blog and my instagram you should already know by now that my hair has gone from purple to all-out turquoise! I for one am overjoyed that I've ditched the turquoise ombre and the full-headed purple and have instead gone for the complete mythical look! 

I'd wanted to do this for quite some time but thought I'd ease my way into it by going for the initial ombre. The plan was to then go the whole nine yards, but I actually got a bit bored of Turquoise and went purple first. Upon first glance of my purple barnet in the mirror I realised my folly! I dreamt of mermaid-turquoise tones once more.

Anyway, as much as Turquoise is my absolute favourite colour in the whole wide world, it's extremely tricky to get it right on your hair. Getting the right balance is tough, particularly if you're in favour of bluey turquoise as opposed to greener shades. 

It took me a grand total of 3 days, yes THREE DAYS, to get the colour just right. That's mainly due to the need to take a break from the hair killer that is bleach. My super-dark hair needed bleaching twice, so a break was essential!

I've put this post together as a bit of a guide to the process and products I used to achieve my look, including photos of my hair at various stages afterwards.

HERE WE GO:

DAY 1

BLEACHING

I used Jerome Russell Bblonde High Life Powder Bleach mixed with Jerome Russell Bblonde Cream Peroxide 12% 40 Vol. To know how to bleach, I'd suggest reading my previous post on it HERE. No photos of it in this post as I binned the packet immediately after use!

In that post I mentioned how I bleached my hair to make the ombre, in this case though, you apply it all over. I have to warn you, you ned to be extra careful around the root area. And make sure you don't rub the bleach into your scalp, the last thing you want is chemical burns! A great tip for this is to apply Vaseline around your ears and hairline to protect those areas.

If you're seeking a much bluer turquoise, you need the bleach to take your hair down to a Platinum Blonde colour (i.e. no yellow at all!). Just think back to primary school: Yellow + Blue = GREEN! If 90 minutes of bleaching still leaves you hair yellowy, rinse it out, sleep on it and bleach again the next day.

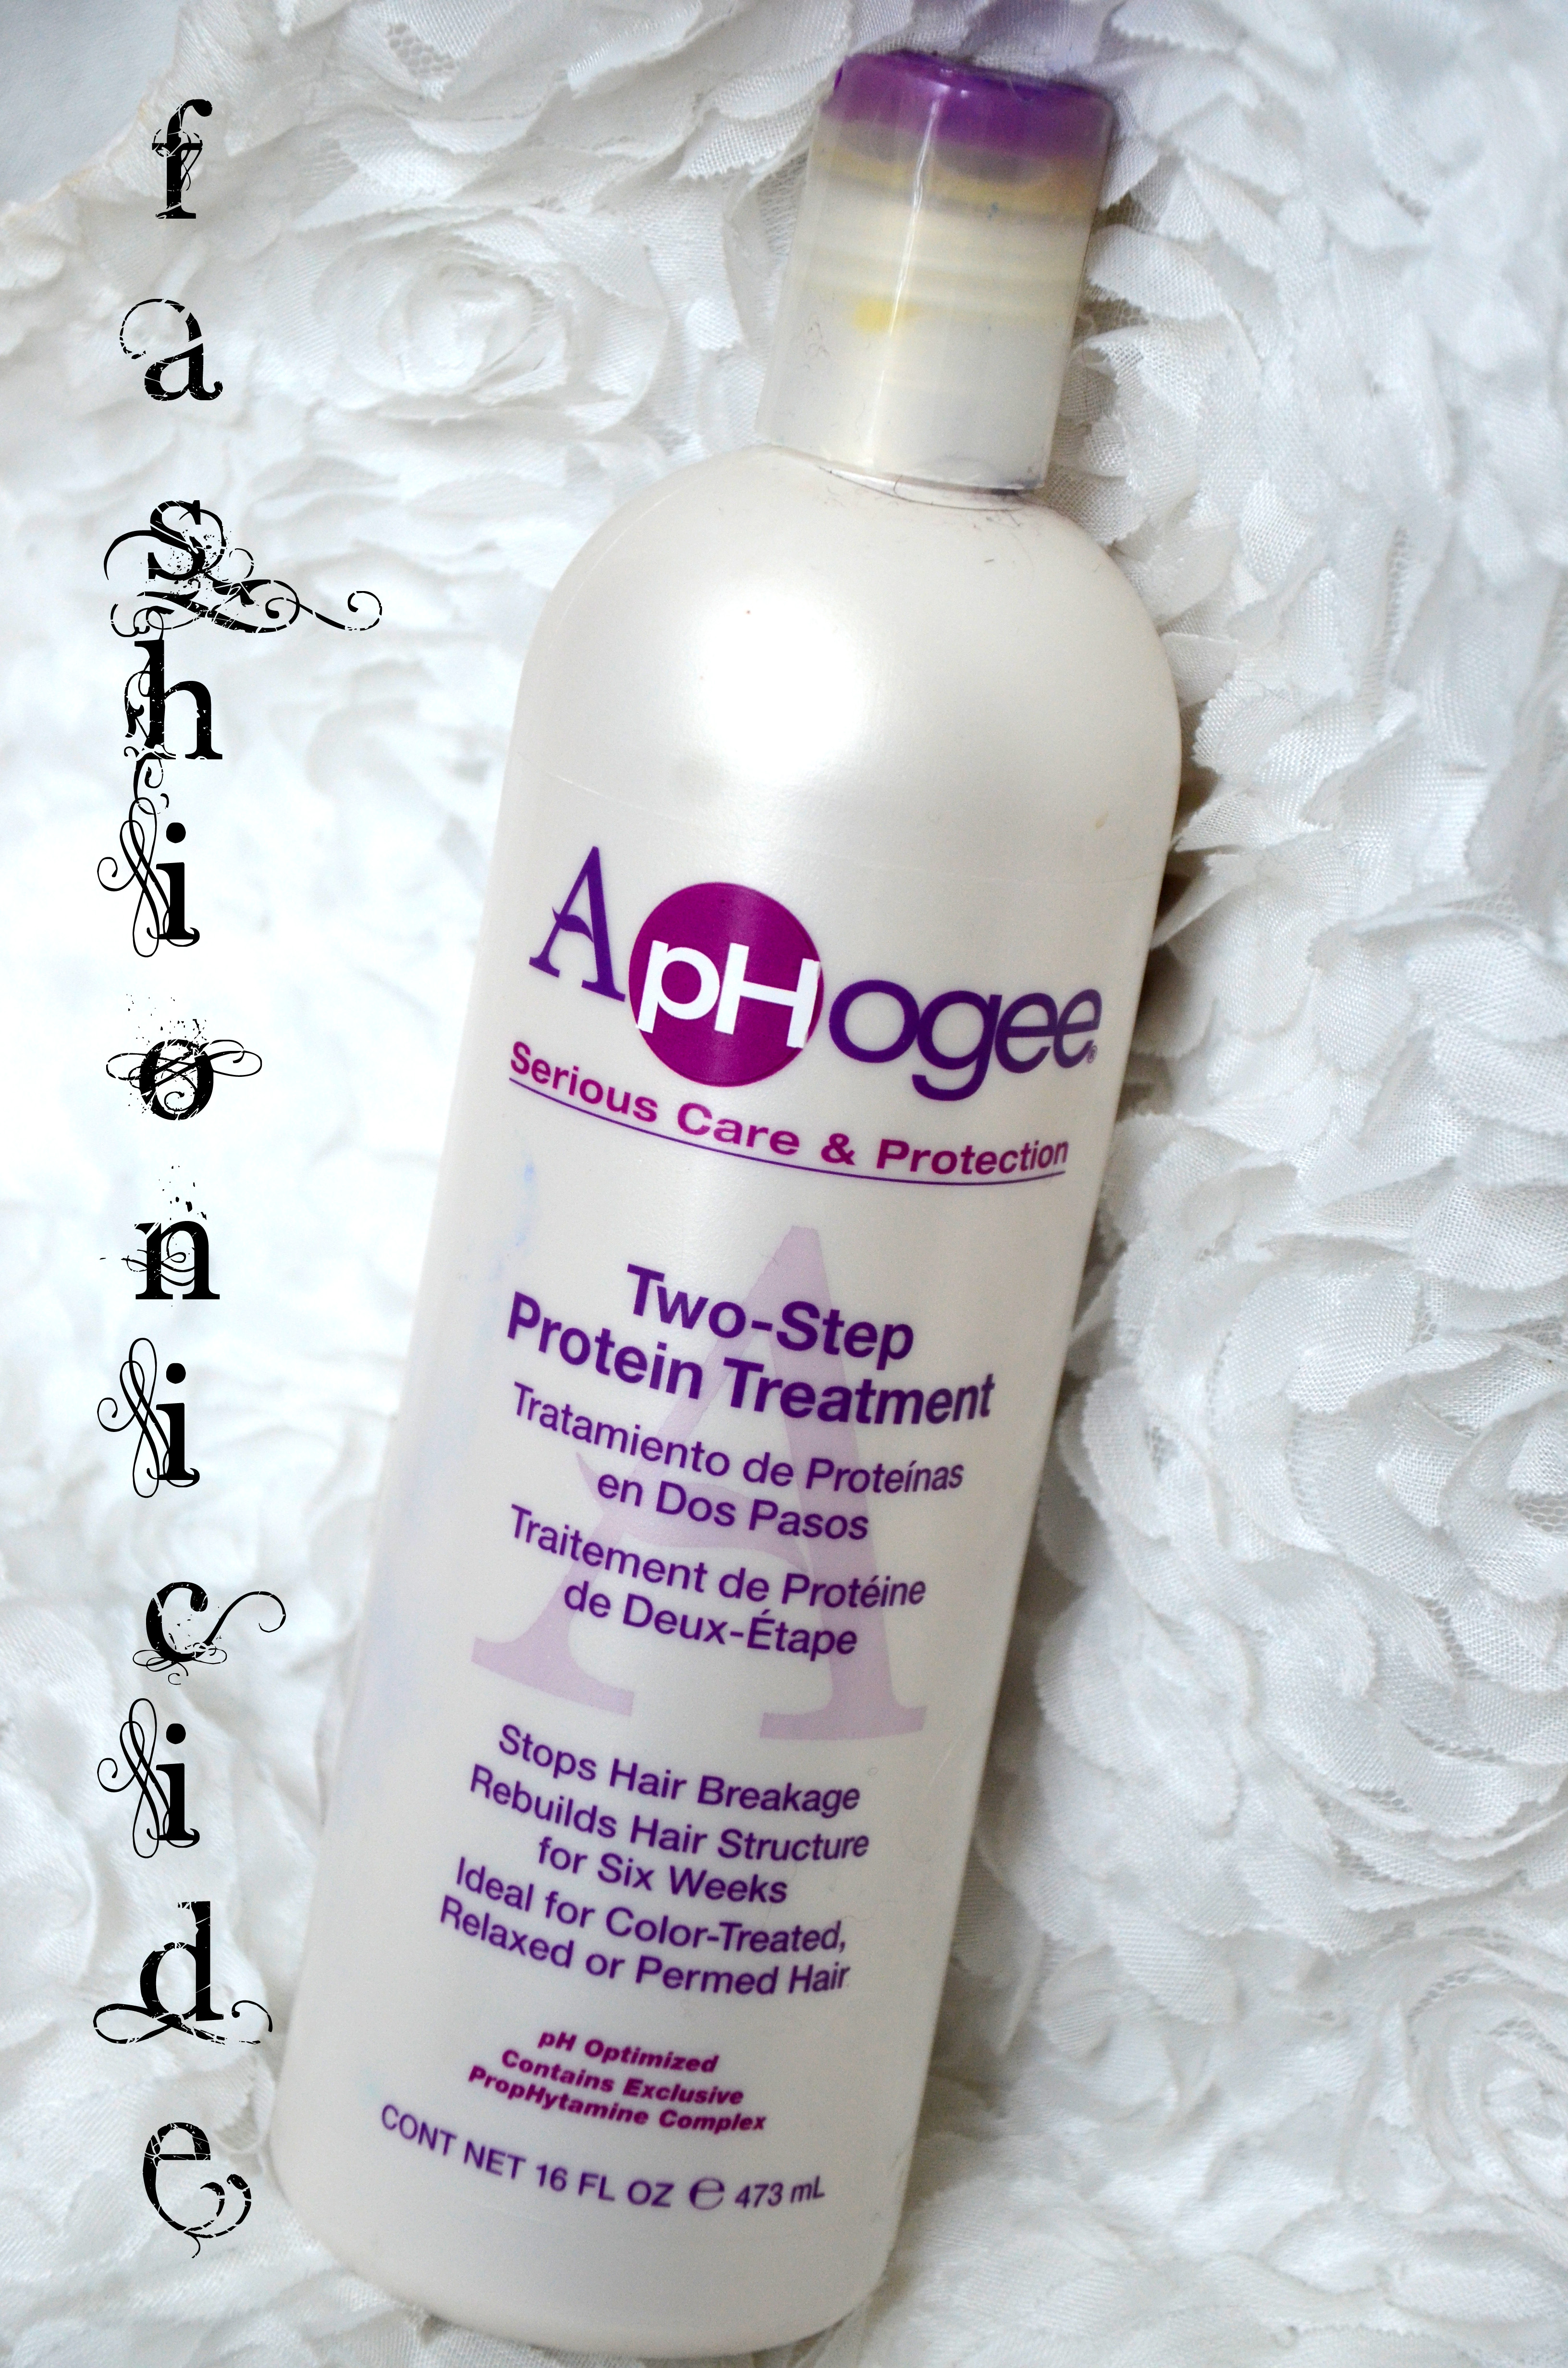
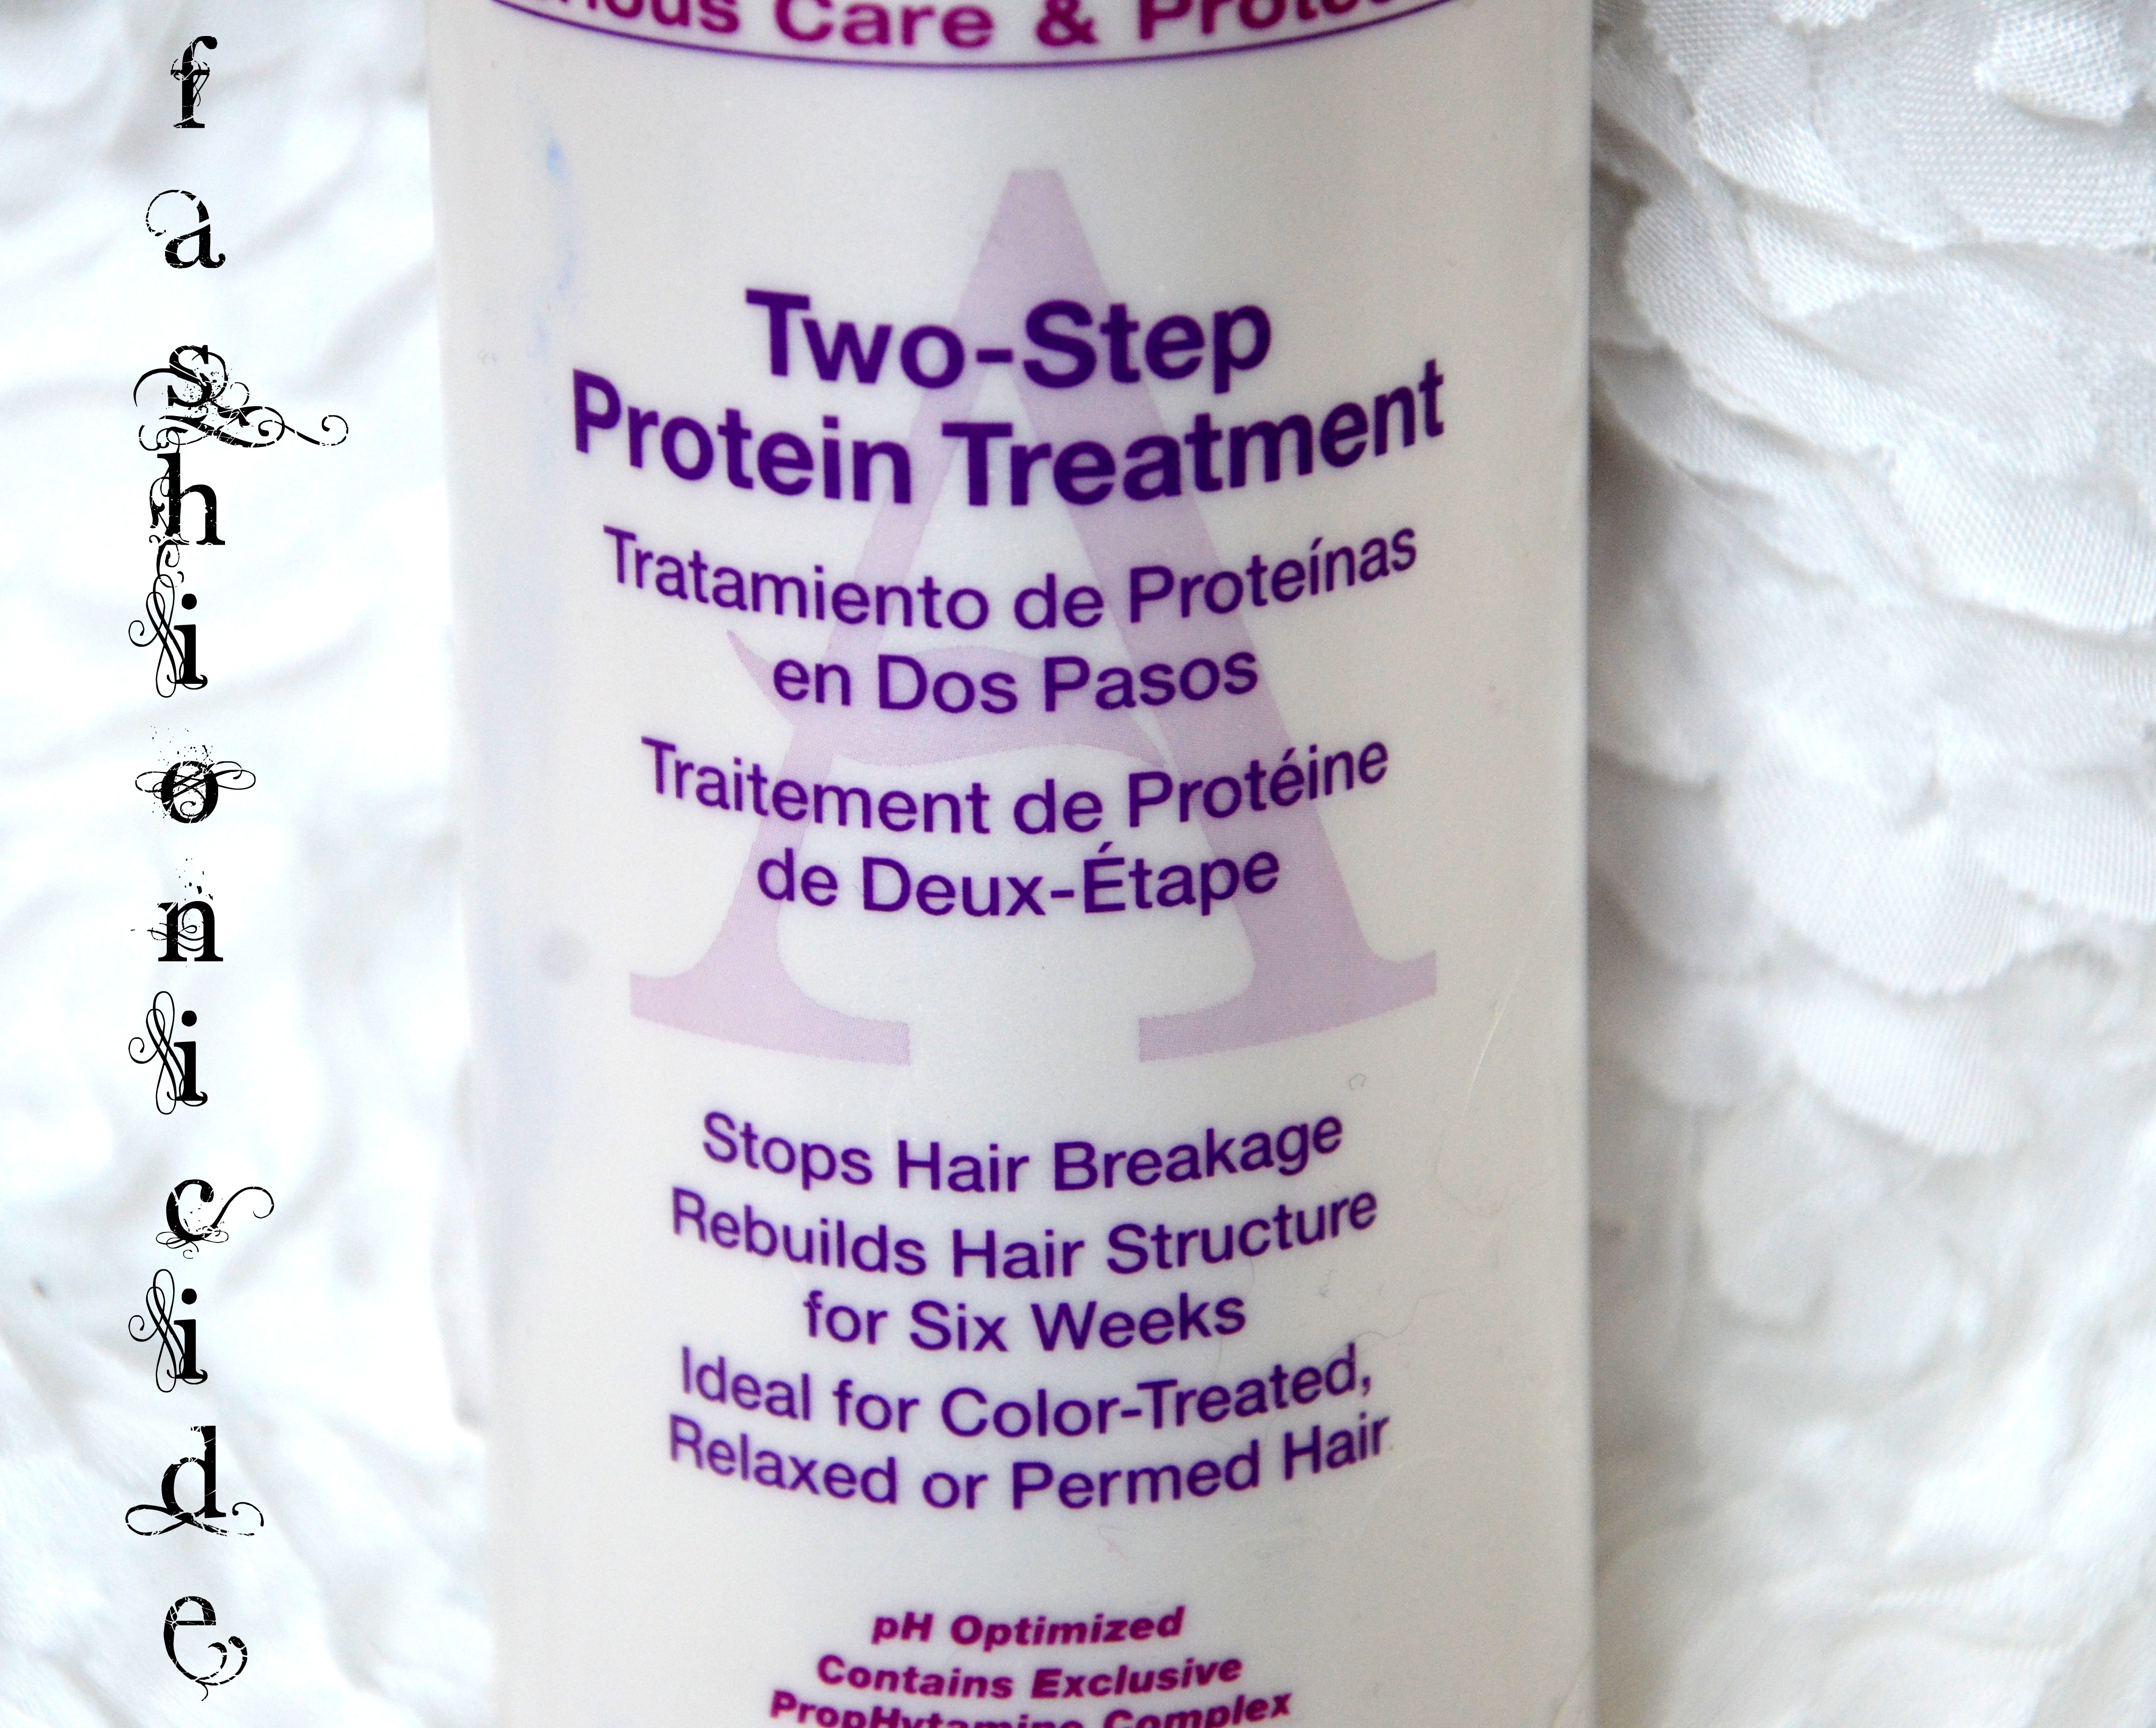
In my case, my hair was a pale yellowey blonde colour. As well as rinsing the bleach out after the 90 minutes had lapsed I applied a Protein Treatment to my hair to strengthen it before bleaching again the next day. I'll do a post on this in future, because without it my hair would definitely have snapped off left, right and centre!

DAY 2 

BLEACHING ROUND 2!

 blueturquoisehair6 
 
L'oreal Paris Feria  by Preference in Extreme Platinum Power

So, as my hair wasn't quite taken down to the shade I needed for my blue-dominated turquoise, I used L'Oreal's Paris Feria by Preference in Extreme Platinum Power. It comes with a sachet of bleaching powder, a handy Platinum Blonde dye, a bit of oil and peroxide. I'm not sure what % peroxide they supply, but as it claims to lift 8 levels of colour I'd presume it's 12%.

Same as with the first bleaching, I applied some Vaseline to my ears to protect them. I then mixed all of the above 'ingredients' in the bottle provided and applied it all over my hair, again taking care around the scalp. This time I left the bleach on for 50 minutes, as that's how long it took my hair to reach the desired Platinum Blonde Colour.

I followed that up by giving my hair a good rinse, making sure I get rid of all the bleach mix. Another clever little tip here is to carefully towel dry your hair and apply the Violet coloured conditioner (this also comes in the box). The violet conditioner will attack any remaining flashes of yellowy colour and neutralise them.

By this stage my hair was looking pretty much as I wanted it to, there were still a few tiny patches of pale yellow but I wasn't that bothered. The choice here is to accept it or bleach again, don't think my hair could have taken another beating though to be honest! And besides, tiny little patches will add a little depth to the end result.

The next step is to apply the protein treatment again, typically you should only really use one of these treatments every 4 to 6 weeks as too much protein can make your hair break off. But my personal opinion is that my hair needed every little bit of help it could get after two rounds of intensive bleaching!

DAY 3

TINTING

 blueturquoisehair5 

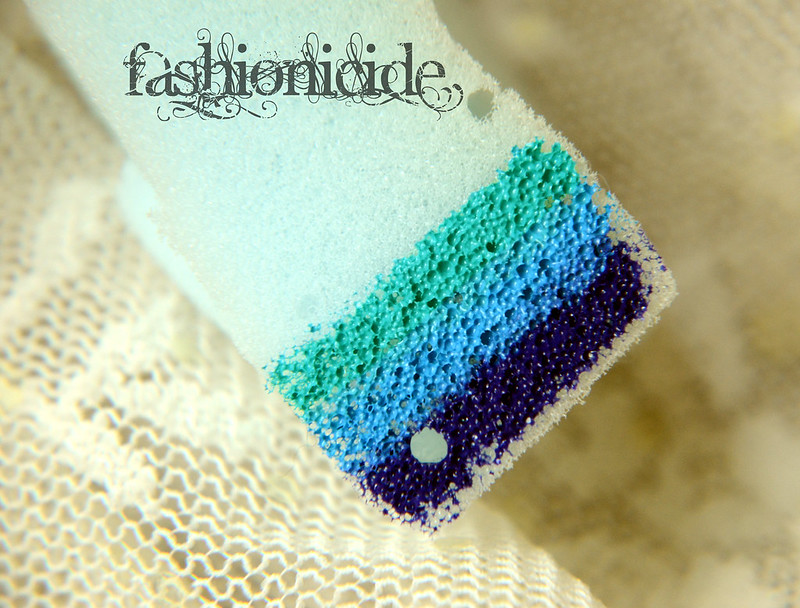
L - R: Fudge Paintbox in White Shade of Pale & Manic Panic Amplified Formula in Atmoic Turquoise

I first used Fudge's 'Whiter Shade of Pale' back in the day when I was still hairdressing. It worked a treat on clients that were suffering from an acute case of canary yellow hair or brassiness. It's essentially a conditioning violet toner. 

My hair did look very platinum blonde, but I'm nothing if not a perfectionist and there were a few areas I thought could do with a little toning down. So I smothered this straight onto dry hair and left it on for just an hour. Then I applied Manic Panic's 'Atomic Turquoise' right over it, tied my hair into a bun and left it on for a whole day! 


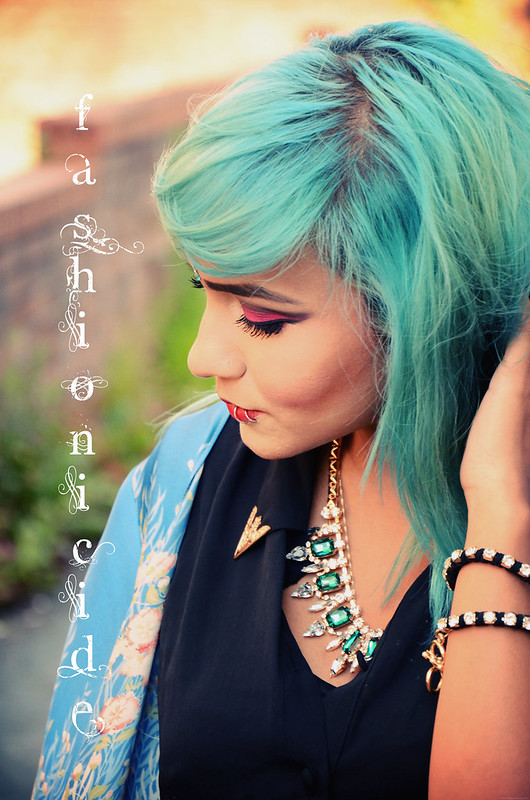
At the end of the day, I gave my hair a good rinse out and voila: Blue Turquoise Hair!

I think it's important to mention here that since dyeing my hair this colour, I've limited shampooing to just 3-4 times a week to slow down the fading process. There's nothing worse than putting in all this effort to get your hair the perfect shade, only for shampoo to wipe it out in days. On that note, don't use Head & Shoulders. It's like Nail Polish Remover for the hair!

On my non-shampoo days I put my hair up into a top-knot or spritz it with Fudge's Sea Salt Spray to give it that little extra bit of texture and allow it to soak up some of the natural oils. I think I've mentioned this before, but I'll say it again: Use SLS-free shampoo, it'll keep the colour for longer!
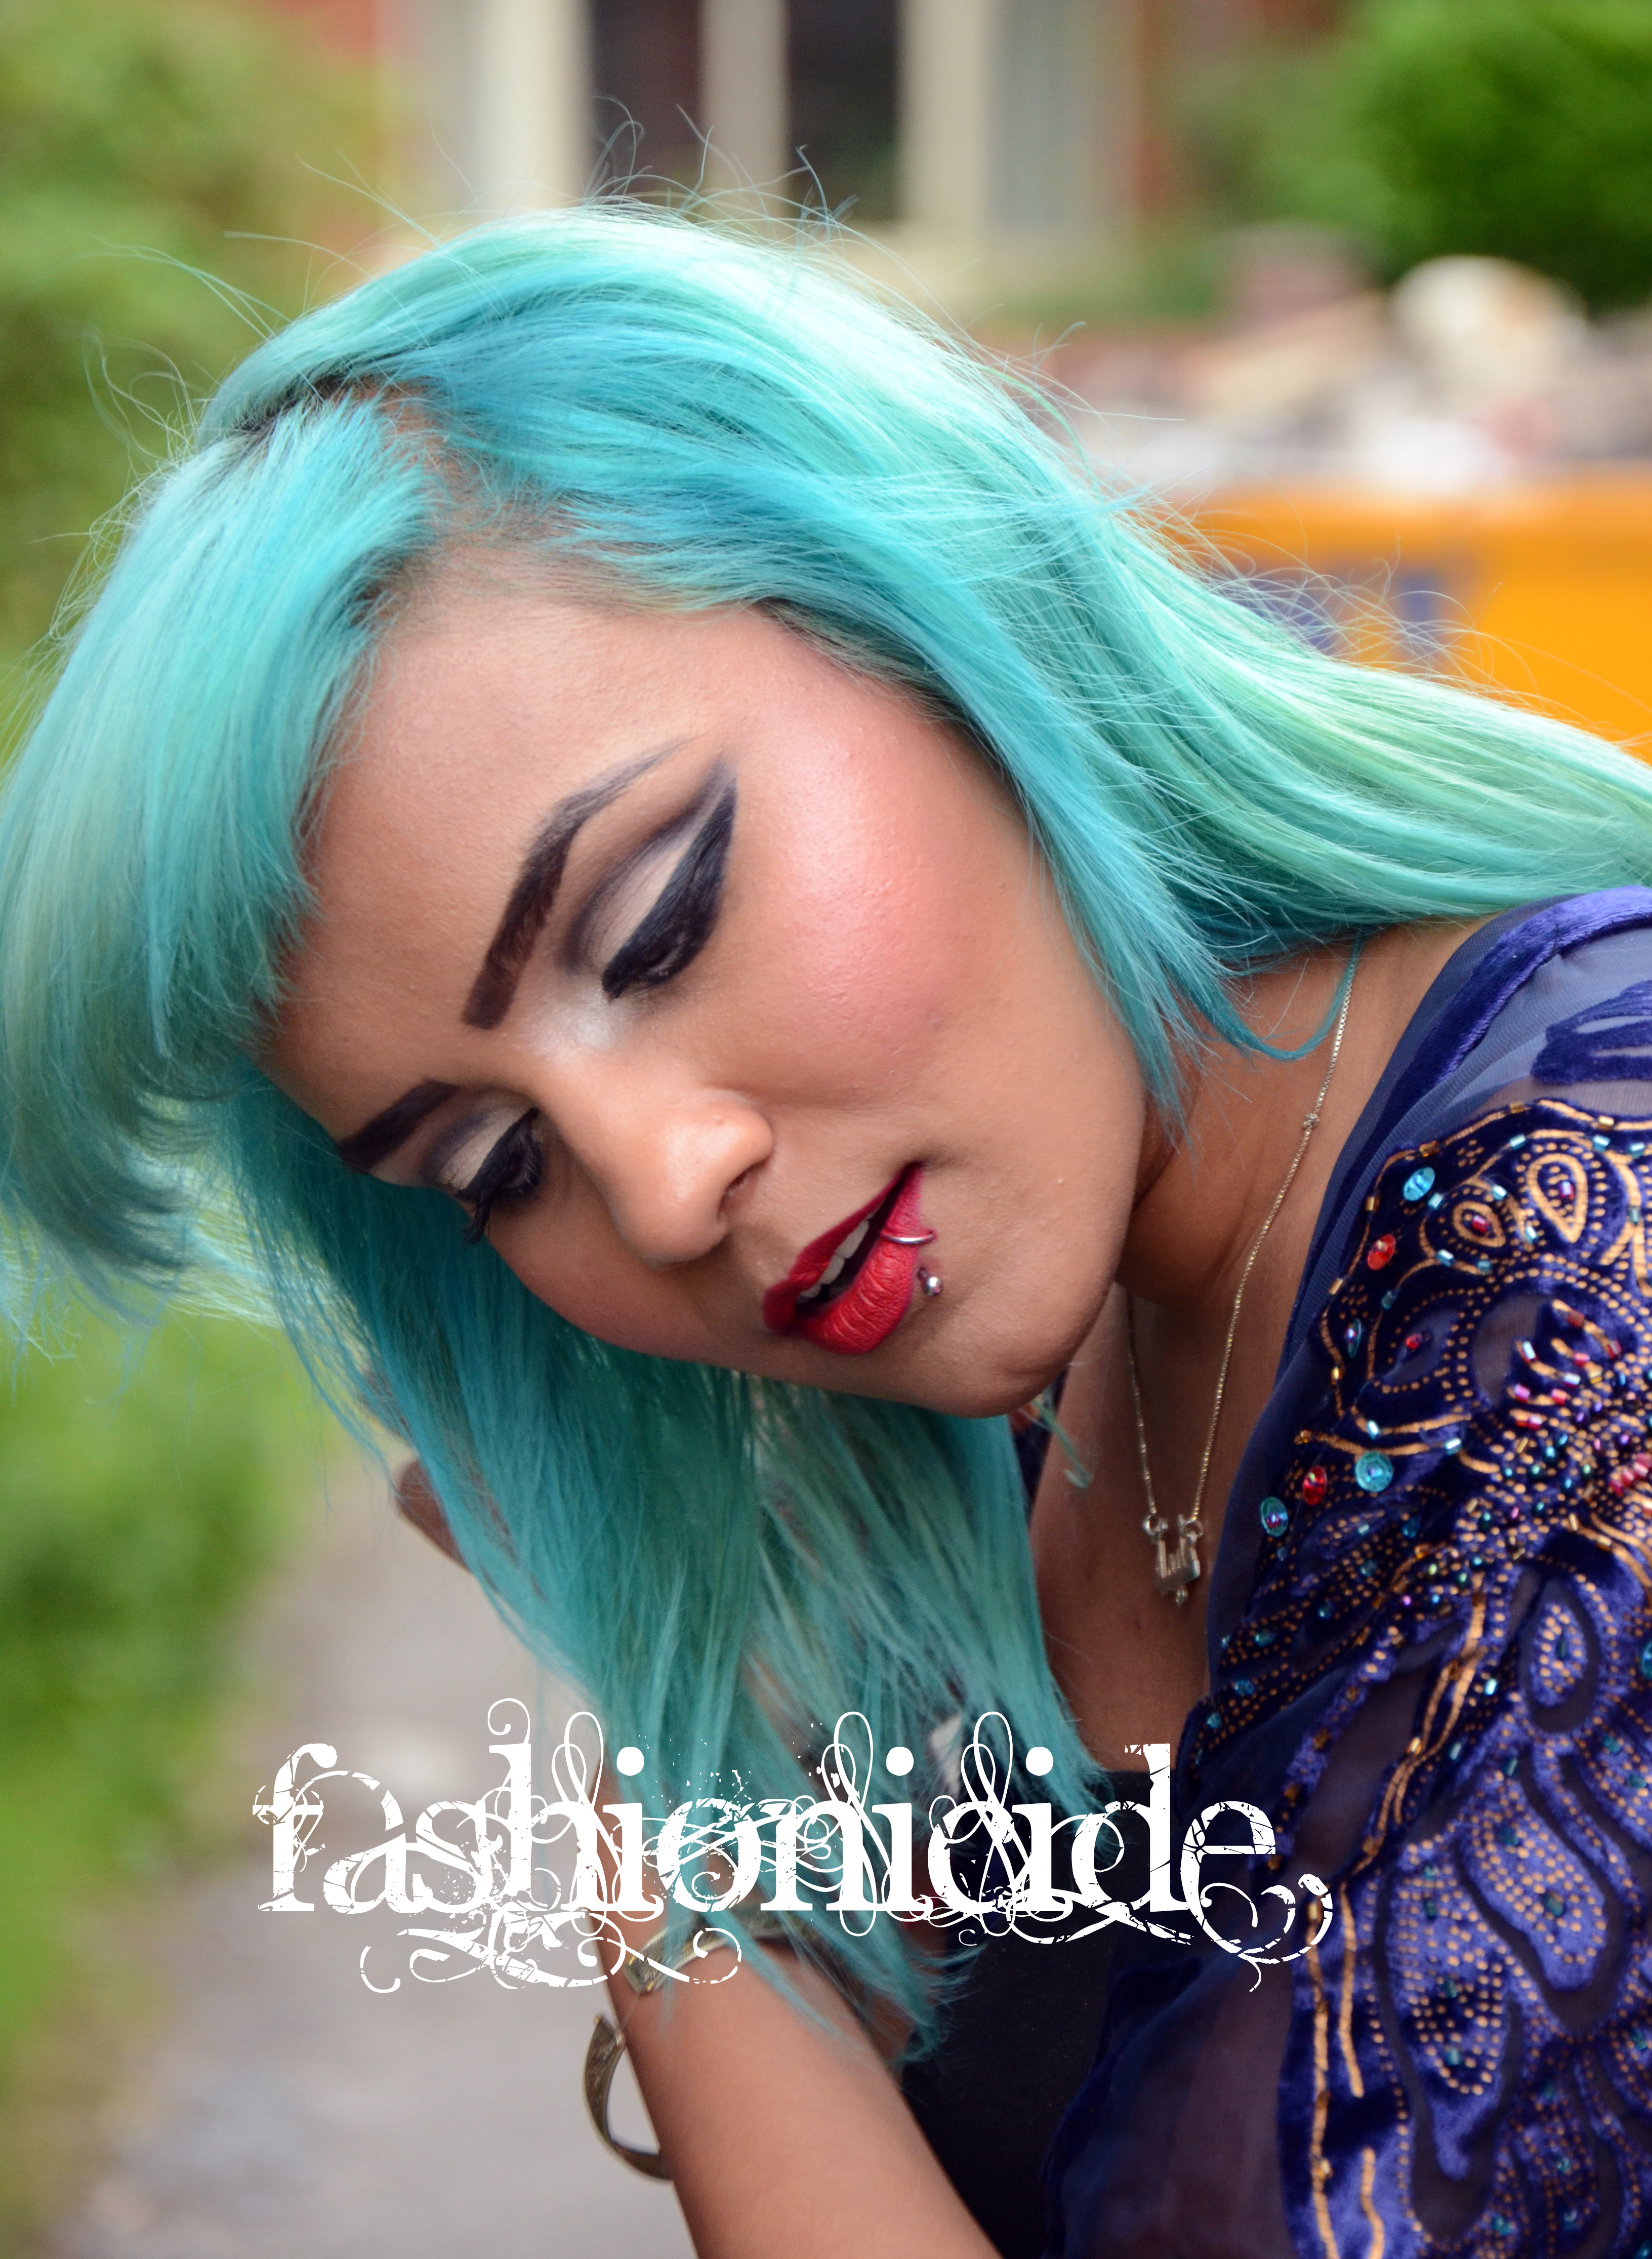
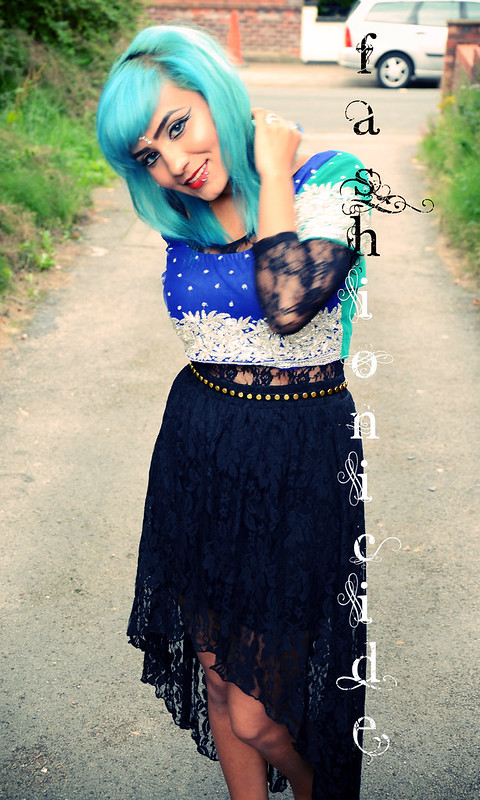
WEEK 1

 blueturquoisehair3blueturquoisehair 

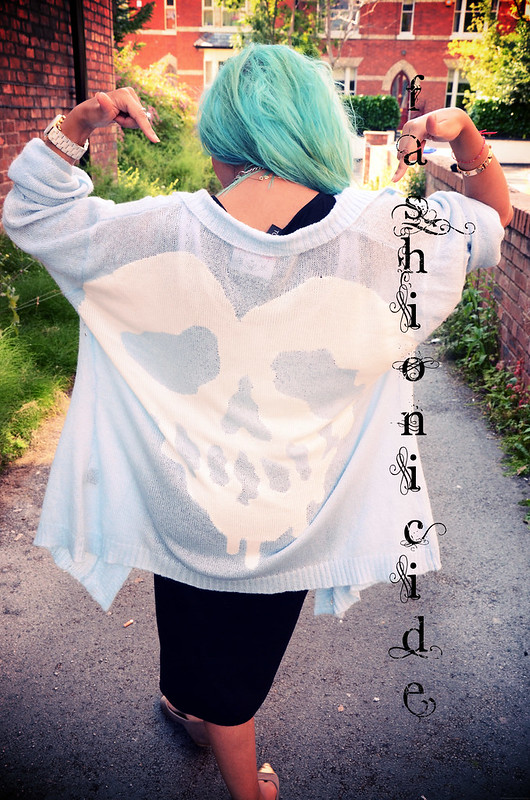
Hair looks incredibly vibrant.
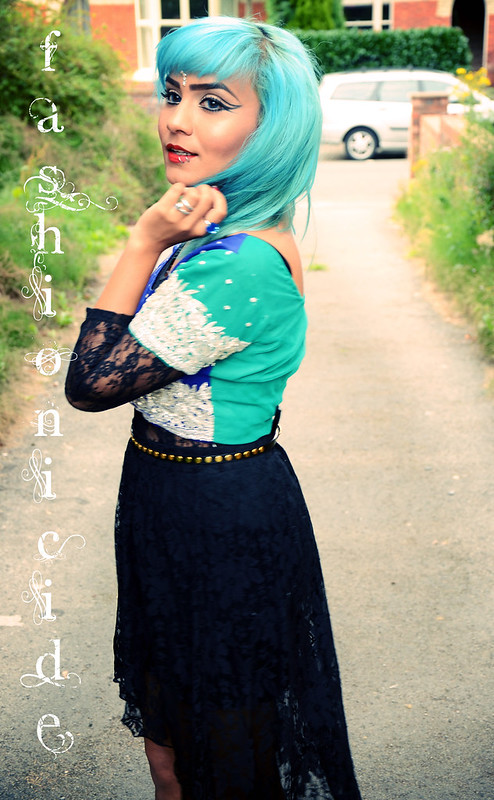
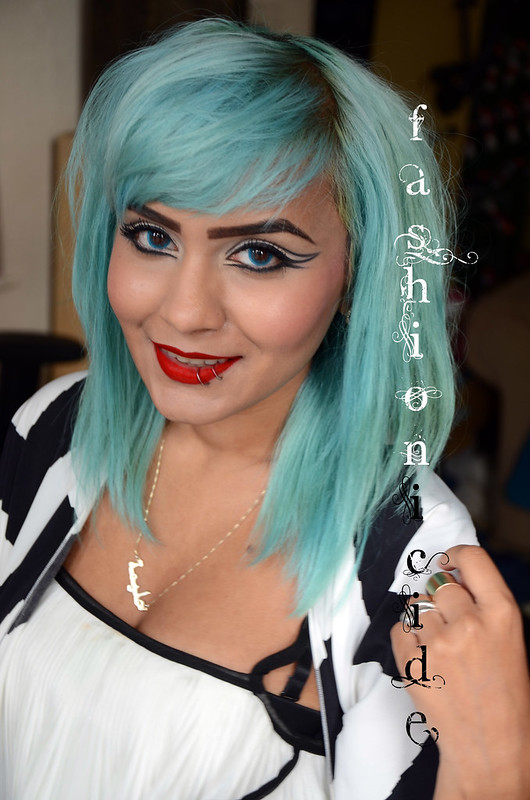
WEEK 2
 blueturquoisehair2 

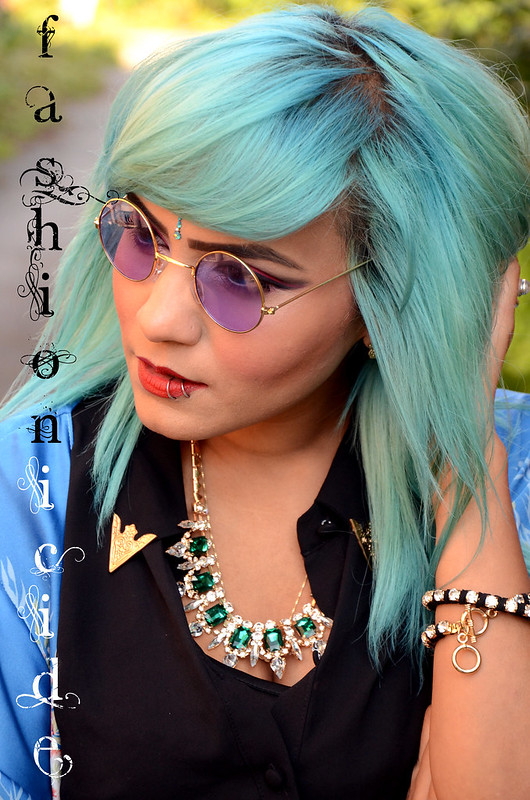
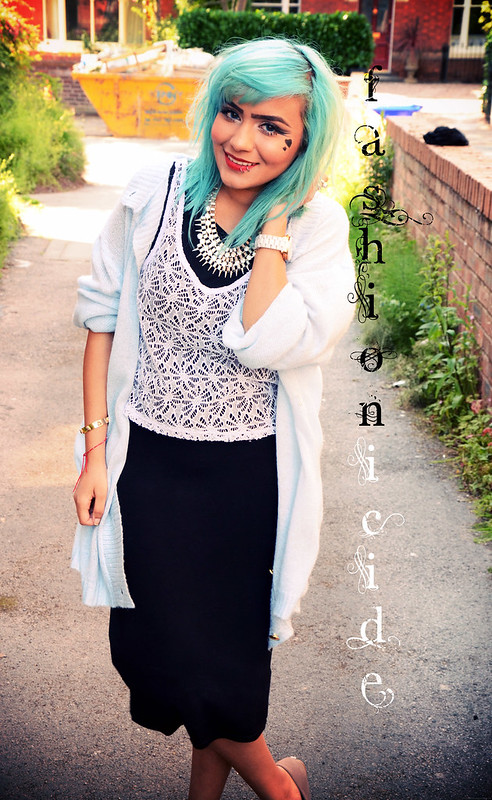
The turquoise is beginning to fade into a pastel blue colour. 
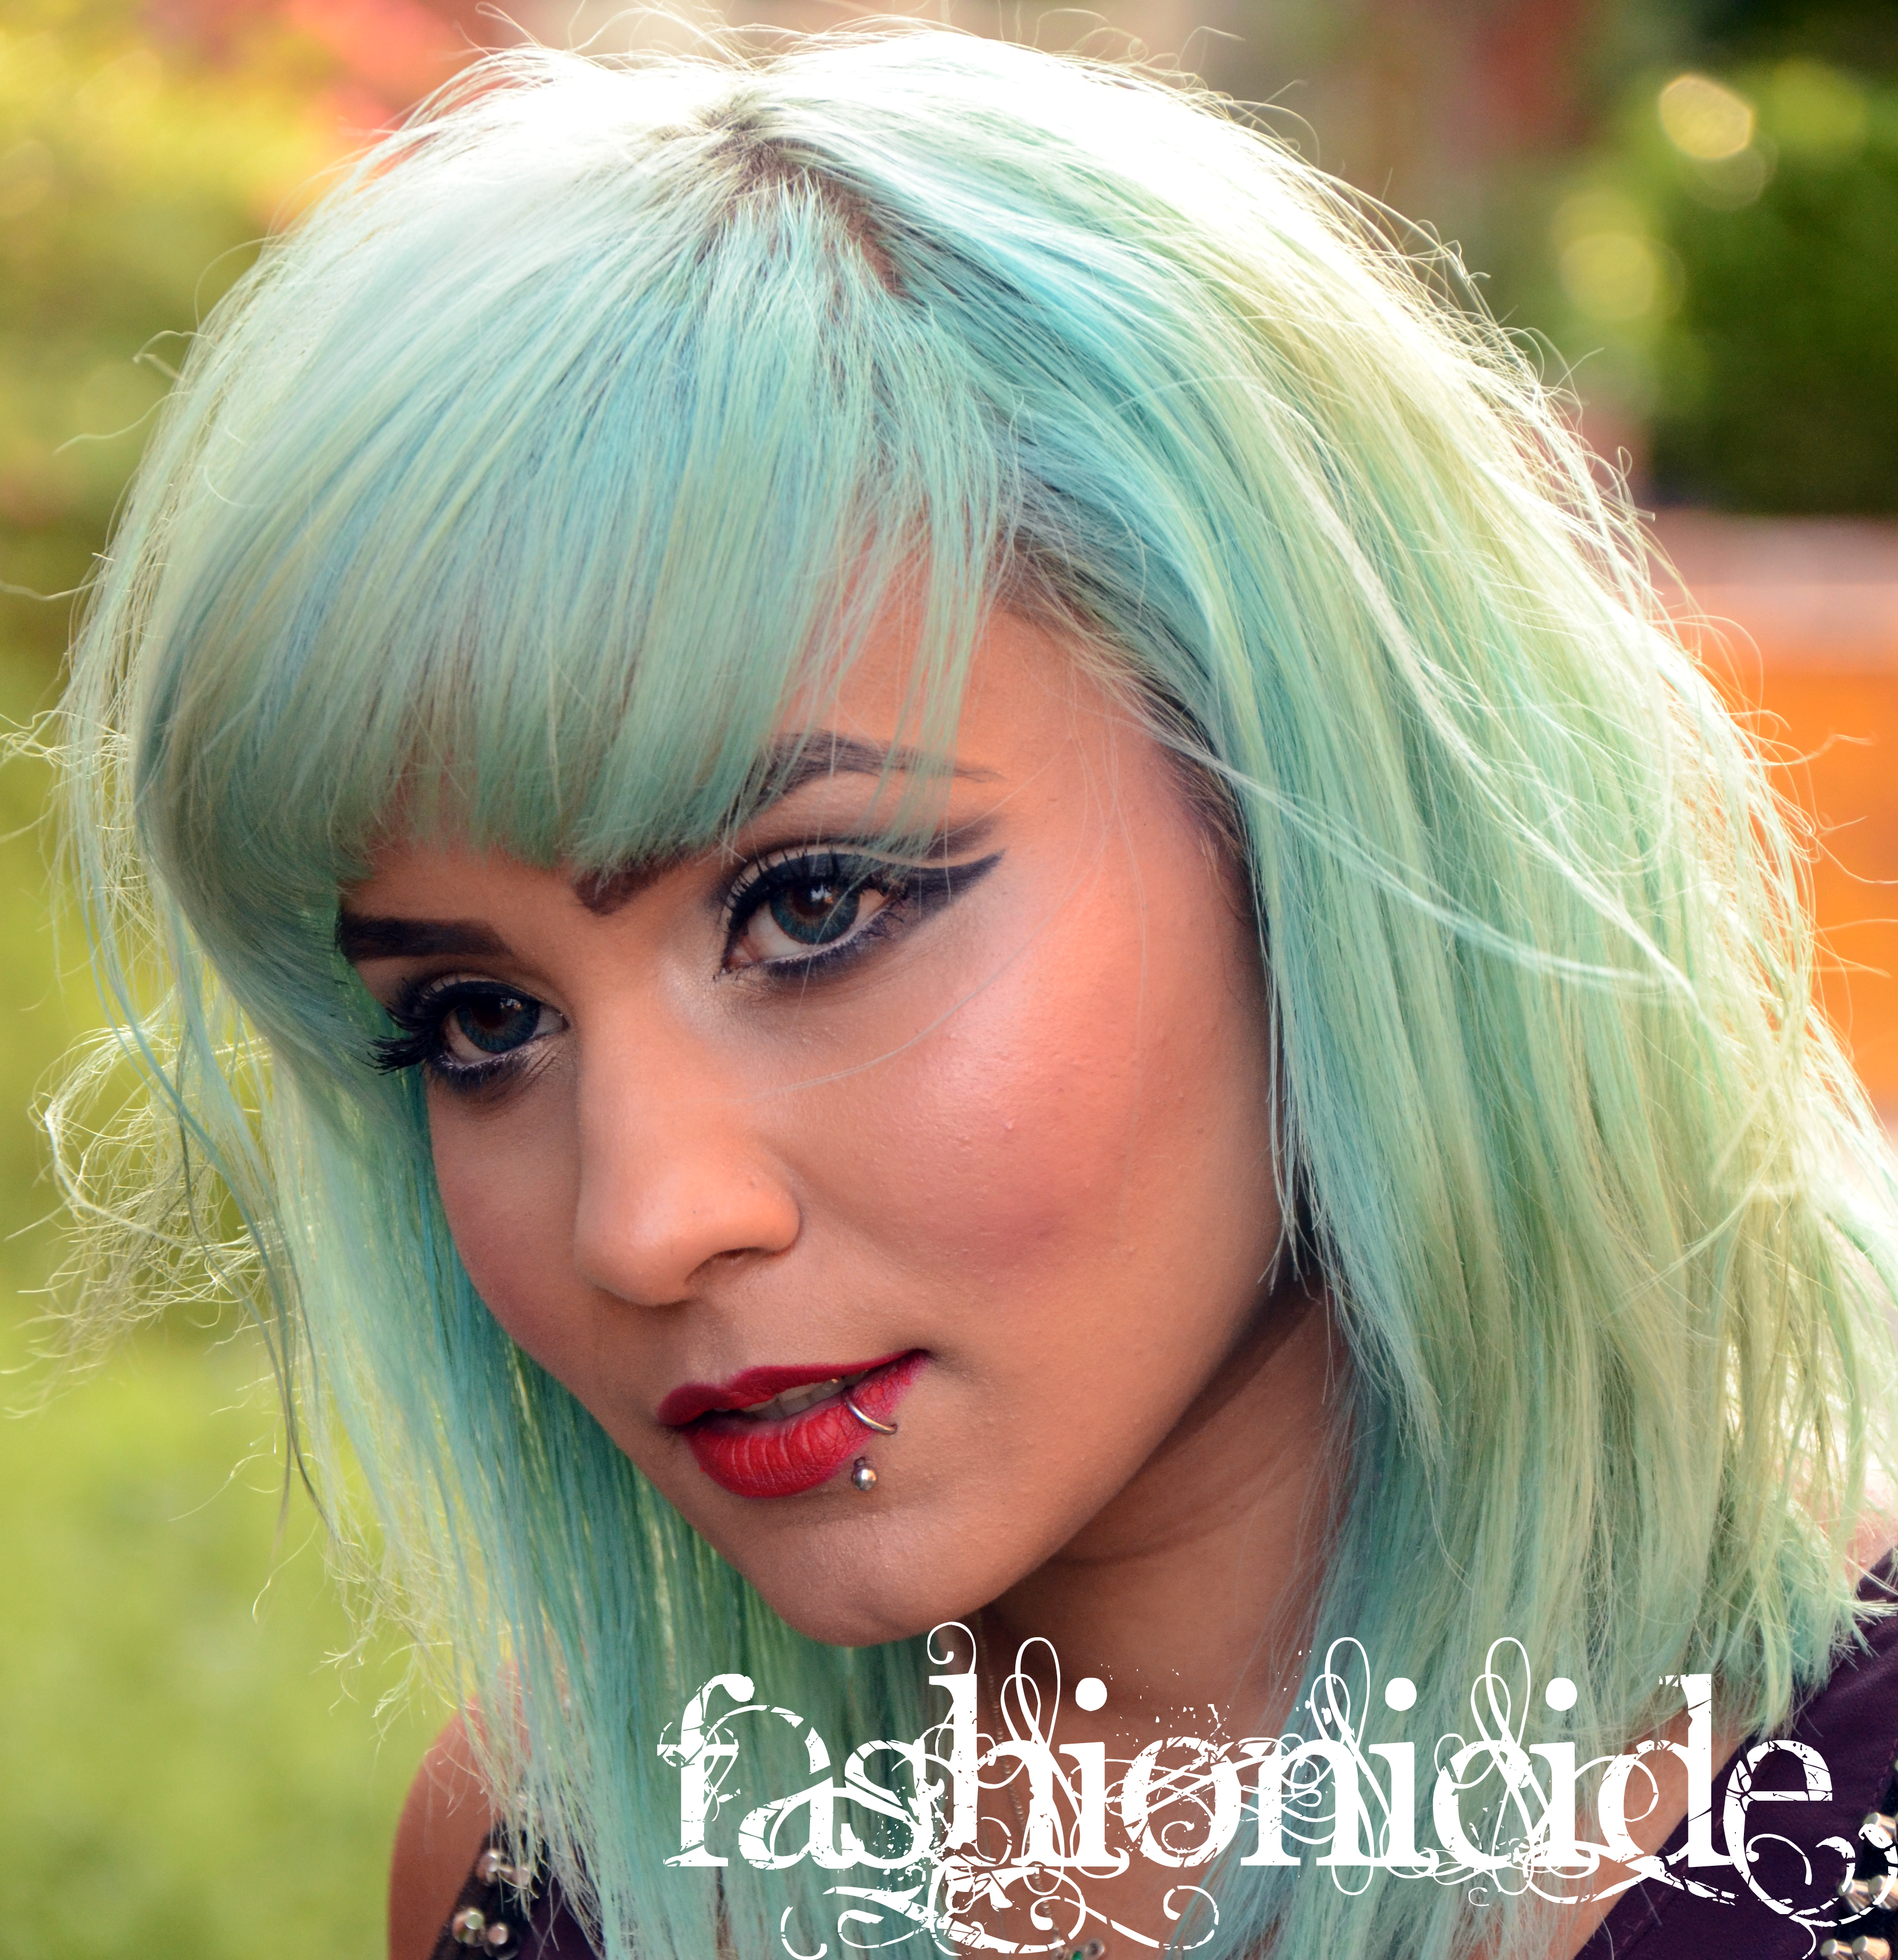
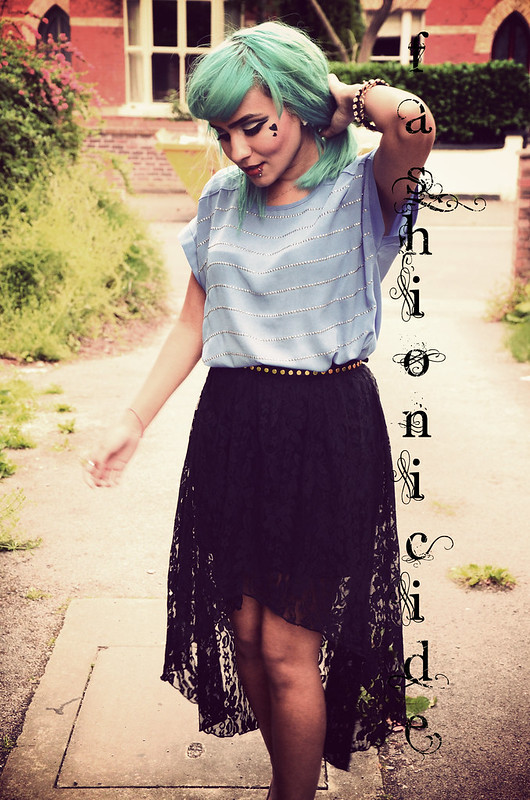
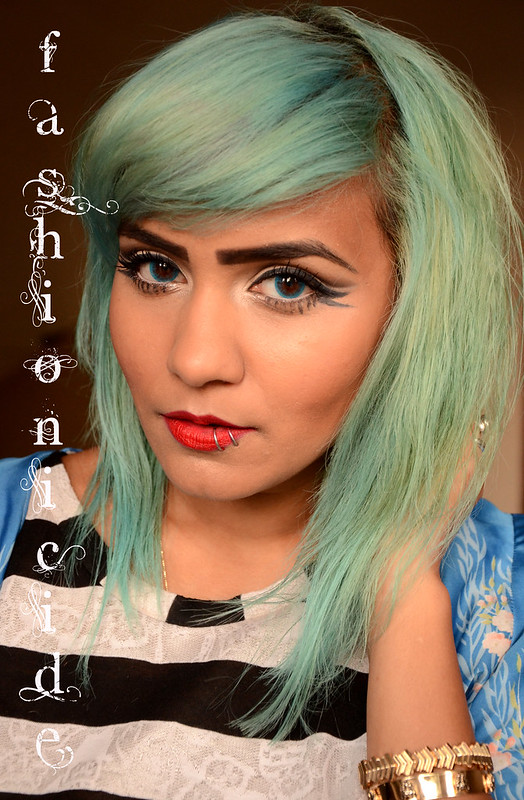
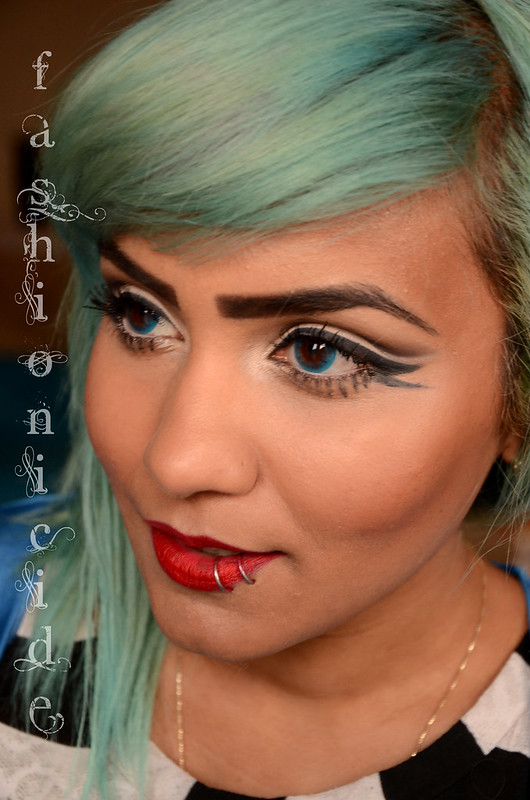
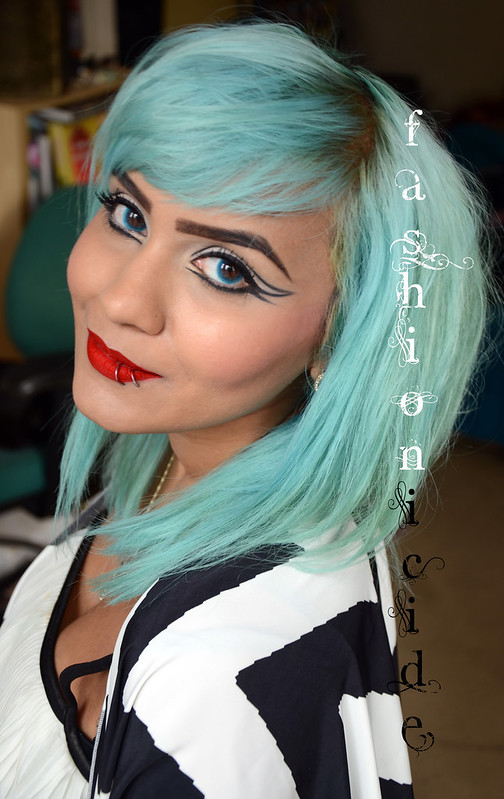
WEEK 3

 blueturquoisehairfaded

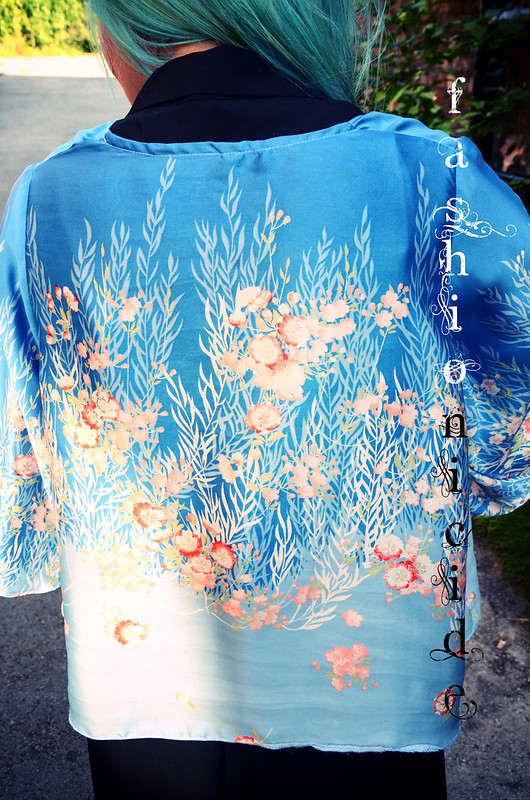
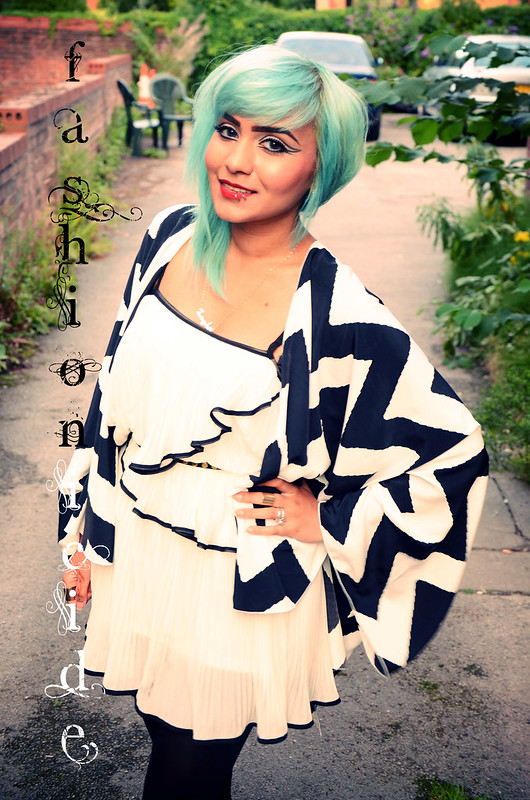
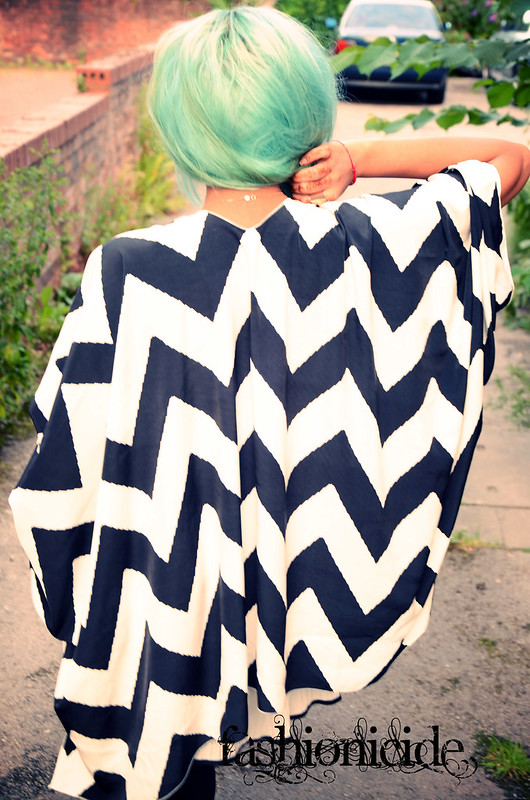
As you can see, the hair fades from a vibrant bluey-turquoise down through light pastelly blue colours into a kind of minty blue shade. I actually quite like the way the hair progresses through the shades as the dye begins to fade but eventually it will need another top-up. The next stage begins to look like dishwater otherwise!

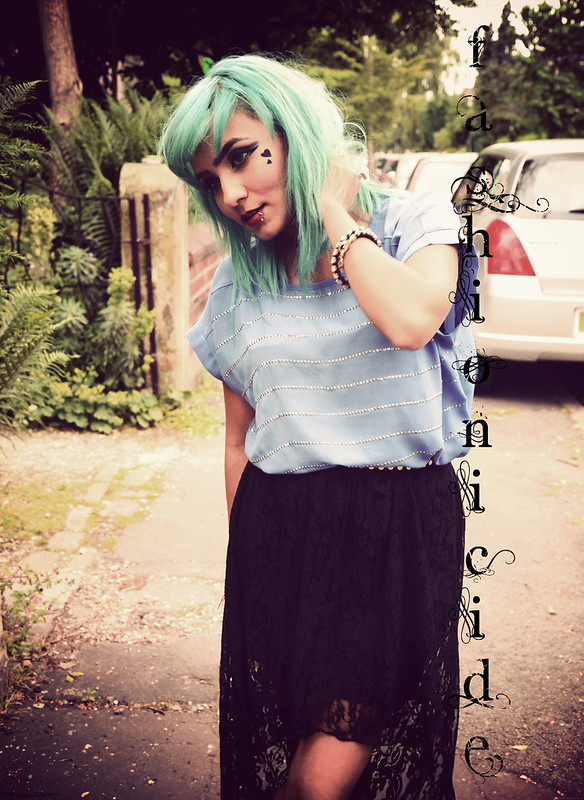
But you know what, I freaking LOVE my hair! 

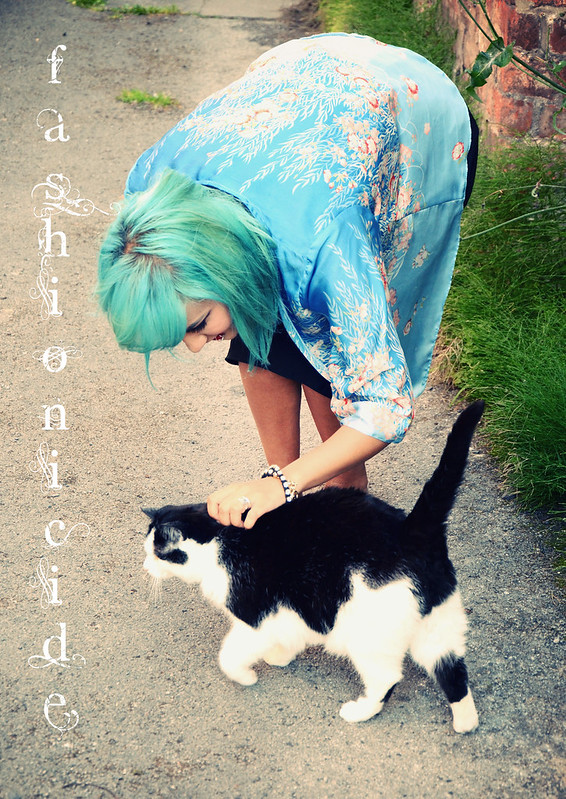
I'm liking it at this pastel stage, you can see a few yellowy-green patches throughout which is wholly down to the unevenness when bleaching. I think I'll be keeping it this way for a while though, probably until I have another dream of being a mermaid in Dubai and wake up feeling like going all vibrant again!

I hope this post was helpful to some of you. If you have any questions, let me know :)

 Halima

Extremely Damaged, Weak, Stringy, Mushy, Gummy, Elasticy hair? Aphogee may be the Answer!

$
0
0
DSC_6929

 DSC_6924

In my previous post I talked about how I managed to colour my hair this brilliant turquoise, I also talked about a mystery product that was essential to salvage my hair from the destruction that is bleaching. Without further ado, I present to you Aphogee's 'Two Step Protein Treatment'.

Just so you can understand how highly I rate this stuff, let me tell you a little about the condition of my hair prior to using this. After bleaching my hair  I found it to be quite stringy looking and elasticy whilst wet. It looked quite mushy and gummy. It got to the point where if I tugged on my wet hair, it would just dissolve into my finger. Describing the condition it was in is tough, I hope that made at least some sort of sense! When my hair did eventualy dry out though, it was extremely brittle.

But this is exactly what bleach does, particularly if you've bleached your hair several times in quick succession. Your poor hair can only take so much punishment, and mine had really had enough. Then a friend who gets her Afro Carribean hair relaxed told me about Aphogee. The symptoms she talked about pretty matched what was happening to my hair, so she suggested I give it a try. I'm glad I did!

It's exactly what the name suggests, a two-step protein treatment for the hair. It isn't for those with dry hair, but it's catered perfectly for those with overprocessed, severely damaged hair. You simply apply it to towel-dried hair, use heat until it's dried and hardened on the hair, give it a good rinse then get on with your conditioning business. The bottle says to use it every 6 weeks where required but I got a little greedy and used it twice in a week (don't try this at home folks!)

I got mine for a snip at £18 for 16oz, I say a snip - fully realising the hair-based pun! - because this stuff has been a life saver! You might be thinking: 'You only described one step!' and you'd be quite right. It's called 'Two-step' because Aphogee have a matching conditioner to go with it, however my friend tells me it isn't all it's cracked up to be, so I just used my own.

First Thoughts?

This stuff is SO weird! I had the obligatory sniff in the store (it's the done thing right?) and it smells like nothing I've come across before. It's a strong herbally scent but think more 'Overgrown, unkempt garden' than 'Herbal Essences'! On top of that, the formula is a sort of runny egg-yolk colour. I knew this could get messy!

USAGE

Aphogee recommend shampooing first, detangling the hair and then applying however I didn't bother detangling. It's just impossible for me to detangle without conditioner and Johnson's 'No More Tears Detangling Spray'. So I just applied straight after shampooing and towel drying.

It really did get messy! I saturated my hair with the runny, yellow goo then used my hooded dryer to completely dry it all out. As the drying process tales place you can feel the hair getting stickier, you need to go through that phase and wait until the hair is bone dry and that stickiness is gone. If you get impatient you'll find you've just wasted a lot of product for nothing!

And patience is key with this stuff, as I used as hooded dryer it took just over an hour for my hair to completely dry out - you can use a standard hair dryer too but it will take significantly longer. You can tell it's dry as your hair becomes really hard and stiff, if you were to bend the hair slightly it'd just snap off (please don't test this out!) For this reason I would recommend you DO NOT put your hair into a bun or a pony whilst you've got this on. Also make sure you limit how much you touch your hair, it is so vulnerable at this point that you could easily lose chunks of hair if not careful.

After it's completely dried and past the sticky stage, I jumped into the shower and gave it a good rinse without touching the hair. Once I felt it was all washed out, I applied my Organix Macadamia Oil Conditioner and did my conditioning thang.

RESULTS

The results are amazing, I whole heartedly believe that the only reason my hair hasn't upped sticks and left already is down to this stuff. It's been bleached so many times of late that each strand must be suffering a severe identity crisis!

Now my hair feels stronger and easier to comb than it was before I bleached it. I couldn't have imagined my hair would be in a better condition after bleaching! It definitely isn't in perfect condition just yet, it looks healthy all over but with a few brittle areas dotted around. I think with the next application the brittleness will be sorted, but I'll report back!

I think it's also important to mention that Aphogees doesn't soften the hair, rather it makes it stronger by putting back all the protein that's been lost through bleaching. I was lost for words (rarer than a solar eclipse!) after rinsing it out, my hair had lost the mushyness and the horrible stringy, elasticy feeling I had before and whilst combing the breakage was severely reduced. All this from just one usage means I couldn't care less about the smell, the formula or the general messyness in application - it's a small price to pay!

My recommendation? If your hair is really damaged to the point where you're thinking of just giving up on it, get out there and buy this! It may well be your last throw of the dice,  but as far as I'm concerned £18 is dirt cheap for the hair equivalent of a defibrillator! It'll bring your hair back to life, and shock you in the process!

I purchased mine from Paul's Hair World in Manchester. However, you can find this stuff in most good Afro-Carribean Beauty Shops or on good old eBay.


 Halima

OUTFIT: Wrapped in LOVE

$
0
0
Hello hello my lahs!

As I've been such a good girl lately, not really purchasing all that many clothes for a good while (mainly because so much of the high street stuff is mleh), I had one of my little wanders into Topshop. Whilst there I came across this pretty little midi tube skirt.

It has LOVE printed vertically on to it four times, twice at the front and twice at the back. I had a quick look at the pricetag expecting a fair old hit to find it was priced at just £22. Not only that, it stated that the item was part of the 'Fashion Targets Breast Cancer' campaign, so £6 of every sale goes towards Breakthrough Breast Cancer!

I have to say that without this label highlighting such a worthy cause I'd have probably just walked off, gone home, had dreams all week about it and ended up back in Topshop only to find that they only have size 12 or 16 left. This seems to be my mentality lately, I think it's because my wardrobes are crammed full and fit to burst I actually feel a bit guilty buying more clothes! I think now that Ramadan is just around the corner I'll be donating some clothes to charity. I really struggle to let go though, so perhaps the holy month will give me the kick I need to just do it!

The midi tube skirt itself is quite long, reaching just below my calves. This is a definite no-no for a petite lass like me so I've actually been sporting it as a boob tube / bodycon type thing until I get myself a sewing machine to alter it.

I paired it with this absolutely stunning Velvet mesh Kimono with lots of beaded detailing and tassels. I have a strong distaste for tassels but I've had to break my own rules for this. Why? I picked it up in a Bedouin stall in the Old City of Jerusalem. After a bit of solid haggling (the best part of travelling!) I managed to drag the price down from 550 Shekels (£100) to 200 (£36)!

 DSC_6736
DSC_6750
 DSC_6753DSC_6763
DSC_6786
DSC_6739
 DSC_6793

Fashion Targets Love Tube Skirt (worn as a boob tube dress) - TOPSHOP LINK
Beaded Velvet Mesh Tassled Kimono - Old City of Jerualem 

I'm seriously loving this Kimono lately, the weather in Manchester has taken a bit of a turn for the worse (as if that's possible!) and I find myself wrapping this around me to keep me toasty, and if necessary the trenchcoat even makes the odd appearance. No doubt the weather will pick up again now that Ramadan is just around the corner, typical!

OUTAKE

 DSC_6761

I'm not always photogenic!

 Halima

HAIR JEWELLERY: My First Matha Patti!

$
0
0
MathaPattiTikka 

Hihihi!

I've been dying to encrust my hair in beautiful, shiny jewels for quite some time now. You all know of my love for jewellery but I feel that it shouldn't just be restricted to the 'normal' parts of the body (fingers, wrists, neck etc) we choose to adorn. The only problem with adorning the hair is that the high street is going through a dull, unimaginative period and only offers basic headbands or, at a stretch, floral crowns or tiaras. They look nice, but I just want some solid bling in my hair! 


Then I came across 'Matha Patti' which I think translates from Hindi as 'Head Band', don't quote me on that though, my Hindi isn't quite what it used to be... Anyways, I've seen these things knocking about for years at full-on Asian Weddings, in fact my sister even wore one to her own. Despite this, I didn't actually know what they were called so it was a quite the struggle to find them on t'internet!

So recently I finally went in to a Desi Clothes shop and the conversation went a little like this:

"Do you do that hair thing?"
"You what?"
"You know, bling for the hair?"
"Oh, you mean Matha Patti?"
"Err, maybe..." 

I was shown a few in-store but they seemed like bridal pieces, lots of reds and golds that just wouldn't match well against my hair so I gave them a miss. I was looking for something silvery perhaps with a splash of 'cool' colour like blue, turquoise or even lavender. But hey, at least I knew what I was looking for now!

Armed with my new-found knowledge I laid siege to the internet, searching for the finest Matha Pattis money could buy. At this point I came across Shelly's Jewels on Instagram. Salmah (the boss) sells the most incredible Matha Pattis I've ever seen! She was very charming and helpful, giving me plenty of advice - I thought they might look a bit silly on me with my fringe. Nonetheless, after her advice I parted with the cash, £35 to be precise!

And gosh, how glad am I that I did?!

 HairJewellery2 
 HairJewellery 

A little bit stunning, isn't it?

I have to say that I found it quite difficult to wear! It can snag on the hair (and mine is still a bit touchy after the bleaching) as it has all these little hooks to secure to your head. I ended up using the odd grip-pin here and there to keep it in place. Also I wasn't exactly sure how it should rest on the head! Instagram saved the day though, and I was told the third Tikka should be resting on the hairline.

I did have a go at this however I found that placing the chains of pretty stones across my forehead felt much more comfortable. This way the tikkas rest in the centre of the forehead, giving the effect of an oversized bindi!

Here I've parted my fringe and stuck on the headpiece.
 MathaPatti

I combined my Drop Dead Unicorn Jumper and a midi skirt with this modern take on a traditional Indian Head-dress to give a real 'East meets West' look! With my mixture of Indian origins and British upbringing I find it fascinating to mix and match elements of both styles and this Matha Patti definitely adds an extra dimension to any outfit!

Shelly's Jewels can be found on Instagram (LINK) and on Twitter (LINK)

And finally, to the 'Desi Gok Wan' that didn't have the guts to use their real username on Instagram or Twitter, left a 'question' on my Tumblr stating how I've worn this 'wrong' and I look 'stupid', I actually prefer it this way. So get bent.

 Halima

FOTD: Tropical Twist using Sleek Ultra Matte Palettes!

$
0
0

Hello my loves! 

I've always been one of those people that is easily sucked in by pretty looking eyeshadows at make-up counters, takes them home, stores them safely away in my pretty eyeshadow drawers and lets them gather dust. One time, I even found one of those teeny little yellow Selfridges bags stuffed under my bed with a few shadows in it. The receipt said it must have been under there a good 6 months. OOPS!

Anyways, my storage area was looking a bit full and cluttered so I had a little re-organisation to make space for more stuff and I came across so many beautiful shadows that I'd forgotten all about. There was only one thing for it: I had to start using them more often!

From that moment on I've got right back into experimenting and playing around with my eyeshadows to the point where I'm now instinctively applying it in the mornings. I have to say though, I didn't think I'd EVER use a yellow eyeshadow! All that changed just a couple of weeks ago when I purchased the Sleek Ultra Matte Palettes: Bright V1 and Dark V2.

One on particular day, I was in a bit of a rush for a dinner I had, I picked up the palettes and for some reason unbeknown to me I picked out the yellow from the Bright V1 and applied it around the eye. Probably due to the rushed nature of the moment I wasn't thinking: "What if it all goes horribly wrong? Cleaning it up takes time BA-ZITCH!"

 But no, I just went with it. I packed the yellow on, opted for the dark green teal shade from Dark V2 and blended it out using my beloved MAC 217 brush and gave it a little dusting of MAC's Wedge eyeshadow to eradicate the harsh lines. Et Voila!

DSC_7499

 DSC_6967

 DSC_7100

 DSC_7119

*FACE*

 NARS Powder Foundation in Barcelona

*CHEEKS*

Illamasqua Cream Blusher in Crush 

*LIPS*

OCC Lip Tar in NSFW

*EYES*

SLEEK Ultra Matte Palette in Bright V1 (BAMM!) & Dark V2 (Orbit)
Clinique Brush on Cream Liner in True Black
Benefit Eye Bright Pencil
Bourjois Little Round Pot Eyeshadow in Beige Rose (inner corner highlight) 
Le Volume De Chanel Mascara in Noir

The moral of the story? Always check under the bed and never throw out old Selfridges bags without checking, you just never know!
.. And get experimenting with your long forgotten eyeshadows and share the results to inspire others to do the same :)
 Halima

OOTD: The Dip Hem Dress, Upgrade on the Maxi?

$
0
0
Hello hello!

As you may have read in one of my previous posts, I've become more than just a little obsessed with midi dresses of late. Well now, I've taken it one step further: The Dip Hem Dress!

Back in the days when they first burst onto the scene I really liked the idea of them, but I found that whilst some would be the perfect colour, the perfect fabric, the perfect cut or the perfect neck-line; I found that none had all four. Call me fussy, but I won't wear something if there's something about it I just don't like.

Another factor that completely turned me off wearing Dip Hem dresses was an old manager of mine. On one of our 'Casual Fridays' she quite literally waltzed her way into the office with her Dip Hem and, without wishing to sound like a complete cow, it was incredibly unflattering to the point where I wondered why would anyone want to wear something like that?! I think what really sealed it for me was this lovely belt she'd wrapped around it, exposing lumps and bumps that need not be exposed.

Fast forward 12 months though and I've gotten over that minor ordeal and purchased my first Dip Hem dress from eBay. Now I know what you're thinking: 'These are So 2012!' But honestly I'm not too fussed with 'seasons', I'm only interested in what looks good. And after trying out a few on the high streets my mind was changed.

I feel that the Dip Hem is a bit of an upgrade on the infamous maxi dress, it doesn't swamp the petite ladies (like me) plus you don't have to be ultra-cautious whilst walking around fearing the awful RIIIIP noise of someone treading on the fabric! And speaking of the fabric, I love how the natural flow to it makes me feel so feminine.

 DSC_6842 
 
 DSC_6841 

 DSC_6840 

 DSC_6833 

 DSC_6823 

 DSC_6822 

 DSC_6846 

Silver Studded Purple Dip Hem Dress - TOPSHOP Petite (via eBay) 
Gold Studded Skinny Belt - Gift
Zip Bowling Bag - Atmoshphere, Primark

As simple as this dress may appear to be, it still manages to feel quite dressy. The asymmetrical cut of the skirt, the flowiness to the dress and the simple studded detailing around the shoulder just oozes class. If I were to wear this out for a celebratory occassion though, such as a certain ex-manager's leaving do, I'd have to pop an embelished crop-top over it.
 
 DSC_6851 

"What's this?" I hear you say "Halima's featured a handbag in her OOTD?"

You'd be quite right! I can't recall having ever featured a handbag in any of my OOTD posts over the years. A big thumbs up to Primark then for producing this stunning ZARA-esque bag and retailing it at only £10! I almost fell over when I saw that a bag of this quality in Primark, I began questioning life, the universe and everything.

When I got it home, it turns out that even little Wilhelmina loved it too, so much so that she often sleeps inside it! It was so good I had to go out and get another, one for me and one for her! HA!

 Halima

REVIEWS: L'Oreal Fiberceutic Treatment - Botox for Hair?

$
0
0
Hello hello! 

 Have I got a little treat for you today?

A couple of years ago I was in Toni & Guy when I noticed a service they had on offer with the tagline: "Botox for Hair". How intriguing!

At the time though, my hair was actually in pretty good condition so it didn't really strike that much of a tone with me. I filed it away at the back of my mind just in case. Fast forward to May of this year and all the bleaching I'd been doing was starting to take its toll, I dived into the deep recesses of the mind and remembered that product:

L'Oreal Fiberceutic Treatment

I did a bit of research and found that retailing prices were quite varied, anywhere from £50 - £75 for the whole set. Naturally I headed for eBay where I managed to snap it up at auction for just £30. So what did I get for my money? 15 x 15ml bottles of Hair Filling Serum, 500ml of Restorative Hair Sealing Treatment for Fine Hair and a blunt, flat syringe.


 DSC_6560 

 DSC_6561 

L'oreal's Fiberceutic was launched back in 2010 

This product is similar to the Keratin treatments that you can find, often an awful lot cheaper. There is one key difference though. Keratin Treatments merely sit on top of the hair as the molecules of the active ingredient are just too large to penetrate, whereas Fiberceutic has something called 'Intra-Cyclane' molecules. These molecules are smaller and have the ability to penetrate into hair, which enables it to temporarily fill in the gaps and bulk up the hair with long lasting results.

So if you have weak, distressed and/or battered hair from the harshness of heat appliances, colouring or bleaching, this product is aimed at you.

Just a little background on my hair: it's fine, weak but abundant and damaged from repeated bleaching. I bleached my ends last year for my Turquoise Ombre, then a couple of months back for my Indigo, then twice again for my all over Turquoise. So you can probably imagine the extensive damage that's been done! My hair lacks shine and softness & feels rough to touch. What I will say though is that my occasional Protein treatments by Aphogee are strengthening it. However the Aphogee can't restore the softness, sleekness and shine that I desire.

USAGE:

 DSC_6570 

As this was a totally new product to me, I thought it best to follow the instruction provided to the letter. To be honest though, it isn't all that difficult to use.

To begin with, I shampooed my hair and towel dried it to the point where the hair was no longer soaking wet. I stuck the syringe into the Hair Filling Serum bottle, sucked it up and applied directly onto my roots, midlength and ends. Each little bottle contains three syringes full, which for my fine, mid-length hair is sufficient.

The serum itself is quite runny but at the same is also a little sticky, and it's surprisingly easy to spread all over the hair. Once applied, I massaged my scalp and hair to ensure even coverage.

 DSC_6587 

The next step is to apply the Resotrative Hair Sealing Treatment which is practically a conditioner. I pumped out the conditioner, applied all over, popped on a shower cap and left it on for about 15 minutes. I was a little naughty and deviated from the instructions here, they said to leave on for just 5 minutes but the rebel within me thought the heat from the shower cap would help the treatment to penetrate the hair. Once the 15 minutes were up, I gave my hair a good rinse.

Easy!

RESULTS

Immediately after rinsing, my hair didn't feel any different at all. That changed though when I began to blowdry. I was 'blown' away by the smoothnes of my hair. It felt so much softer and was super glossy! What with all the recent bleaching, it was unusual for my hair to feel in such good condition. What struck me most was the drastic reduction in hair breakage during the drying process, usually I get loads but not this time!

Once I'd finished drying my hair looked bulky, each strand looked like it was plumped up. Overall my hair felt bouncy and silky, it also had the "Swish" effect! It just looked healthy. And it wasn't just me that noticed this, a couple of friends asked if I'd had my hair done at the salon as it looked super sleek and glossy!
DSC_6753
Swisshing!
L'Oreal claims that each treatment lasts up to 10 washes and in order to prolong the results, it's best to use the Restorative Sealing Treatment in between full treatments. For me, this only lasted 5-6 washes even with the Restorative Sealing Treatment. I can't be too critical of L'Oreal though, I do have incredibly porous hair!

Would I recommend this? 
   
Without a shadow of a doubt, I would absolutely recommend this. If bought at full price it can be a touch expensive, however if you are at your wits end with hair breakage and you yearn for smoother, shinier hair again this could be right up your street. For fine-haired ladies that long for bulky, plumped up, bouncy hair Fiberceutic really does live up to it's claim:

"Botox for Hair."

 Halima

OUTFITS: This is not the Best Dip Hem in the World, This is Just a Tribute...

$
0
0
 I'm back with another Dip Hem or in other words, the High Low.

If you happened to stumble upon my last outfit post, you may remember I was banging on about how much I'm loving that sumptuous purple Dip Hem dress I purchased on eBay. Well, only a day or two after that post I visited Forever21 and spotted the most gorgeous high-low skirt. EVER.

Yes, it's a bold statement coming from one as fickle as I but just take a look at it! It's black, it's lace, not too long nor too short. It's the perfect size for petite ladies and best of all: it cost £12. Twelve Pounds Sterling.

Forever21 weren't just hot on the skirts that day, I also picked up this rhinestoned lavender blue top, although Forever21 would prefer it to be called 'Periwinkle', for £15. Whether you want to call it Lavender Blue or Periwinkle, the top is still a beauty and it was the colour that drew me in. My wardrobe is devoid of anything this colour and this top convinced me it was time to change!

So for this outfit I've paired the two together, tucked the top into the skirt and wrapped my favourite skinny studded belt around it. Would you believe, I wore this to a Wedding! Don't fret though, it was a 'Smart Casual' occasion, with the groom donning jeans and a shirt!

DSC_7299 

 DSC_7280 

 DSC_7295 

 DSC_7300 

 DSC_7277 


 A gust of wind. Thank GOD it has an underskirt with it or that would have been awkward... 

Periwinkle Rhinestoned Top - Forever21 (It's on sale on the website! LINK)
Black Floral Lace Dip Hem Skirt - Forever21 
Gold Studded Skinny Belt - Gift
Black Wraparound Diamante Bracelet  Forever21 

As you might be able to guess Forever21 is my new favourite store at the moment, which is pretty dangerous! I got a bit distracted writing this post, ahem, browsing through their sale section. *Gulp*

I couldn't find the lace skirt online but I did spot loads on the rails at the Trafford Centre store last week so there may still be a few in stock!

 Have you bought anything from Forever21 lately? What are your 'Must Haves' for the beautiful weather we've been having recently?

OH, I almost forgot... I've gone and signed myself up to Lookbook! I'm still a little unsure as to how to use it, so if you have any tips, get in touch! I'm shocked though, at one point  technology didn't faze me, but now I'm like: "Wuh?!" Clearly I'm not 'Down with the kids' anymore!!
 
 Halima

Super Easy DIY Ocean Inspired Ombre Nails

$
0
0
blueombrenails 

I've been fascinated with the ocean ever since I was a young girl. It's common knowledge that 70 - 75% of the earth's surface is made up of the ocean yet somehow we find ourselves knowing more about the surface of the moon than about the depths of our seas. And there's something quite alluring about the mystique that surrounds the unknown, hence my fascination!

 One of the great things about the ocean is the variation in colours and shades: swirls of light blues and greens from the water and coral in some places; deep, dark, terrifying blues in others. So as a little beauty-based homage to our beautiful oceans, I decided to give Ombre Nails another go.

COLOURS

DSC_7902

 DSC_7904
 L- R - Barry M Gelly Hi-shine Nail Paint in Guava, Barry M's Standard Nail Paint in Cyan Blue and Indigo.

Whilst Barry doesn't quite have that same mystique, he definitely doesn't disappoint either with his range of shades! The Gelly range has a number of unique colours with a super glossy finish. It's a shame the longevity is pants, else it'd be near perfect.

I forgot to include it in the picture, however I also used Barry M's Matt White as a base. I applied two coats of this stuff to make it opaque and left it to dry.

APPLICATOR

 DSC_7914
 
I purchased a cheap bath sponge at just under £1 and cut a small chunk of it out. The size doesn't really matter as long as it covers the whole nail. And by the way, once you've finished with it, it makes a great toy for kittens!

 ombrenailssponge

I applied a generous amount of each colour, lined up next to each other on the sponge. Then I began dabbing the sponge directly on to the nail, moving it up and down slightly to blend the colours into each other. Of course sponges have loads of tiny little bubbles in them, leaving the nails a little bumpy, so to iron out these bumps I applied two layers of top coat

At this point the nails will look messy as anything as the colours will have rubbed off onto your skin around the nails. I used to peel these bits off in the shower, but now I use an old eye-liner brush, dipped in nail polish remover and brush over the messy edges.

 blueombrenails3

 blueombrenails2

 blueombrenails4 

I have to admit that I'm not very good with nail art, but I'm really surprised how easy it is to ombre nails, and it looks so good!

Once I've finished with the bath sponge I'll most likely purchase a make-up sponge instead. I mean it's great and everything but I think the flatness of the make-up sponge will make the whole process even easier!

What to try next? 

I'm a fan of Astronomy too. Perhaps Galaxy nails? ;)
 Halima

NEW IN: LA Moda Elise Clutch Bag

$
0
0

DSC_8180DSC_8175DSC_8181DSC_8172 

So last Friday I braved the summer sun and headed in to the City Centre for the Sample Sale at Label PR in the Northern Quarter. Apparently this was their first ever Sample Sale and they'd managed to bring in Lavish Alice, Rock N Rose, South Beach& La Moda with up to 90% off. As soon as I heard about it, I was there!

I wandered through the Northern Quarter searching for the place, it isn't the easiest to find as the street it's on is split in two, I walked past the smouldering shell of a building that used to be Paul's Hair World too, the smell of burnt wigs and bleach still lingered in the air. When I eventually found the place, I was immediately drawn to this jet black, gold studded, leathered skeleton hand clutch bag with a gold chain.

 I'd seen this bag somewhere before, where was it? Ah yes, it was on the La Moda website. I remember being desperate to buy it but a lack of funds prevented me clicking 'Add to Cart' on that occasion. It was like fate had brought these two star-crossed lovers, me and the bag, together once more. 

I love clutch bags but tend to find the ones that really catch the eye don't have a chain to hang over your shoulders. I know it's called a clutch bag, but there's only so much clutching one can do so it's nice to have the option to sling it over the shoulder, is that just me? Besides, I'm terrible at holding things in my hand. If my iPhone didn't make such a loud cracking sound when it hit the floor I'd have lost five of the things by now!


Anyways, what with the edgy looking design, creepy-cool skeleton hands and the ever important chain attached this bag screamed "BUY ME NOW". And who was I to resist? It was almost like the cashier could read my mind, she knew I was thinking: "This bag is £10??!!"

I handed over the dough, hurtled home and had a good roll around on the bed with my new bag. It was love!

A big thanks to Stacey for the heads up on the sale, I can't wait to attend more of these Sample Sales in Manchester. Apparently these sales pop up every other week around here. Oh, I do heart Manchester ♥
 Halima

OUTFITS: Summery Silk Kimono and... Yep: Another Dip Hem!

$
0
0
Hi Hi Hi! 

 This post comes with a slight health warning up-front. If you're sick of the sight of me sporting dip hems, hi-low dresses and skirts, I suggest you look away now!
 ...
Okay, so thanks for not looking away yet! This will probably be my last post on these... Okay I lie, I bought another one from Forever21 a week ago that I'm dying to show you, but that's it! Unsurprisingly the Hi Low dress in this post is also from Forever21. They have really got it going on right now, every week they have exciting new stuff in abundance, their stock rotation must be crazy high!

I picked up this pretty standard black dress with buttons running down the front and gold-tipped collar that give the illusion of a blouse. The gold tips really made this stand out for me, I mean it's pretty enough as it is but those tips had a hissy fit in the store demanding that I buy this dress. I much prefer the cut of the collar on this to those 'Peter Pan' collars that have been doing the rounds for years. Why won't they just grow up and fly away?

Anyway, I paired my freshly-bought dress with this beautiful blue silk kimono. For some reason this baby has never made it on to the blog before, which is almost criminal on my part as I actually purchased it just before going away to Dubai in 2011. It's been a staple in my wardrobe ever since, I find that draping myself in black brings my mood down a little so throwing this on over the top gives dark outfits a burst of life and colour. Most importantly, it makes me feel like *ME* again! :)

DSC_7455 

 DSC_7360 

 DSC_7435 

 DSC_7452 

 DSC_7382 

 DSC_7432 

 DSC_7425DSC_7359 

Gold Tipped Collar High Lo Dress - Forever21 (this season)
Blue Silk Floral Kimono - Miss Selfridge (OLD)
Gold Studded Skinny Belt - Gift
Black Wraparound Diamante Bracelet - Forever21 (this season)
Gold Leopard Headed Bracelet - Forever21 (this season)
Gold Emerald Necklace - Personal Palace (LINK) 


The emerald looking necklace you see in the photos was purchased from Instagram of all places. I came across a boutique on there called Personal Palace and managed to bag this for under £15. It's pretty sleek looking and has been absolutely dazzling in all the recent sun we've had. It dazzles so much, the light bouncing off of it has driven my kittens up the wall - literally!

For those of you fasting, I hope it's going well for you so far! My headaches haven't quite subsided yet, it must be the body craving its caffeine fix. *shakes like a junkie* 
 Halima

Super Affordable Lilac Round Sunglasses!

$
0
0
DSC_7485

I'm really loving round sunglasses at the moment, their retro edge is perfect for mixing up my outfits and adding something extra. I bought my first pair a couple of months back from Topshop, they're huge and black and I've featured them in a previous post somewhere!

But I still wasn't quite fully satisfied, I needed something a little different. Distant memories of wearing lilac tinted shades as a youngster popped in to my head,I was obsessed with them! The thing is though, nobody really sells them. Well, not for grown-ups anyway :(

Until, that is, I searched eBay. Oh eBay, my trusty eBay. Is there anything you can't do? Well I found some round, lilac-tinted shades on there for just £2.69 including shipping. Yes, Two Pounds and Sixty Nine Pence. Just call me Lima, Queen of the eBay. There was a teeny little catch though, they were actually intended for some kind of fancy dress costume. But so what? I wasn't going to let that stop me from rocking these when the sun comes out to play!

DSC_7414

DSC_7022

DSC_7018


 If you quite like the look of round sunglasses but don't fancy spending too mach cash, these babies would be right up your street! I bought mine HERE.

I'm also liking the look of the blue ones too... Hmm, looks like my sunglasses collection is about to expand again ;)

So tell me, what's been your eyewear of choice this summer?

 Halima

Fake Bake Bronzer Compact + Kabuki Brush = FACE CONTOURING!

$
0
0
facecontouring 
Hello hello! 

I've been such a slacker lately! I've been neglecting the blog a little as Ramadhan has really taken its toll this month, but believe me I have so much to talk about! The problem is, after a hard days work in this unusually sizzling hot Summer, I've been getting home around 5ish and heading straight for bed! In fact, I've been struggling to keep my eyes open on the way in to work too!

Anyways, over the past couple of months I've had a fair few peeps ask me about how I contour and what products I use? Up until recently I was using Sleek's Contour Kit, however Fake Bake sent me their Bronzy Babe Bronzer Compact and Bronzing Powder Brush and they've really impressed me.

 FakeBakeBronzer 
 KabukiBrush

The Bronzing Powder Brush is essentially a Kabuki brush. Now I love my Body Shop Kabuki which is just ridiculously soft! However, the big issue for me is that it isn't really convenient or hygenic to carry around with me in my bag. Fake Bake provide a cap with theirs, so once you're done with it, you can cover up the brush and pop it in your handbag!

If like me, you constantly find your Kabuki liberating itself from your make up bag and having little adventures all over your handbag, you need to get yourself one of these! And yes, the zipper on my make up bag is bust. It's one of those things that I always say: 'Yeah, I'll buy a new one tomorrow' but then never do. I think it's been broken for a couple of years now...

 FakeBakeBronzer3

So, after that little confession, on to the bronzer! The casing is leopard print on top and contains a mirror inside. I've never liked leopard-print, there's something very Kat Slater and tacky about it so that immediately put me on the back foot with it.


But, as the old saying goes, you should never judge a book by its cover - no matter how garish that cover may be. I don't know about you, but I find it so disheartening to hear folk we come across in our daily lives judging others based on appearance. There's so much more to people than the way they look! Well anyway, I wasn't about to judge this poor little thing on it's cover, I wouldn't want to hurt its feelings!
  
FakeBakeBronzer2

Upon opening the compact I was quite surprised by the shade of it, it's pretty dark! Also there's a subtle gold shimmer running through it, but upon swatching it was barely noticeable. Using the Kabuki, I buffed this under my cheekbones - the colour is intense! It's extremely pigmented and actually looked like I'd gone overboard! Looking at the description:

"Bronzy Babe bronzing powder has triple pigmentation which means that, you need use less, it looks fresh and stays put for longer and in a generous sized compact with mirror, it will last for ages"

Figures!

I now use this with a light hand and buff it in to the MAX and get something that looks a little something like this:

 FaceContour 
HowToContureFace

 As you can see, after all the buffing, it still looks pretty apparent I've applied a bit too much. With that being said, using this with Illamasqua's Blush Up Brush, it's perfect! With the Illamasqua brush, I find I have more control over the pick up of the product and the shape of the brush fits perfectly under my cheekbones.

I'm no expert in contouring, but I'm sure I'll get there eventually. I don't get all that much practice as I find that under my cheekbones it's quite hollow anyway, but a light dusting with the right brush really defines them- we're onto a winner! What with all the heat just now, I'm using the Kabuki for some desperately needed daytime powdering!

I couldn't find the Bronzer on the Fake Bake website, but I have managed to find it on the Hair Trade website for £15.99 LINK. The Kabuki can be found on the Fake Bake website and will set you back £9.99 LINK

Would I purchase the bronzer when it runs out? I think I'm on the fence about that, it's really long lasting which is a huge plus, but it is £15.99 and the Sleek Face Contour Kit costs just £6.49. I guess it comes down to whether you want longevity, and how much you're prepared to pay for it. If £15.99 is no big deal for you, bag it!

Have you used Fake Bake? What did you think? Any tips for a budding contourer like myself?

 Halima

OOTD - DROP DEAD Heart Club Cardigan

$
0
0
DROP DEAD

Ok, so not the conventional way to start a post but what I'm referring to is the brand Drop Dead, I'm not telling you to drop dead! And you know, I've been really liking their outerwear lately. The colours and the prints have drawn me in.

My first purchase from these guys was a Unicorn Jumper in the most gorgeous pastelly lilac colour I featured in a post not too long ago. Ever since that purchase, I've been checking out their website often to ensure I don't miss out on anything new and unique. A couple of weeks back I spotted this cardigan so perfect, I almost dropped my laptop.

The cardigan in question is an incredibly soft, baby blue number which is ridiculously oversized. I do like that though, it's like nothing I own. At the back there's a massive white heart-shaped skull, I guess that's Drop Dead's logo. Either way, I LAV IT!

I don't know if you agree, but finding baby blue, lilac or any other pastelly coloured clothing on the high street (of good quality at least) is pretty rare, I can't help but question WHY??! My only thoughts on that is pastel colours can associated with the young. Who knows, but I think these colours are so gorgeous they could work on almost anyone. I mean, why on earth are we being hounded by fluorescent colours at the minute? Give me a baby blue or a lilac over a garish yellow or a neon green any day of the week!

Today's outfit is incredibly casual, as I've been feeling a bit under the weather lately. Whenever there are sudden changes in the weather I start to feel pretty ill. Yes, my immune system is lame and No, I don't know why I live in Manchester sometimes either.

DSC_7519

 DSC_7544

 DSC_7525

 DSC_7542

 DSC_7528

Baby Blue Hearts Club Cardigan - DROP DEAD Clothing LINK
Black Jersey Midi Dress - TOPSHOP
Lilac Lace Crop Top - H&M
Spiked Silver Statement Necklace - Primark 

All of the items featured are from this season, the Primark necklace set me back just £8! I could not believe that 1) It cost just £8 and 2) It was in Primark?! Honestly though they are doing really well in the Jewellery department, I purchased a pack of 8 midi rings for £1.50! I went back in the following week to get more but they were all sold out. *Sad Face*. Topshop have been pretty stale of late, although I've noticed they've introduced a new jewellery range which is both unoriginal and way overpriced.

Back to DROP DEAD, I've currently got my eye on the Death Bed Jumper. It's Gold, it's metallic and has a huge coffin print at the back, ahh! WANT! 

And there you have it! 

It's Eid soon (THANK GOD). Ramadhan has been cruel this year. The constant heat and sunshine did not help at all. Typically though the Eid forecast is for rain, and no doubt August will be a complete wash-out too! 

It's ok though: "When the rain falls they talk of Manchester, but when the triumphant rain falls we think of Rainbows. It's the Mancunian way." Lemn Sissay.

 Halima

EID OOTD: The Meeting of Two Cultures

$
0
0
Hi hi hi!

Hasn't Ramadhan just flown by this year? I guess we say that every year though, time marches on endlessly and if you look away for just a fleeting moment, you'll find days or weeks have passed without you realising. Perhaps the delerium of working in a non-AC building in 30C temperatures without food or water for 18 hours each day played its part, but at times I felt like I was that car in the music video for Snow Patrol's 'Open Your Eyes' - drifting around at high speed in a bit of a daze!

Still, I was sad to see Ramadhan end. Those of you who aren't Muslim might wonder why on earth we'd be sad to see it end, but to find out the answer to that question all you have to do is spend a day fasting with a Muslim family and you'll see why - the atmosphere is just so special. 

Last year pretty much all Muslims celebrated Eid, or the end of Ramadhan, on the same day. This might not seem like a big deal but believe me it rarely happens. This year there was a bit of a split, as Saudi declared they had sighted the new moon, when all the science indicated it was most likely only possible to see it in South America. Other countries, like Oman and Pakistan didn't sight it until the next night so we were split a little. Either way, Eid had arrived! :)

Usually in the UK we find out about the end of Ramadhan a few hours ahead of time, so this usually prompts every Muslim in Britain to go out and do some last minute Eid shopping - at the same time. Groceries for the big meal, sweets for desserts, toilet paper for the aftermath, presents for relatives that announced a last-minute visit, guys getting their trademark 'no back and sides' at the barbers, renting out fast cars, girls getting in some last minute eyebrow threading or facials or even a new outfit...

This year though, I made the (slighly) controversial decision to not buy a new outfit. Ok, be honest. How many of you just spat out your coffee in shock? Seriously though, I own way too many clothes and I'd been thinking this Ramadhan how we all go out shopping for a brand new Eid outfit every single year. I didn't want another disposable Indian outfit that would only ever be left to gather dust afterwards.

So this year I paired last year's Eid Ul-Fitr top from my Sari (known as a Choli) and paired it with my new favourite laced dip hem skirt from Forever21. Beneath the Choli, I wore a lace sleeved top all wrapped up with a gold studded belt. I think the outfit sums me up pretty well actually - bright, fun and a mixture of Eastern and Western influences.

That's quite important for me actually, as I often get asked what ethnicity I am or 'Where are you from?' I guess if you're not from a minority background you may not understand exactly how frustrating that can be sometimes, it's almost as if it's a qualifying question that will determine the nature of any future interactions whether that be with Asian or White people. Me? I'm Indian, but 'home' is Britain and being both Indian and British can be a challenge. 
Who are we? We are who we are.

I love both Western and Eastern clothing. I love my skirts, vests and dresses but I also love my Saris, Bindis, Mehndi and even the occasional Kameez but often we stick to just one or the other, why can't we have both? Yesterday, I had my cake and ate it (in more ways than one!)

DSC_9087 

 DSC_9119 

 DSC_9084 

 DSC_9109 

 DSC_9134 

 DSC_9073 

Turquoise and Blue Silver Embellished Choli - Karol Bagh Market, New Delhi
Blacked Lace Dip Hem Skirt - Forever21
3/4 Sleeved Black Lace Top -  Topshop
Gold Medallion Hand Harness - Topshop

I bought the Hand-Harness last year and every time I look at it, I think how it looks like it's a chunk from a Belly Dancer's belt, ha! 

As for the outfit, I was a little surprised at just how well these two cultures fused together. I've definitely found a new use for the rest of my Cholis. Whatever this path I'm on is, It's totally new. And I like it.

Until next time..

 Halima

The Idiot's Beginner's Guide to Mehndi

$
0
0
beginnersmehndi2  
I love Mehndi. 

That might not sound quite so odd being that I'm Indian, but as a youngster I absolutely hated the stuff. I think that was probably down to the fact that nobody in the family could do it properly at the time, so I used to end up with two big brown circles on my hands. They were meant to be the Sun. Oh and also the scent that used to linger once the mehndi had developed into it's rich brown shade.

It's all changed now though, I can't get enough of the stuff. No longer can I detect that lingering smell, not sure what kind of mehndi my family used but the stuff I get is practically odourless. Although I kind of like the idea of tattoos, I'm incredibly fickle so would never get one done as I know that as I grow older I will undoubtedly ask myself 'Why?', particularly as wrinkles begin to take hold of the designs! So mehndi is the next best thing.

Now I'm no artiste, and even though I have steady hands when it comes to applying eyeliner, when it comes to mehndi it's a completely different story. I'm hopeless! But where there's a will there's a way, and I've found a workaround that almost makes me look like a pro with the mehndi cone!

So if, like me, you're not so hot with a cone in hand, you'll love this little cheat I recently re-discovered:
 
beginnershenna3 

 beginnersmehndi3 

SECRET WEAPON

Mehndi stencils! Sweet, sweet nostalgia. I purchased mine off eBay on the cheap. I recall seeing these everywhere when I was younger. They come in the form of stickers which can be stuck onto your hands, feet or pretty much any part of your body! Once you've done that, you just fill in the gaps with your Mehndi cone. Sounds simple, right? 

WRONG! The hands are far, far too small (unless you're 5 years old!) and the feet are even worse! So as usual I found myself having to adapt them a little to work for me. I just seperated the digits from the main part of the hand and stuck them on individually. Also, from the stickers it's pretty clear what areas of the body they are actually intended for but I found that they can be easily used elsewhere.

In the photos above, I've used the sections intended for the ankles on my wrists and you can see that it doesn't look out of place! 

Once I've filled in the gaps I let the mehndi dry to the touch. The next step is to apply a lemon juice and sugar mixture to the dried mehndi and wrap around the area in cling film, with the stencil still in place. I'd then leave this on overnight whilst I sleep and unwrap it in the morning. I tend to find that the combination of the lemon juice/sugar mixture and leaving the mehndi on overnight results in incredibly dark mehndi!

I always apply mehndi at night just before bed as I find that the longer it's left on for, the better. The lemon juice and sugar makes the dried-up mehndi stick to the skin much better, the cling film also seals the area restricting break-off during the night.

 mehndi

I have to mention the Mehndi cone that I use. I've no idea who makes it or what it's called as it's all written in Hindi. All I know is that back in India it costs 10 Rupees per cone, and that it's pretty darn good! Over here in Manchester, I buy two for £1 from Anand Fashions on Wilmslow Road. I'm there every week hauling on their jewellery and bindis!

I find that one can never have enough bindis, they only really last for a day and because they're so small they always seem to disappear. Also, they're so pretty that I've actually had a girl physically hit me on her birthday, ordering me to give one to their friend! What is this? High school? Anyway enough about the deluded peeg, if you live in Manchester or are just passing through I highly recommend you check out Anand Fashions.

 beginnersmehndi 

 beginnershenna 
 
So there you have it! The Mehndi was a lot darker however I took the photos a couple of days later and it's still looking good! 

Next up I will be attempting to use the stencils all over my hands. How do you girls apply your mehdni, any hints and tips?

 Halima

REVIEWS: NARS Pure Radiant Tinted Moisturizer in St Moriz

$
0
0
DSC_8292 

Tinted Moisturisers...

I remember using tinted moisturiser quite often during my teens, it might take some effort but try to think back to the days when Nivea had just two shades. Two shades! Oh how the industry was lacking back then.

I was never really that keen on Nivea's version either to be honest, the lack of coverage for an adolescent teen with raging cystic acne was almost as appalling as the lack of shade range. It completely turned me off the idea of tinted moisturisers, and I hadn't bothered trying any since. Until last year that is.

That was when NARS launched their very own range of tinted moisturisers. As we all know NARS have a brilliant range of foundations with shades to suit pretty much any skin tone, so upon hearing of the launch I knew I had to at least try it. After all, I have complete faith in their brand.

The reason for that faith is because Sheer Glow in Barcelona is to this day my 'Holy Grail' foundation. The coverage is perfect and the shade range was spot on. It has peachy undertones which neutralised the hyperpigmentation I had, thus giving me mannequin-smooth perfect looking skin.

Anyway, I digress! Back to NARS Tinted Moisturiser in St Moriz. Would it follow in the footsteps of its big sister, Sheer Glow? 

 DSC_8295

I was a bit stuck for which shade to actually choose, both Annapurna and St. Moriz both looked quite close to my skin tone. I eventually plumped for St. Moriz, even though Annapurna reminded me of Nepal, as Annapurna was just a little too dark for my liking even if it did have those lush peachy undertones.

Last winter I was colour matched at the NARS counter in Selfridges to St. Moriz, and for once I actually came away feeling that it actually was the right colour. I've had a few bad experiences at these counters in the past, walking away looking either like a ghost (too light) or an Oompa Loompa (too orange!). The Sales assistance totally understood why I had my reservations at being matched in store and was actually pretty good.

Looking at the website I presumed St Moriz would have been more suited to those who use the Stromboli shade of foundation. With that in mind the SA assured me, as the colour is quite sheer, it would be forgiving in the Summer when my skin darkens quite a bit. Just for reference I'm usually anywhere between MAC's NC37 and NC40, but in the summer I can go up to NC42.

I wore the St. Moriz a couple of times in the winter, when I was a true NC37 however I just wasn't feeling it. In winter I crave full coverage foundation with tons of highligher on to get into the festive spirit. So I put it back in the drawer of unwanted, unused products to gather dust and be forgotton about. And then summer hit... 

When the sun is shining I like my skin to look natural and glowy, so I'm nowhere near as concerned about full coverage as I am in the gloom of winter. With this summer being particularly sunny and warm, this product seemed like a completely different proposition. It seemed to give me everything I need.

 DSC_8297 

Here's what NARS have to say about it:

"Your skin – almost bare, but better. This advanced, oil-free formula provides a translucent veil of color and sun protection while helping to reduce the appearance of hyperpigmentation and dark spots in just four weeks. Infused with lush, naturally derived botanicals and ingredients to immediately helps thirsty skin feel hydrated. Kopara from French Polynesia and mineral rich seawater revive and re-mineralize skin for a softer, smoother, and brighter natural glow. Skin is transported."

 DSC_8304 

TONE, CONSISTENCY & APPLICATION

Looking at the photo above, St Moriz looks slightly cooler than Barcelona which would be a bit problematic if it was a foundation and would leave me looking ghost-like. But because this is a tinted moisturiser it's much more sheer and is actually quite forgiving. Once I've blended it on to my skin using the ELF Studio Powder Brush, you can see just how sheer it really is and didn't leave me looking ashy at all. Also the consistency isn't quite as thick as a standard foundation, so it feels incredibly lightweight. 

NARS suggest applying this over a moisturiser and as my skin is oily/combination but is also dehydrated, applying a moisturiser is a must for me anyway. When I followed their guidance though I found it to be a bit too dewy, so I tried it without the moisturiser and my skin appeared so luminous!

The tinted moisturiser contains SPF30 in it which is a real plus point. For me though I feel this probably won't be sufficient enough to protect my skin from UV rays as I've noticed the tinted mousturiser starts to fade away during the day. A little powder does help a bit, but to stop my skin looking like a slick of sweat I now use Murad's Oil Free Sunblock with SPF30 from Lookfantastic:LINK

With this sunscreen, my skin has the right amount of dewy-ness for my taste and the product blends seamlessly into my skin. At random points during the day I'll then apply NARS Powder Foundation in Barcelona to blot out any excess oil

FORMULATION, FINISH AND LONGEVITY

As my skin is relatively clear at the moment, I find I that don't need to use too much of this just now. I dot it over the skin then blend it in like a mofo. Saying that, you have to be a little careful as this not buildable at all. As it contains moisturiser within it, it can make your skin appear a bit too shiny. I'd suggest applying concealer to any areas that need covering.

Having said that, it's definitely enough to blur out any imperfections on your skin, but it won't completely mask them like a foundation or concealer would. That's ok though because this isn't really the point of a tinted moisturiser anyway. I think that this product is perfect for me, given that my skin is pretty clear at the moment. 

As mentioned earlier I do have hyperpigmentation in certain areas, so if on occasion these areas require special attention I apply a tiny amount of L'Oreal's Nude Magique CC Cream in Anti Fatigue. On normal days though I don't bother, as my skin looks pretty good with just the tinted moisturiser. The end result is that when I'm wearing St. Moriz, my skin looks and feels as smooth as a baby's bottom!

As for longevity though, the product seems to start wearing off throughout the day to the point that by around 6pm it looks like it's completely gone. What's worse is that with my oily/combination skin it just looks like I've covered my face in oil - not a great look in a restaurant! My tip here is to touch it up with a little powder throughout the day.

CAM WHORING:

 DSC_7585 

During the day with NARS Powder Foundation on top to set it into place...

 DSC_8410 

And by night, the skin looks quite dewy. It almost looks like I have highlighter on! It's a beauty, isn't it? 

Now, observing the picture above, I have a serious case of Flash Back Photo Face. I'm putting it down to the SPF30 within the Tinted Moisturiser which is one of the downsides to this. If you are going out expecting to be photographed, I'd avoid this and opt for a foundation such as NARS Sheer Glow or Bobbi Brown's Natural Finish Foundation, any foundation with little or no SPF will do you nicely. 

Now to sum up:

  PROS
  • Lightweight coverage, perfect for Summer where you don't require heavy foundation on the skin
  • The shade is quite sheer so it's not a problem if you're in between shades
  • Blurs out imperfections, skin looks fresh and appears soft
  • Skin appears quite natural looking and gives you that artificial glow as if your skin is happy :) 
  • Can be applied and blended with fingers or a brush
  • Skin glows, you could even skip highlighter
  • By the end of the day, skin appears dewy (with the help of powdering during the day for those oily/combination types)
  • If you're looking for an every day foundation but want something lighter, this was made for you!
  • Contains SPF30 (If like me, you're into that!)
  CONS
  • Priced at £28, some could argue that it's pricy for a tinted moisturiser when you could get a similar effect by mixing a blob of foundation with moisturiser
  • It's a tinted moisturiser so it won't completely cover up imperfections
  • Without powdering (for oily/combination skin types), this will completely disappear off your face
  • Again for those of you with oily/combination skin, skin can look too dewy without a matte moisturiser/sunscreen on underneath 
  • The SPF 30 will give you that dreaded white cast look with flash photography

WOULD I REPURCHASE?

I think I would, but only to use in the summer and for that reason I'd probably go for the slightly darker Annapurna shade. I definitely won't be using this in Winter as I like my face to appear supremely flawless.

 And there you have it! Well done to yous that made it to the end, quite a mammoth post this time but I hope you enjoyed it!

Have you tried the NARS Tinted Moisturiser?

 Halima

FOTD: Edie Sedgwick Inspired 60s Retro Make Up Look

$
0
0
DSC_8927 

Looking back at the year so far, I've really been starting to experiment more with my make up. I've grown a bit tired of the typical top liner and mascara combination and the smokey eyes I roll out for those special occasions. I wanted to try something a bit different, something I'd never really done before.

So I looked back in time to see what people a little further back were doing with make up, and found that the women of the 60s had some interesting techniques going on. I came to the realisation that 60s eye make up will be my signature look for 2013, and that I must have been born in the wrong era!

I'd say that the main inspiration behind my experimentation is Edie Sedgwick, who was brought to my attention by Laa Laa (big thank you!). Just a quick Google Image search shows that this lady oozed class, her make up always looked incredible, yet so so simple! 

Over the years I've kinda got into this routine with my everyday eye make up, which consists of a wash of white or cream eyeshadow on the lids. It's not too dissimilar to the kind of shadow used back then, so perhaps that plays a part as to why it has appealed so much to me.


But I think that the biggest draw for me is the sheer amount of eyeliner involved. I've been using it since I was 15 and it'd just be criminal for me not to use any. 

Eyeliner is my crack.

 If there were an 'Eyeliners Anonymous' I'd probably go, but when they say they're trying to help wean me off it, I'd scream and crash through the window, running home quickly so I can roll around on the bed with my Clinique Brush on Cream Liner.

Anyways... My 60s Style Make Up is ever evolving, no two looks are the same as I continue to play around and experiment. It's quite a bold look and some may say that it's too bold to rock out every day, but you know what? F**k the rules. If I've got the time, why not? ;)

Now onto the evidence:

DSC_8852 

Exhibit A: Thick Eyebrows, Rose Red Lips and Wavy Eye Shadow

 DSC_8861 

Exhibit B: From the side...

 DSC_8925 

Exhibit C: Thick Black Lines hug the Eye-line, before breaking away

 DSC_8904 

Exhibit D: Close up on the Contacts, my actual pupil is still visible!

*FACE*

YSL Touche Éclat Foundation in BD50 (MAC equivelant NC37-NC40)
MAC Prep+Prime LoosePowder

*CHEEKS*

Illamasqua Cream Blusher in Crush
Fake Bake Bronzey Babe Bronzer Compact

*EYES*

MAC E/S in Orb (wash over eyelids)
Clinique Brush On Cream Liner in True Black (top liner and flicks)
Benefit Badgal Smouldering Black Eye Pencil (lower lashline)
Pixi Glow Tinker Bell Fairy Dust (inner corner highlight)
Benefit Eye Bright Pencil (waterline and brow bone) 
Soap & Glory Thick & Fast Mascara

*LIPS*

Stila Stay All Day Liquid Lipstick in Beso

So that was my 60s Style Make Up look! As I'm experimenting so much, with no two looks being the same and a few variations here or there, I feel I need to start investing more into my eyeliners. For the flick on the upper and lower lash lines, I've been using the Clinique Gel Liner which lacks the kind of precision and colour intensity that I want. I'll be looking into purchasing a felt-tipped liner to give me that, which should elevate this look to new heights!

I've been spending a lot more time recently on my make up, and as a result my skills are improving and my confidence is growing. The old saying really is true:

"Practice Makes Perfect..."

I'd encourage everyone reading to mix things up a bit with their look and try something new, what's the worst that could happen? I will definitely be experimenting more and more, and will be posting new looks in the not-too-distant future! 

It's been a little while since my last post, so apologies for that but life has been very, very busy recently and I've just been so tired! But, I had some exciting news on Friday so the blogging bug has bitten me again! :) 

Tell me about what, or who, inspires your make up looks? How often do you try something fresh?
 Halima

OUTFITS: Mesmerising in Monochrome - Charlize's Chevron Kimono

$
0
0
DSC_8958 

 Hello hello!

It definitely won't be news to my regular readers that I have an undying love for all things Kimono, and as each week goes by it seems that my collection just grows and grows! But I don't just buy any old Kimono, no no no! I look for the ones made with gorgeously floaty, feminine fabrics and dreamy prints. I just love the versatility of them and could easily wear Kimonos 365 days a year.

A couple of months back I came across Charlize Kimonos on Instagram. They're a brand new, indie company formed by two Australian mums that focus 100% on kimono goodness. Heaven!

There are plenty of kimonos knocking about on the high streets and the bigger online retailers nowadays, however it can be bit of a struggle to find the right prints. I want something different, something unique. The ladies at Charlize have got it spot on. All you have to do is pick the fabric you like, choose from 5 different lengths and wait for your garment to be hand-sewn and shipped. It may take a good few weeks to drop through your mailbox, but it's worth the wait.

I chose the Chevron kimono, though in all honesty if money wasn't a factor I'd have ordered everything... TWICE!! But alas, my mad experiments in the basement to grow a money tree have failed so far. So I gave my measurements to these lovely ladies and a few weeks later, it had arrived.

I have to say, when I tore open the parcel and pulled out the kimono I was a little surprised at the cut. I'm much more used to the fitted style, but this was much looser and more like a cape. I wasn't 100% sure about it at first, but after parading around for a while in front of the mirror (el oh el), it really grew on me. This truly was unique.

It also inspired me to go all out monochrome for the first time in ages, so I hunted through my wardrobe, ended up in Narnia, had tea with Mr Tumnus, came back again and found this old black and white pleated dress I bought from Topshop. I have no idea when I bought this, except to say that it definitely wasn't recently! I wrapped my favourite gold studded skinny belt around it, et voila!

DSC_8955 

 DSC_8985 

 DSC_8965 

 DSC_8953 

Black and White Heavy Pleated Dress - TOPSHOP
Chevron Kimono - Charlize Kimonos

Sadly Charlize don't have a website up yet (not that I know of anyway), however you can place an order on their Facebook (LINK!) or via their Instagram (LINK!). Now just try explaining that to your mother, as if the internet and eBay weren't baffling enough:

 'You bought a what from where?!'

When payday comes around, I'll be back on their Instagram going crazy for Kimonos. Take that high street.

 Halima
Viewing all 299 articles
Browse latest View live